How to Start Seeds Indoors in Recycled Paper Pots
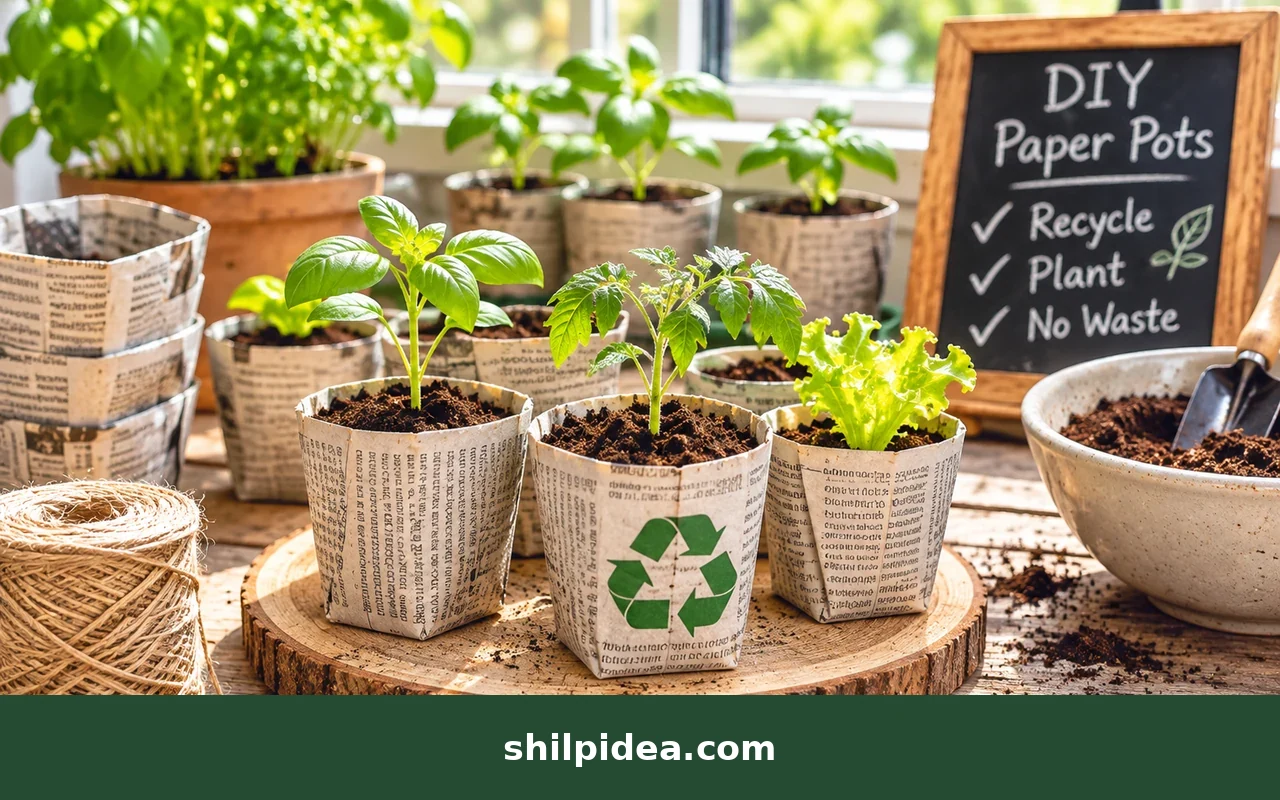
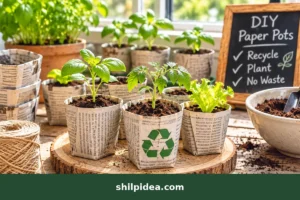
Starting seeds needn’t mean buying plastic trays. With plain newspaper and a clean jar, you can fold temporary pots for herbs and flowers.
Pair them with seed-starting mix, a waterproof tray, and careful watering. If you enjoy upcycled garden projects, this is a practical way to reuse clean paper without glue.
We’ll cover the folds, sowing depth, moisture checks, and timing for better starts. Explore our seed sowing ideas for suitable plants, then follow your packet’s instructions.
Materials and Tools
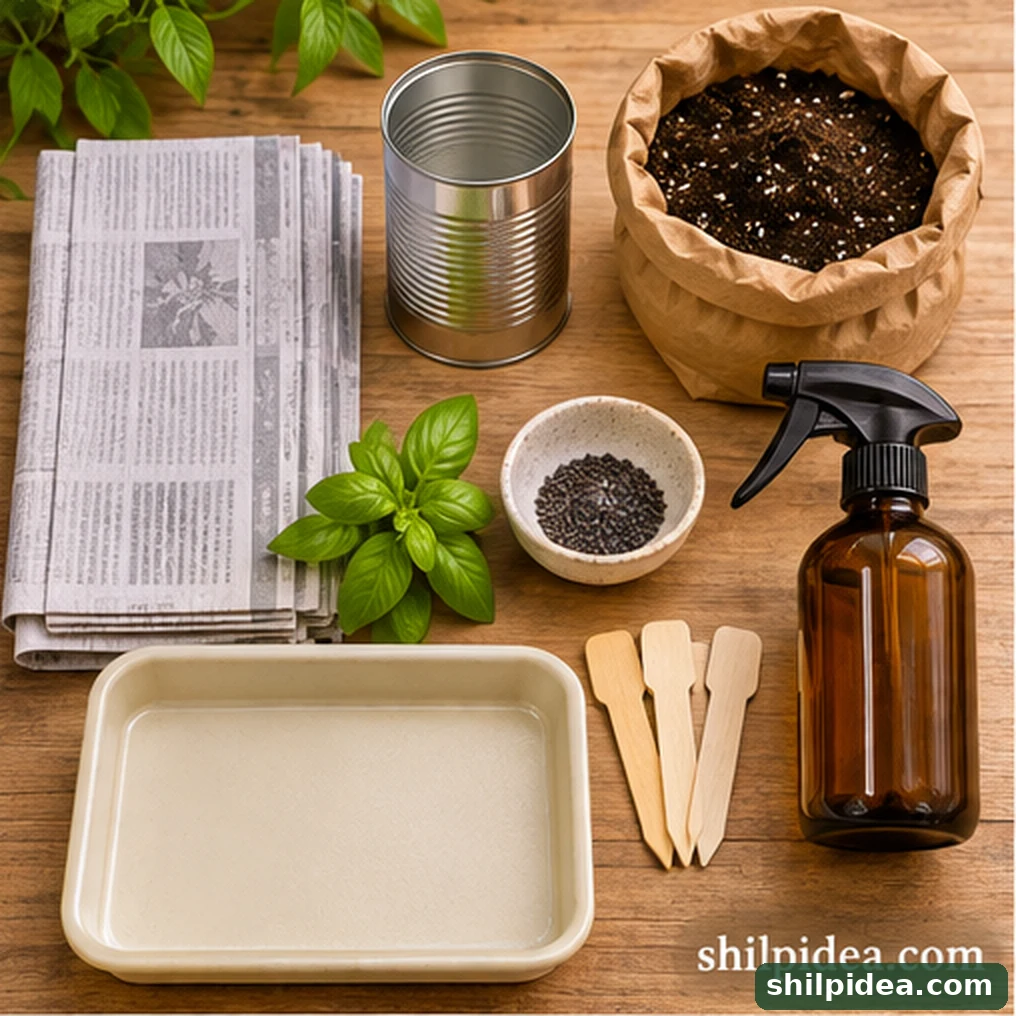
Prepare these supplies for about six small newspaper seed pots; exact mix volume depends on your pot size.
- Plain newspaper – 3–6 clean, uncoated sheets, cut or folded into roughly 35–40 cm (14–16 in) long strips.
- Clean shaping jar – One smooth-sided 7–9 cm (3–3½ in) jar or blunt-edged can to form each pot.
- Waterproof tray – A shallow, sturdy tray large enough to hold all six pots upright and catch drainage.
- Seed-starting mix – Around 1 litre (roughly 1 US quart), ideally fresh, fine-textured and peat-free.
- Seeds – Basil or another suitable herb, vegetable or flower seed chosen for your region and season.
- Plant labels and pencil – Six washable or reusable labels marked with plant name and sowing date.
- Small scoop and mister – For filling and moistening the mix without washing seeds out.
- Optional clear cover – A ventilated propagator lid for warmth and moisture until seedlings emerge.
Precautions Before You Begin
A few simple checks protect both the paper pots and the seedlings.
- Choose plain, non-glossy paper; avoid coated pages, heavily colored ink, and paper with staples or tape.
- Use a smooth, clean jar or can; avoid sharp metal rims and let an adult handle scissors if children are helping.
- Set every pot on a waterproof tray, never directly on an unprotected wooden windowsill.
- Use fresh seed-starting mix rather than heavy garden soil, and avoid leaving paper pots in standing water.
- Keep seeds, soil, and equipment away from small children and pets; wash hands after handling planting materials.
1. Wrap Newspaper Around a Clean Jar
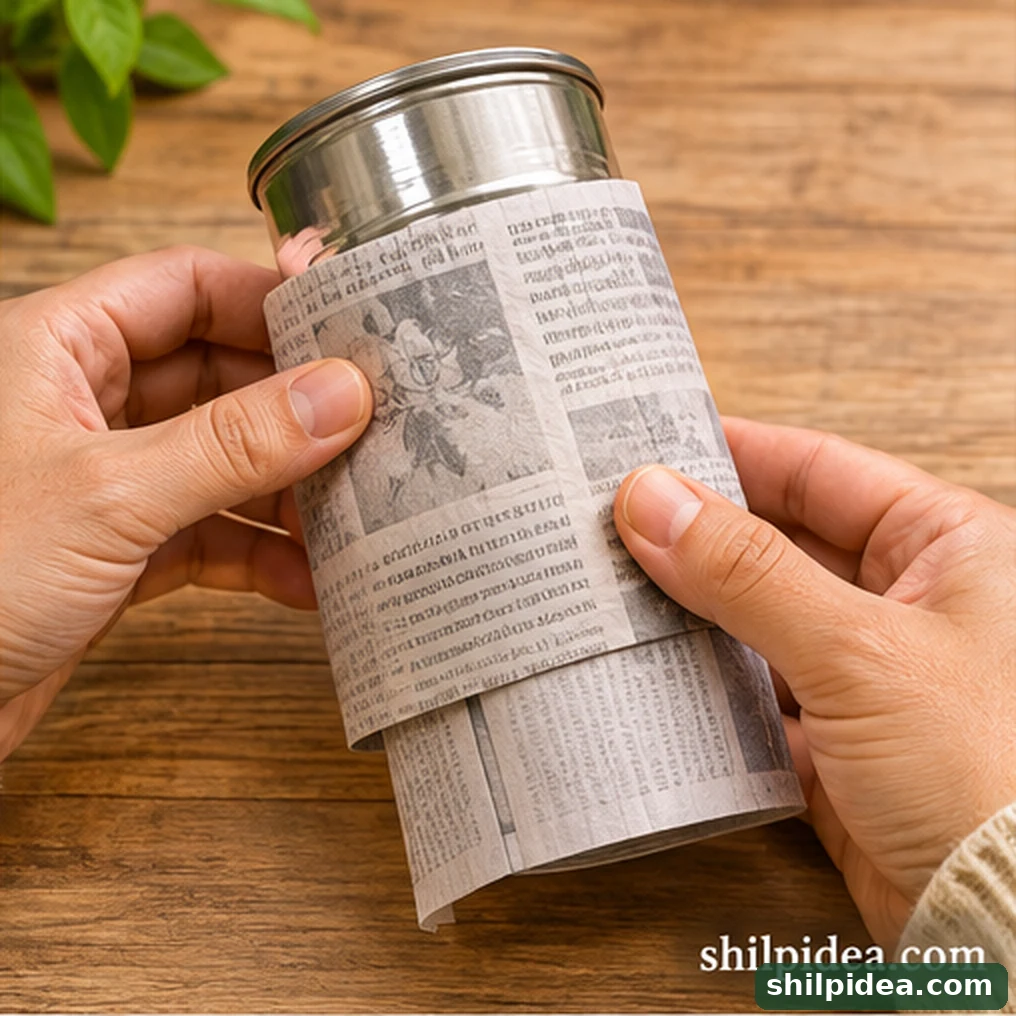
- Size the strip. Fold plain newspaper lengthwise to form a band about 14–16 cm (5½–6¼ in) tall. Use a strip long enough to circle the jar with several centimetres of overlap.
- Shape the cylinder. Wrap the paper firmly around the jar, keeping about 3–4 cm (1¼–1½ in) extending beyond its bottom. Overlap the loose edge without glue.
2. Fold the Base and Lift Out the Mold
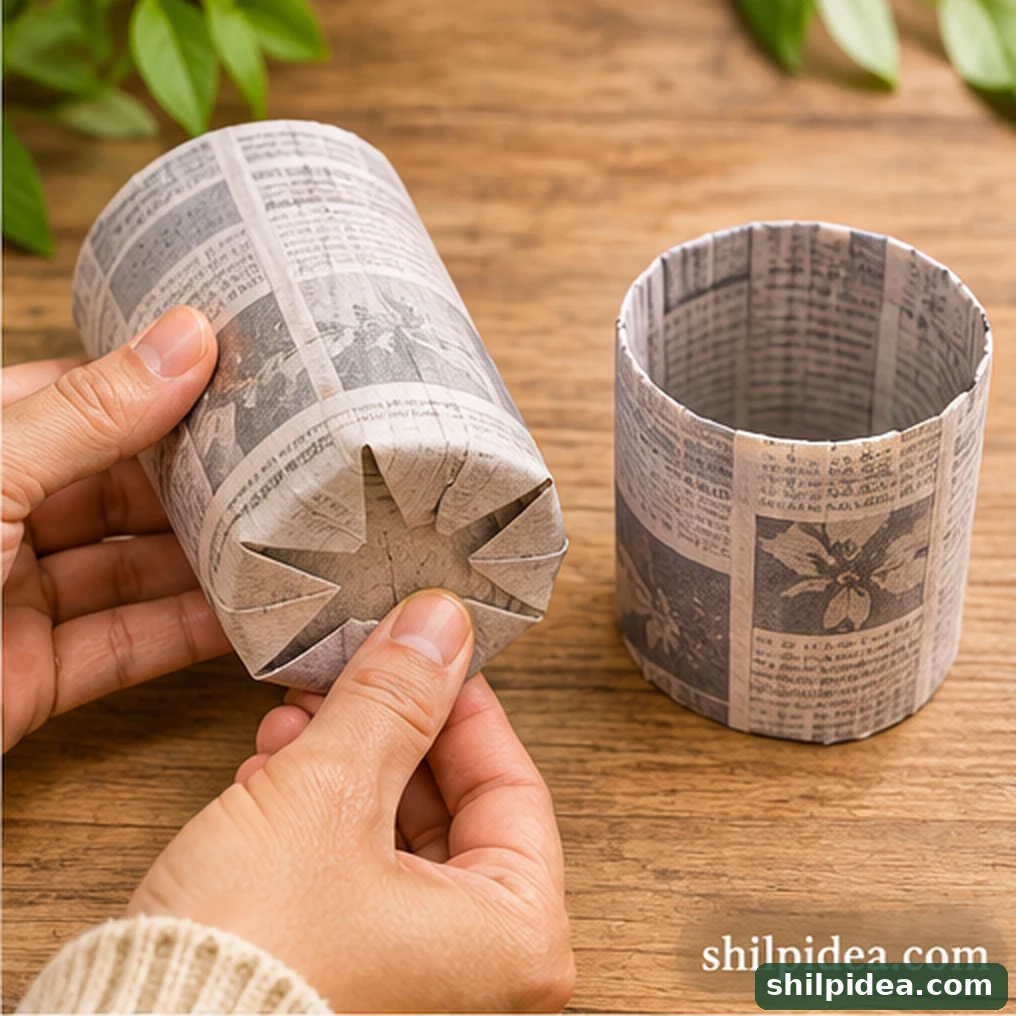
- Close the bottom. Turn the jar upside down and fold the overhanging newspaper inward in overlapping flaps until the base is covered.
- Press the folds. Gently flatten the paper against the jar base, then turn it upright and slide the jar out without tearing the sides.
- Set the pot in a tray. Place the open newspaper cylinder upright in a shallow tray. Repeat until you have six; the folded base lets excess water seep into the tray.
3. Fill the Paper Pots with Seed-Starting Mix
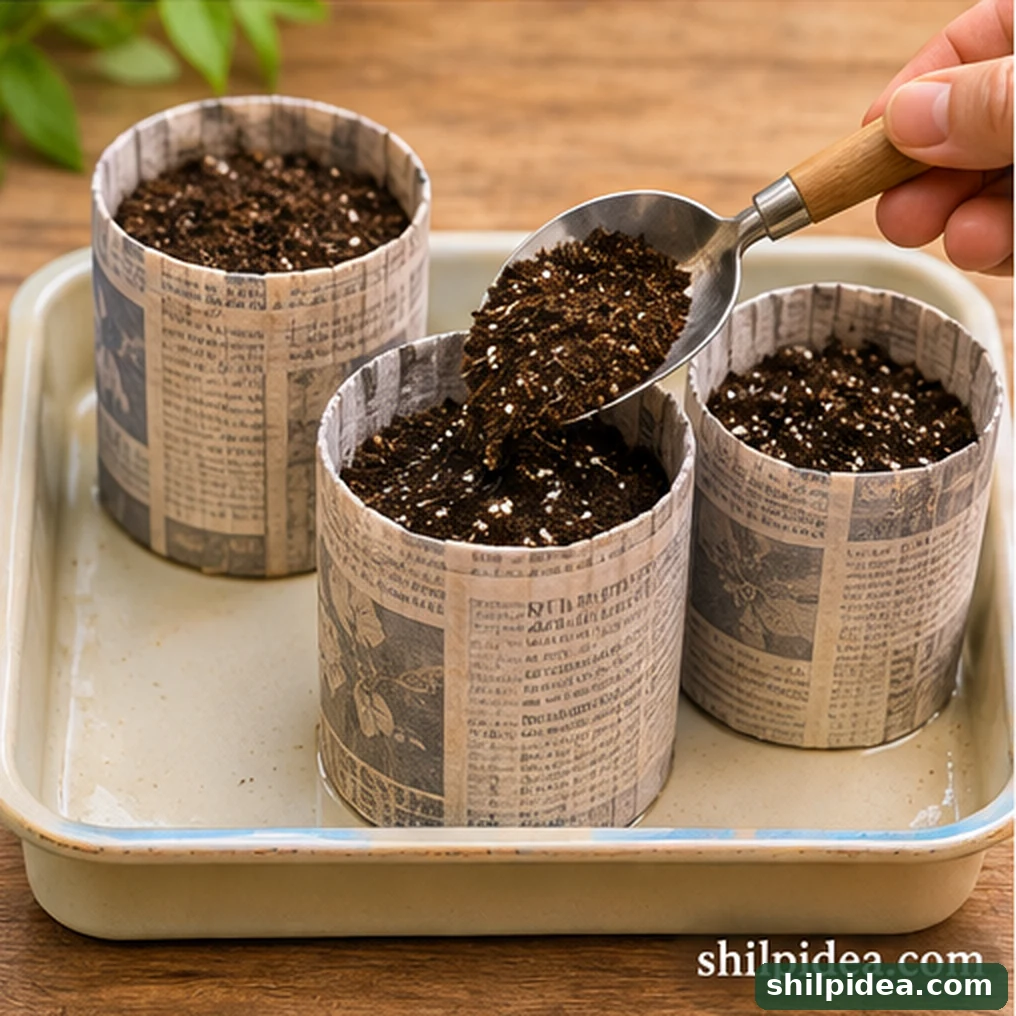
- Moisten the mix. Add a little water to the seed-starting mix before filling; it should feel evenly damp, not dripping.
- Fill gently. Spoon mix into each pot, leaving about 1 cm (⅜ in) below the rim. Tap lightly to settle it without packing it hard.
4. Sow, Cover, and Label the Seeds
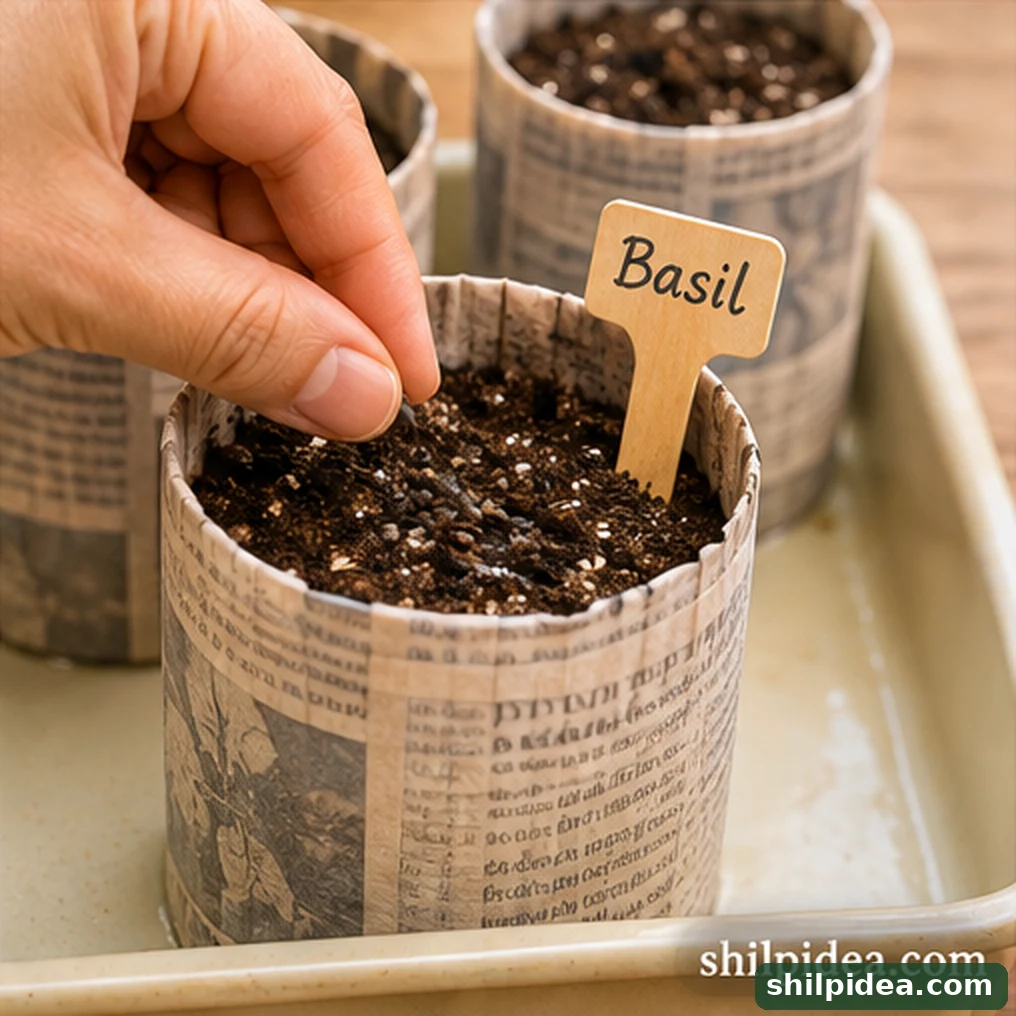
- Position the seeds. Place one or two seeds in each small pot unless the seed packet recommends a different spacing or sowing method.
- Cover to the correct depth. Follow the packet carefully: some fine seeds need light at the surface, while others need a measured layer of mix.
- Mark every pot. Label the plant variety and sowing date now; similar-looking seedlings are easy to confuse later.
5. Water from Below and Raise the Seedlings
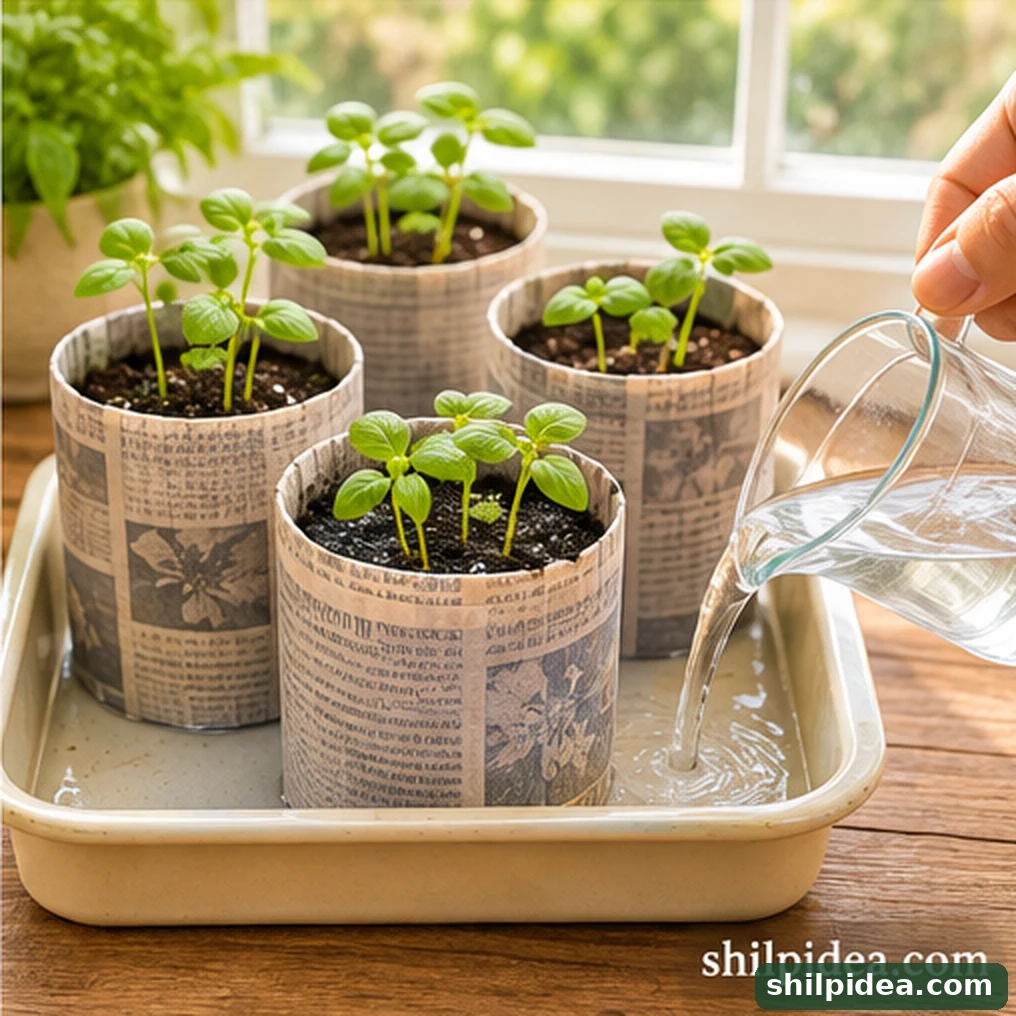
- Water the tray. Add a small amount of water to the waterproof tray and let the mix absorb it upward. Tip away any remaining pool once the surface is evenly moist.
- Choose warmth and light. Place the tray in a bright area at the seed packet’s recommended germination temperature. If using a clear lid, allow ventilation and keep it away from hot direct sun.
- Uncover and observe. Remove the cover as sprouts emerge, provide strong indirect daylight or a suitable grow light, and keep the mix damp but not waterlogged.
How to Care for Paper Pots After Sprouting
Check moisture daily: paper can dry faster than plastic, yet soggy paper encourages mold. The RHS indoor seed guidance recommends gentle watering, removing humidity covers when sprouts appear, and moving seedlings into brighter conditions. Rotate the tray for even growth and thin crowded seedlings according to the seed packet.
When roots reach the pot base or the seedling has enough true leaves to handle, move it to a larger container if required. Peel away any stubborn paper, slit the side if roots look trapped, and bury the remaining paper rim under soil so it does not wick moisture away. Acclimatize outdoor-bound seedlings gradually before transplanting, following local frost dates; November planting calendars differ across the US, UK, and Australia.
Troubleshooting Paper Pots and Seedlings
Paper containers work best when you correct moisture and airflow problems early.
- White fuzzy growth on paper: Reduce standing moisture, separate the pots for better airflow, and discard badly affected paper if seedlings are compromised.
- Seedlings leaning or stretching: Increase appropriate light exposure, using a grow light if the windowsill is too dim.
- Surface drying too quickly: Check daily and water in brief bottom-up sessions rather than leaving the tray continuously filled.
- Leaves collapsing at soil level: Remove affected seedlings, avoid oversaturation and improve air circulation; Penn State Extension notes that damp paper pots can promote fungal problems.
More Gardening Projects to Try
Ready to reuse more everyday materials in the garden? Explore these practical ideas for planters, seed sowing, and small-space greenery. They pair well with the paper-pot project whether you are growing herbs indoors, organizing a balcony, or planning a container garden for the warmer months.
- Begin with Flower and Vegetable Seeds
- Try Creative Recycled Garden Planter Ideas
- Make Self Watering Plastic Bottle Planters
- Explore Bamboo Pots for Succulent Displays
- Find Hanging Planters for Smaller Spaces
- Style a Small Balcony Garden Corner
Have you tried starting herbs or flowers in homemade paper pots? Tell us which seeds you chose, what worked, and any moisture or transplanting challenges in the comments. Your notes can help other Shilpidea readers plan their next little indoor garden.



















0 Comments