How to Make a PVC Pipe Laptop Stand for Your Desk
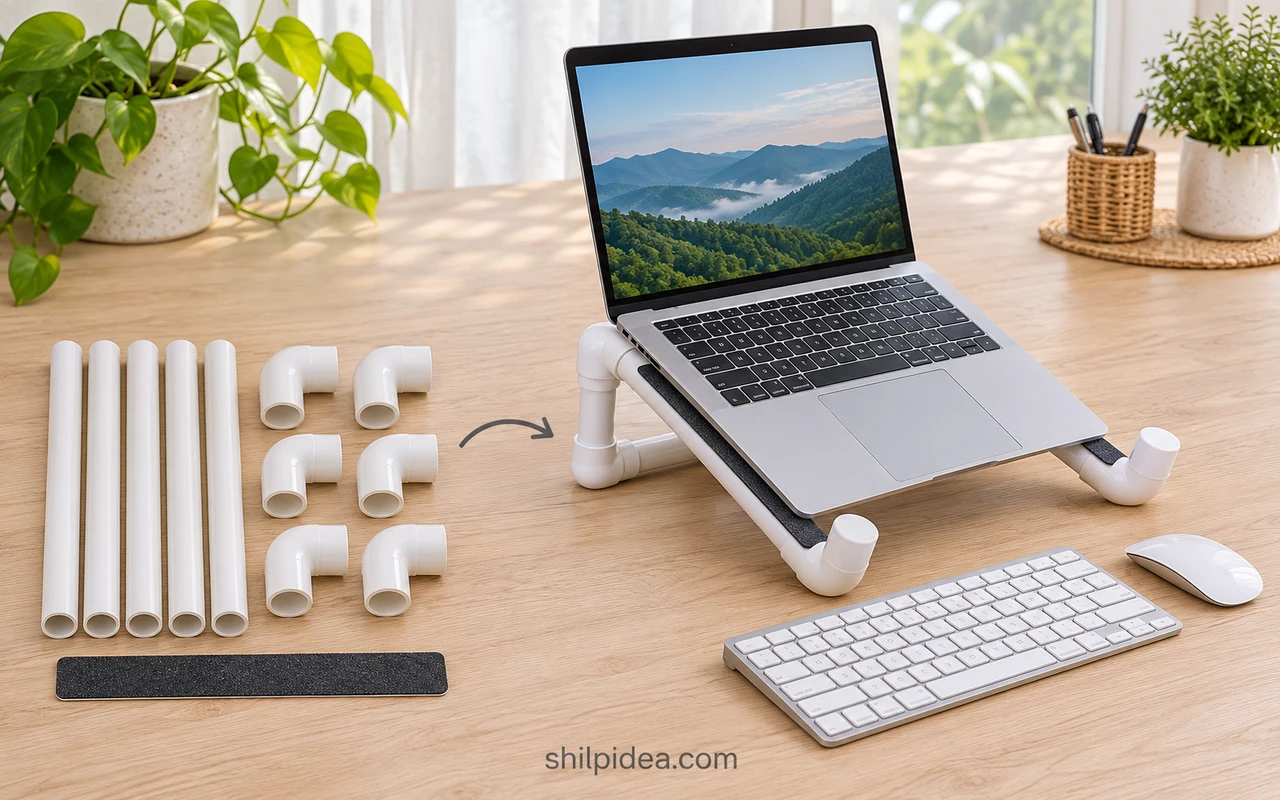
Make a low, inclined laptop stand from five PVC pipe pieces and six elbows. Two padded rails support the laptop, while upturned front fittings help keep it from sliding forward.
Unlike our PVC vase ideas, this project needs careful fit and stability checks. Start with the sample cut list, then adapt it to your device.
If you enjoy our PVC lamp ideas, this offers another use for matching pipe and fittings. Keep the finish simple so the padded support points remain easy to inspect.
Materials and Tools
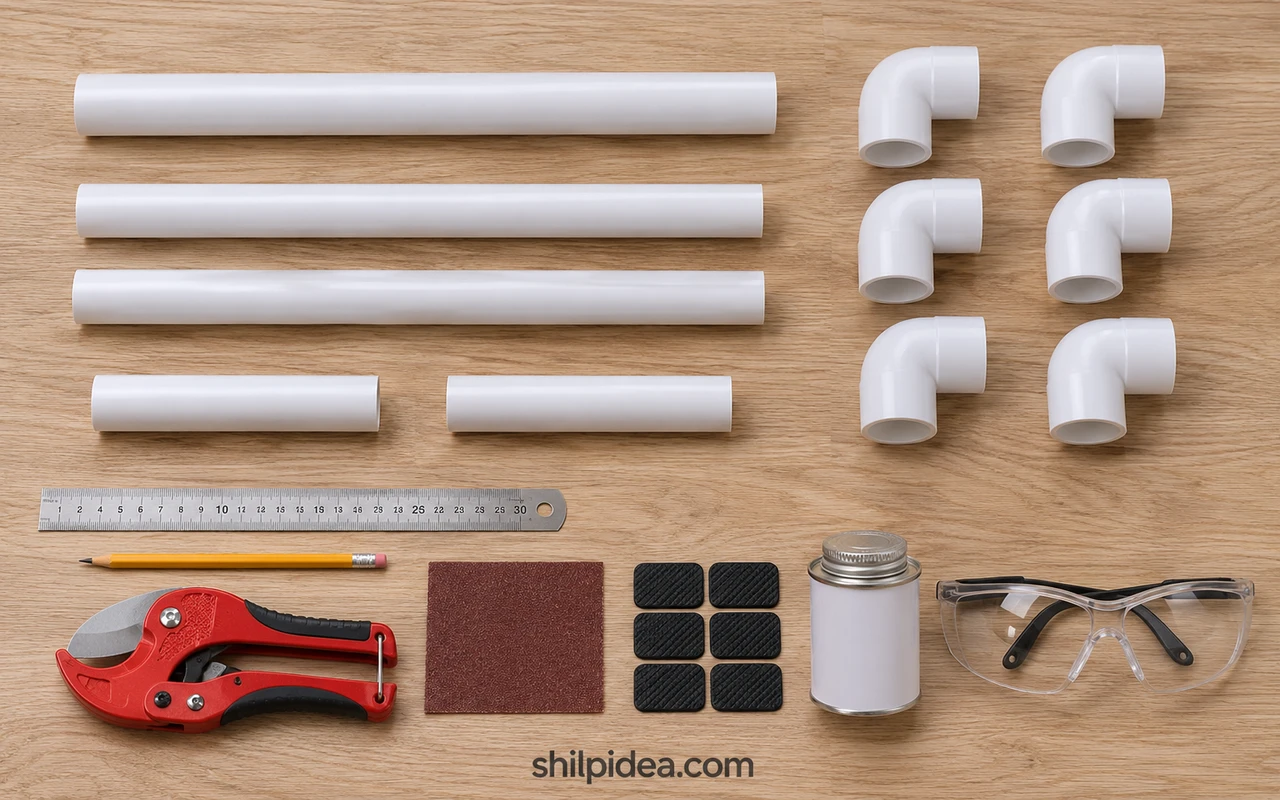
Gather matching parts before cutting; fitting dimensions affect the assembled size.
- PVC pipe – Straight, sound pipe from one matching size system; the source example uses 20 mm metric pipe, not interchangeable US nominal ½-inch parts.
- Sample cut list – One 8⅝-inch (22 cm) rear crossbar, two 7⅞-inch (20 cm) support rails and two 3⅛-inch (8 cm) rear risers.
- Six elbows – Matching 90-degree PVC socket fittings for the same pipe system; do not mix loose-fitting sizes.
- Measuring and cutting tools – Tape measure, pencil, suitable PVC cutter or fine-tooth saw, clamp, deburring tool and fine sandpaper.
- Grip material – Thin self-adhesive rubber strips for the rails and front stops, plus pads for the desk-contact points.
- Jointing supplies – Compatible PVC solvent cement and primer where required by the chosen product instructions, with appropriate protection.
- Fit-check supplies – A cardboard template matching the laptop base and a safe substitute load; keep the laptop off the unbonded frame.
- Optional finish – PVC-compatible paint and surface-preparation supplies; leaving the frame unpainted is also fine.
Precautions Before You Begin
Protect your hands, workspace and device before assembling the stand.
- Secure the pipe before cutting, wear eye protection and keep fingers clear of the cutter or saw.
- Use cement, primer and optional paint with the ventilation and protection their labels require, away from flames and ignition sources.
- Never heat-bend or flame-treat PVC. Remove sharp edges without burning or melting them.
- Do not trust friction-fit joints with a laptop. Bond the final frame and allow the required cure before checking a load.
- Keep vents, ports and hinges clear. This homemade frame has no verified weight rating; stop if it twists, slides, cracks or flexes.
The five-piece layout and sample lengths come from Andrea’s PVC stand at SuperZiper. These are starting dimensions, not a universal laptop fit. The new illustrations explain the construction; they do not document a physically tested Shilpidea build.
1. Measure the Laptop and Cut the Pipe
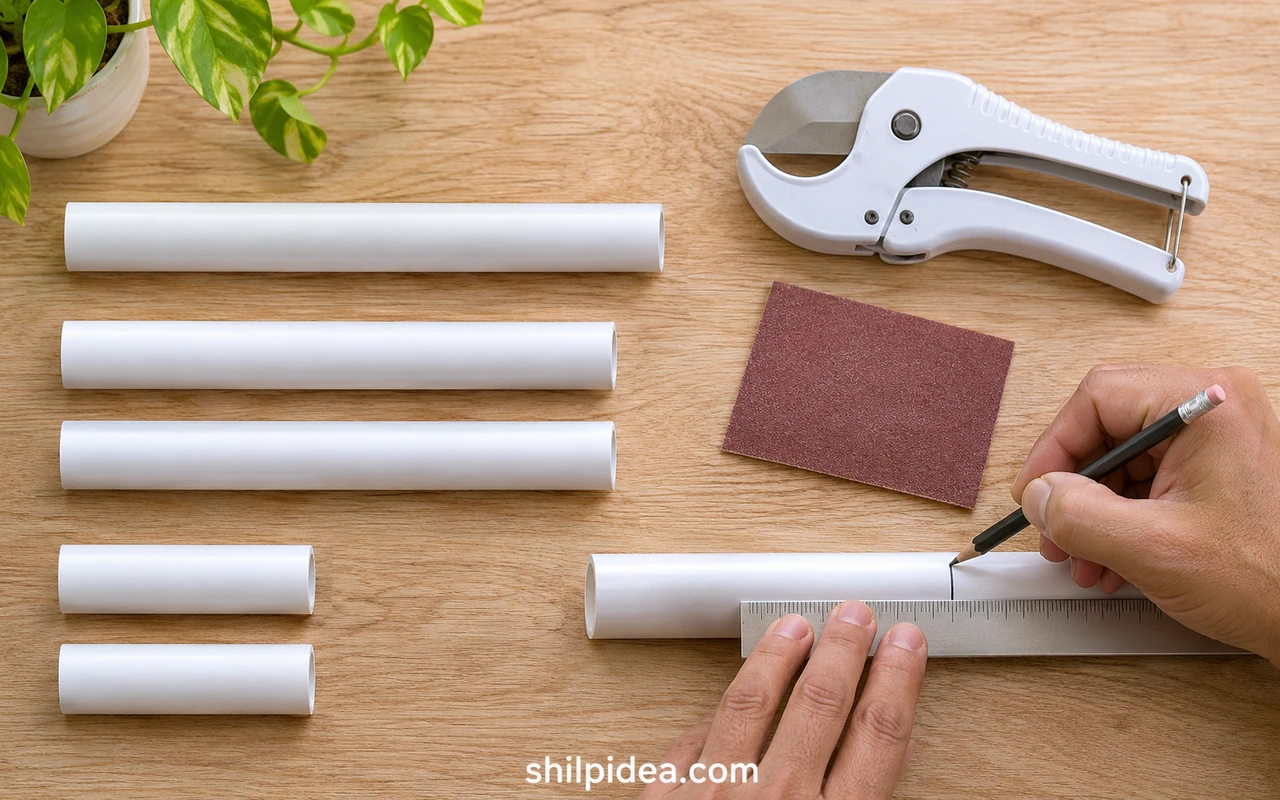
- Plan the support points. Trace the laptop base onto cardboard and mark its feet, vents and ports. Position the two rails beneath solid areas, inside the footprint rather than outside its edges.
- Cut the five pieces. Use the sample lengths as a starting layout. Cut both rails equally and both risers equally. Cut square, deburr inside and outside edges, and wipe away all shavings.
Keep usable offcuts for a separate project, such as the containers in our PVC garden ideas. Do not shorten a support rail merely to use an existing scrap.
2. Build the Rear Support
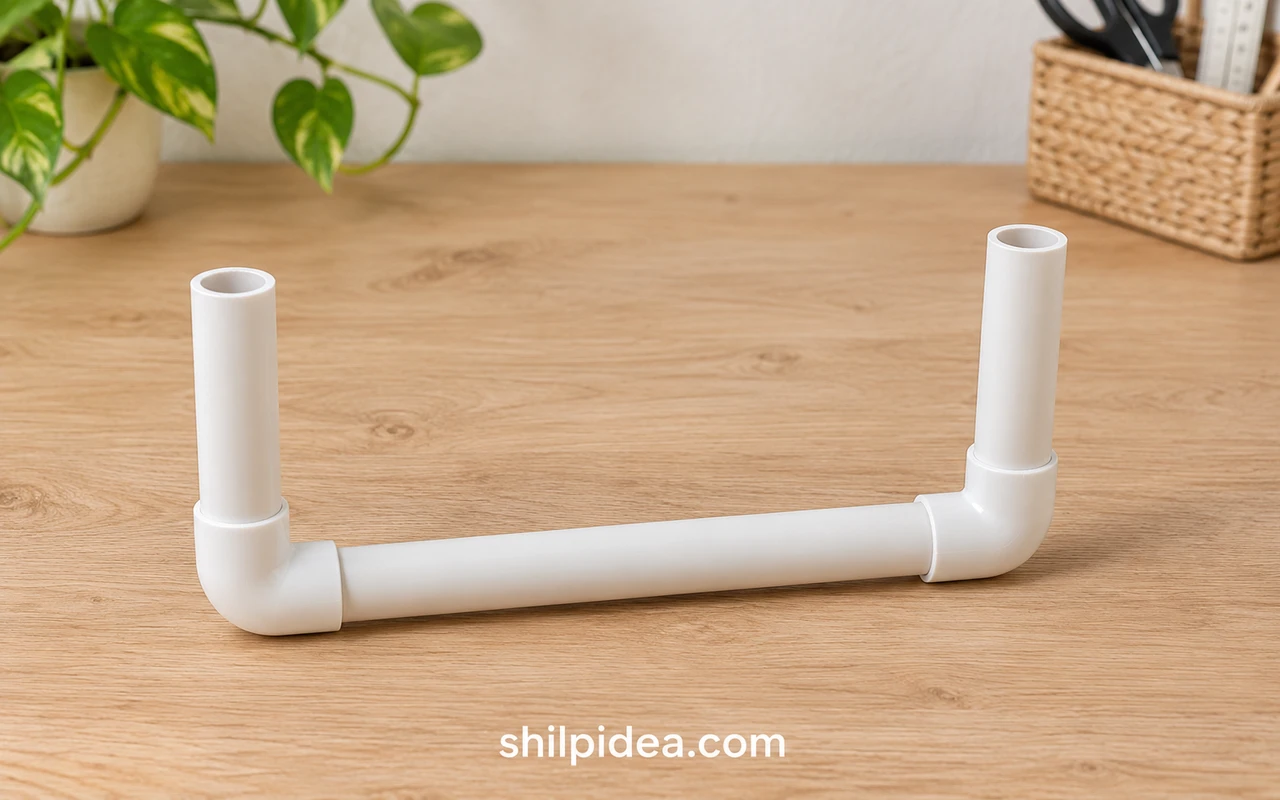
- Join the crossbar. Dry-fit one elbow onto each end of the 22 cm piece. Turn both open sockets in the same direction; these will receive the two short risers.
- Add both risers. Insert an 8 cm piece into each open socket to form a shallow U. Keep the pieces symmetrical and do not hammer resistant fittings fully home during the trial fit.
3. Fit the Rails and Front Stops
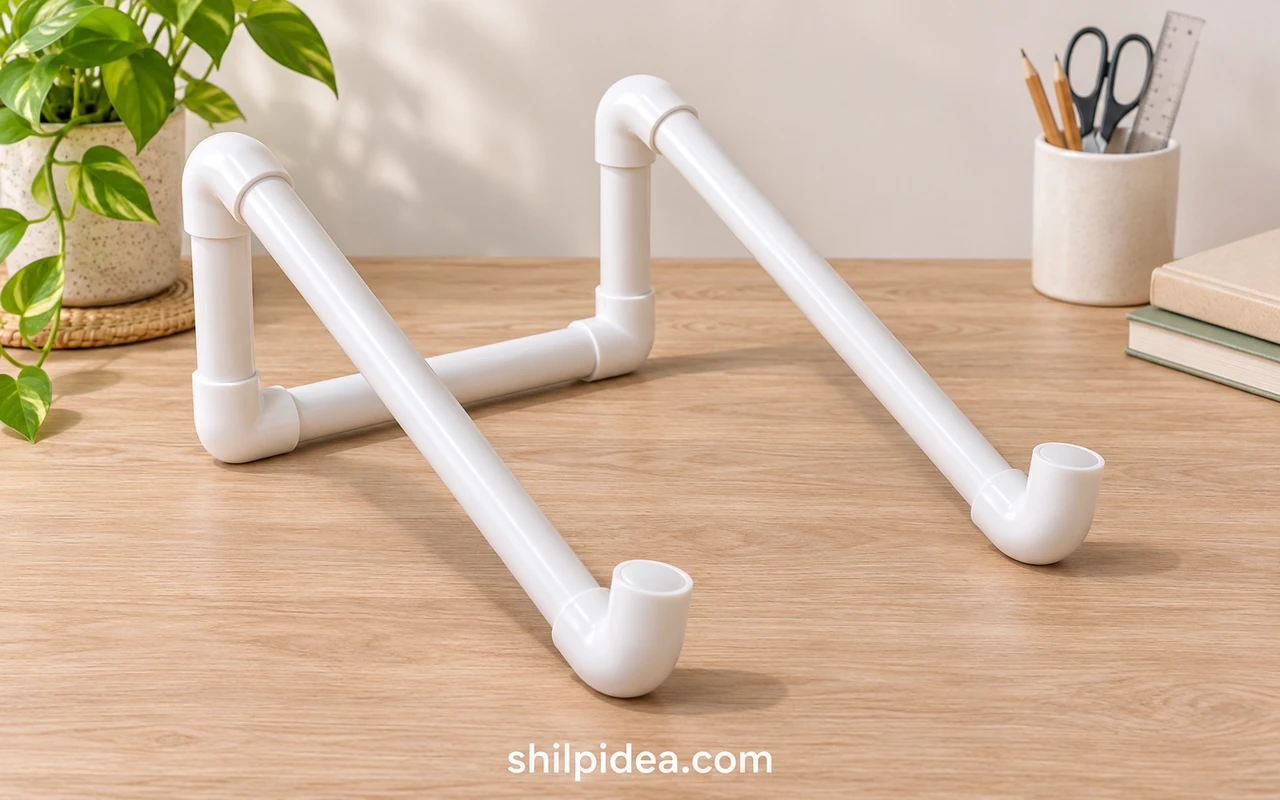
- Connect the rails. Add an elbow to each riser, then insert the two 20 cm rails. Tilt the rear U slightly forward and rotate the elbows until both rails run parallel and slope toward the desk.
- Turn the front fittings upward. Place an elbow on each rail’s front end with its free opening facing up. Both lips should retain the front edge without touching the screen or covering controls.
- Check the footprint. Set the frame on a flat desk and place only the cardboard template on it. Adjust width, tilt and fitting angles until both rails support the template and all desk-contact points sit evenly.
4. Secure the Joints and Add Grip Pads
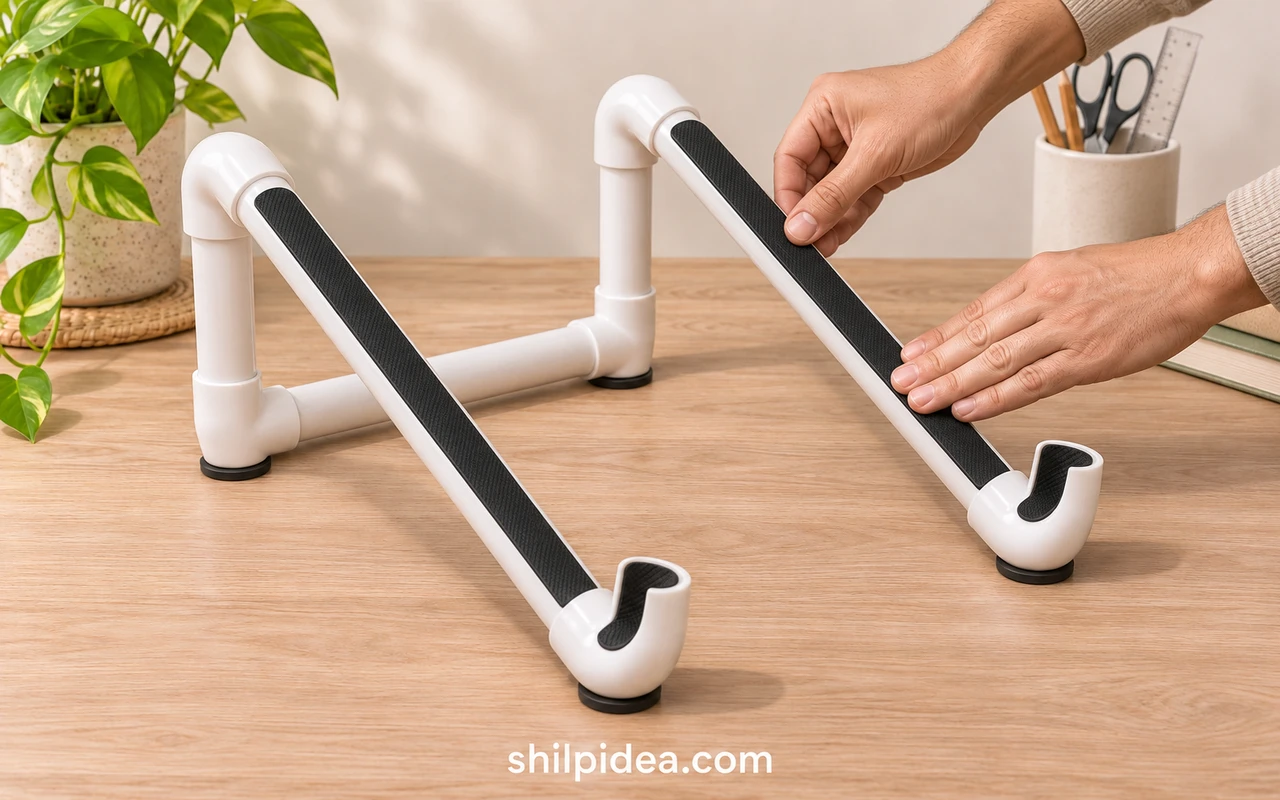
- Mark and bond. Mark each joint’s alignment, then dismantle the trial assembly. Follow the chosen primer-and-cement instructions to prepare and join the parts, seating them correctly and checking alignment as you work.
- Wait for the cure. Keep the frame level and unloaded for the manufacturer’s required curing period. Temperature, fit and product affect the wait; handling strength is not the same as a fully cured joint.
- Pad the contact points. Apply thin rubber strips along the rails and inside the front lips. Add pads where the stand touches the desk. Keep the strips clear of the laptop’s vent openings.
Follow Oatey’s solvent-welding guidance together with your actual product label. If painting, finish only after bonding, follow the paint’s preparation and full-cure directions, and keep paint off grip surfaces. This illustrated version stays white.
5. Check Stability and Set Up the Desk
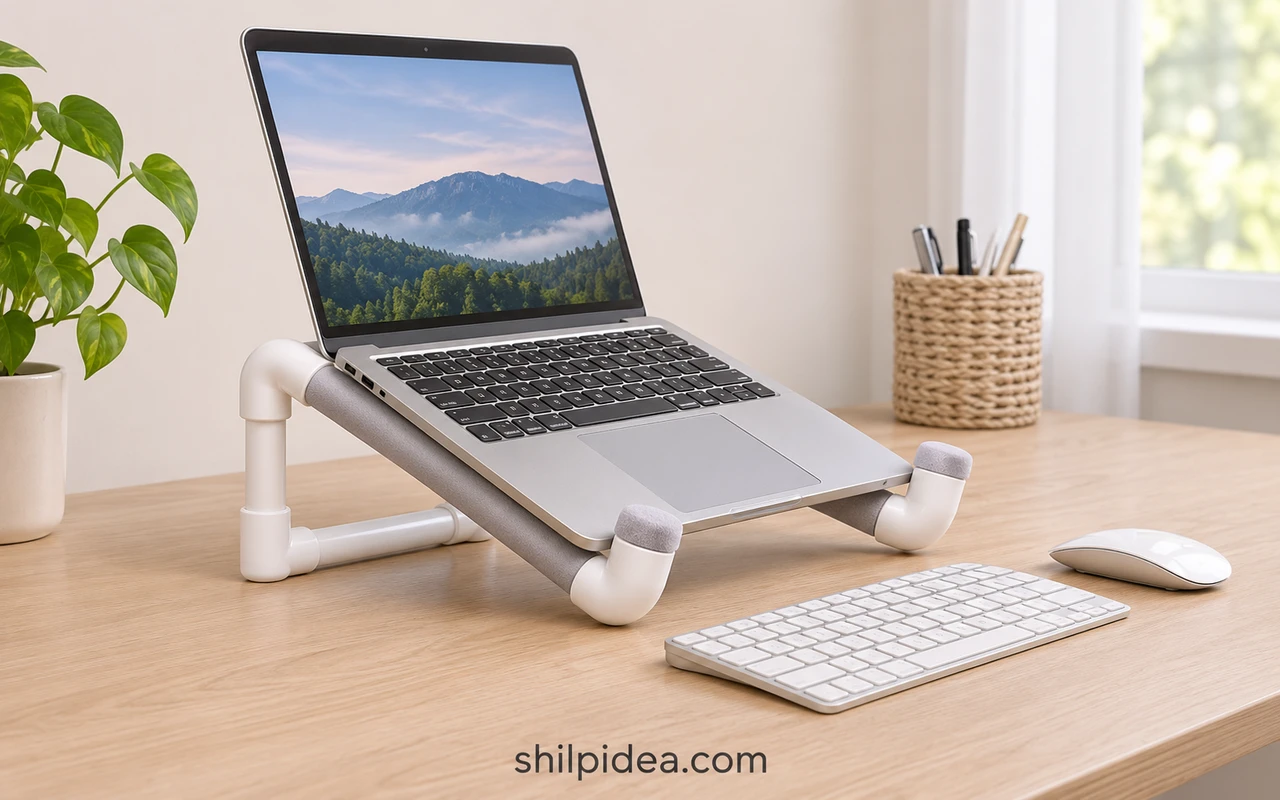
- Test without the device. After curing, use a safe substitute load of similar weight, spread across the rails. Check gently for rocking, joint movement, flexing or sliding. A successful check does not establish a load rating.
- Place the laptop carefully. If the frame remains stable, center the laptop with its front edge behind both stops. Keep a hand ready while opening the screen; check the balance again with the screen in its usual position.
- Use separate controls. Put an external keyboard and mouse in front, leaving your forearms relaxed. Do not lean on the laptop or type forcefully on the raised keyboard. Recheck the frame whenever you move it.
For longer laptop sessions, OSHA’s workstation guidance recommends an external keyboard and pointing device. A small stand alone does not guarantee comfortable screen height or prevent overheating; follow the laptop manufacturer’s ventilation requirements.
If the Frame Rocks or the Laptop Slips
Remove the laptop immediately. Unequal cuts, misaligned elbows or missing pads can leave a contact point raised. Rebuild a poorly aligned frame rather than concealing the problem with thick padding. If the device sits beyond the supported area, the lips miss its front edge or its weight bends the rails, use a different design or a suitable commercial stand.
See the original project: PVC Laptop Stand by Andrea / SuperZiper.
Plan the Rest of Your Handmade Workspace
Once the stand fits and passes its checks, leave room for the separate keyboard, mouse and charging cable. Keep decorative projects outside that working area so they do not crowd the device or its vents. These related collections offer more ways to use PVC, reuse timber and add handmade details around the room, each with different construction requirements.
- PVC Pipe Lamps for Home Lighting
- PVC Pipe Gardens for Small Spaces
- PVC Pipe Vases for Home Decor
- Pallet TV Stands for Living Rooms
- Switchboard Painting Ideas for Home Decor
Would you leave your stand white or choose a color for your desk? Share your plan in the comments. If you have made a PVC stand before, we would love to hear which fitting or stability checks helped you most.







































0 Comments