25 Christmas Tree Display Ideas Made with Picture Frames
A picture frame can turn a Christmas tree motif into a decoration that fits above a mantel, on a shelf, or along a narrow wall. Check the inside dimensions of the frame before choosing what goes in it. A flat print suits a shallow frame, while ornaments and miniature trees usually need more depth.
These paper Christmas trees offer lightweight shapes and folds you can adapt to fit a frame you already own.
If you are planning the whole room, use these Christmas wall decorations to work out where a framed tree could go and what to display around it.
1. Fill a Frame With Vintage Ornaments

Arrange small ornaments on a flat backing in rows that get wider toward the bottom. Lay the pieces out before attaching them so you can spread out the brighter colors. A white mat leaves a clear border around the tree. Use a deeper frame if the ornaments project past the front edge.
Follow the Maker’s Method: Frame a Vintage Ornament Tree
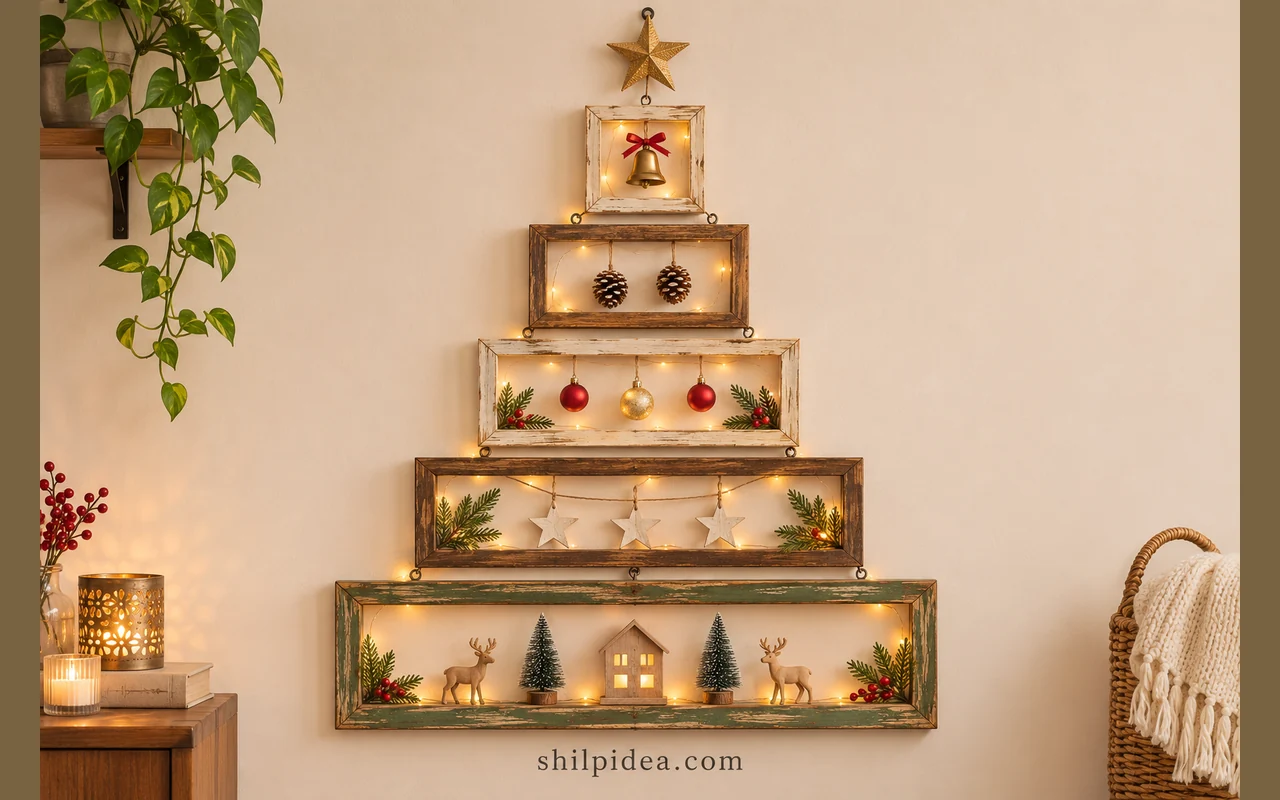
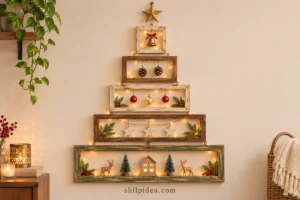
2. Stack Empty Frames Into a Tree

Place three open frames in increasing sizes from top to bottom and finish with a star. You can leave the original finishes visible or repeat one paint color across the frames. Lay everything on the floor first to check the silhouette. Use light frames and mount them individually if the assembled piece feels awkward.
Follow the Maker’s Method: Stack Thrifted Frames Into Trees
3. Hang Mini Photo Frames on a Tree Shape

Mini picture frames can outline a tree when they hang at different widths. Use a mix of small portraits and holiday snapshots to give the display something to discover up close. Test the layout with paper templates before adding hooks. Leave space around the upper frames so the point of the tree reads clearly.
4. Use a Red Frame Around a Patchwork Tree

A red frame gives a multicolored patchwork tree a clear edge. Lay small scraps against a pale background and move the busiest patterns away from the outline. Leave enough blank fabric around the tree to fit the mat. For a shallow frame, use flat scraps without raised trim so the glass fits.
5. Float a Tree of Baubles Inside a Deep Frame

A deep frame leaves room to build a tree from small baubles. Group the ornaments on the backing first and move the brighter pieces around until the shape feels balanced. A star can sit on the inner border above the tree. Use a rigid backing and an attachment method rated for the pieces’ weight.
6. Frame a Gold Potted Tree Print

A small print can turn a spare ornate frame into seasonal decor in minutes. Use a dark background to make the gold tree visible and align the pot with the center of the frame. A ribbon over the top corner can soften the frame. Keep the ribbon loose enough to remove after Christmas.
7. Set a Wood Tree Into a Rustic Frame

A flat wood tree stands out against a pale plank backing. Match the frame to the tree for a simple look and leave enough room to see each branch tier. If you build it from offcuts, sand the exposed edges and make sure the frame is strong enough for the added weight. These wood slice decorations offer more ideas for working with small pieces of wood.
8. Frame a Black and White Tree Print

A few black tree silhouettes on white paper can stand out in a dark frame. Leave room around the artwork so smaller decorations in front do not cover the print. Try one small tabletop tree beside the frame to repeat the outline in three dimensions. This approach fits shallow frames as well as deep ones.
9. Prop Several Framed Trees on a Shelf

Set a few framed tree designs next to one another and overlap the corners slightly. Put the largest one toward the back and turn the smallest a little so each tree remains visible. Repeat one shade of green or one frame finish to connect the group. Anchor any frame that could tip forward.
10. Build a Dark Tree on Gold Backing

Stack short strips on a gold backing so the widest piece sits at the bottom. The gold border between the dark tree and the outer frame makes the silhouette easy to read. Lay the strips out first to check the taper. Use spacers if the strips would otherwise touch the glazing.
11. Suspend Tiny Trees in an Open Frame

Hang small trees and a few light baubles inside an open frame so they can move a little. Vary the hanging lengths and leave the bottom edge open so the individual shapes remain visible. Tie greenery to one corner to soften it. Use lightweight pieces and check the knots before hanging the frame.
Follow the Maker’s Method: Frame Hanging Christmas Ornaments
12. Pack Baubles Into a Triangular Frame

A triangular picture frame gives small ornaments a ready-made outline. Begin with the larger baubles near the bottom and fill the gaps with smaller pieces. Test the arrangement without adhesive so you can move colors around. Hang the frame above a clear surface or set it on a ledge wide enough for the base. Use these handmade Christmas baubles to carry the colors into another display.
13. Make a Tree From Old Jewelry

Sort old brooches, charms, and jewelry findings by size before arranging them on a dark backing. Put the wider pieces near the base and save a piece with a clear outline for the top. Check that the finished piece fits inside the frame depth. Use a strong board if the collection is heavy.
14. Arrange Green Buttons Inside a Frame

Use different sizes of green buttons to fill a simple tree shape. Place the bigger buttons near the base, then use tiny ones where you need to fill gaps. A patterned backing adds detail if the buttons still stand out against it. Mount it in a frame with enough space to clear the highest button.
15. Stack Short Strips Across a Reverse Canvas

Reverse a small canvas so its wood frame faces out, then place short pieces of decorative fabric or ribbon across the backing. Trim each row a little shorter than the one below it. A small bow gives the top of the tree a clear finish. Keep the strips light so the canvas stays taut.
Follow the Maker’s Method: Try Reverse Canvas Tree Art
16. Build a Small Winter Scene Around a Pink Tree

A pink tree can stand out against a white winter scene and a dark frame. Place the tree low enough to leave some sky above it. Add a few small seasonal details near the frame edges to keep the center open. Use a deep frame if you want to set loose miniature pieces inside.
17. Piece a Quilted Tree From Fabric Scraps

Build a tree from layers of folded fabric, with the shorter folds near the top. Vary the prints within the same color family so you can still read the stepped outline. A rigid backing helps the fabric stay square inside a frame. Try the fit before adding any raised trim or buttons. These fabric Christmas decorations offer more ways to use the rest of the fabric.
Follow the Maker’s Method: Sew a Quilted Christmas Tree
18. Make a Trio of Trees From Burlap

Cut three burlap triangles and arrange them on a backing that contrasts with their texture. Small bows and separate trunks make each tree easy to distinguish. Leave a little space between the three so the cut edges remain visible. A horizontal frame works well for a mantel or a shallow tabletop.
Follow the Maker’s Method: Frame a Burlap Tree Trio
19. Build a Tree From Collected Corks

Cut or arrange corks so their round ends face out and gradually widen toward the base. Put a few painted or patterned pieces in the gaps if the tree needs more color. For a frame, choose a shadow box deep enough for the corks and use a backing that can support their weight.
Follow the Maker’s Method: Frame a Wine Cork Tree
20. Tie a Greenery Tree Into a Square Frame

Use the open frame to show the full outline of a small greenery arrangement. Angle the branch tips outward toward the bottom and tuck the binding under a light bow. Leave space at the sides so the longest branches do not snag. A shallow shelf works if the frame has a steady stand.
21. Set a Greenery Tree Against Wood Slats

Horizontal wood slats give a simple greenery tree a striped backdrop. Arrange sprigs or artificial foliage in tiers and step back to check that their outline is even. A few small red details are enough to mark the shape. The frame and slats can share a finish if you want the greenery to stand out.
22. Layer Sea Glass on Dark Backing

Arrange flat pieces of sea glass in rows and overlap them just enough to form a tree silhouette. Use a dark backing to show the edges and a white frame to give the design a clear border. Leave space at the top for a small star and let the adhesive set before moving the frame. Try these paper tree ideas to test the silhouette in a few sizes before framing it.
23. Make a String Tree on a Framed Wood Board

Draw the outline lightly first and space the nails around the tree before adding thread. Build up the green silhouette in a few passes and use one contrasting thread for a garland. A frame or wood edge can keep the composition tidy. Leave clearance behind any glazing so the nail heads do not touch it.
24. Reuse a Found Art Frame for a Textured Tree

Take the original picture out of a thrifted frame and use the opening to plan the tree. Choose a backing that fits the frame and makes the material you picked easy to see. Lay the tree out before attaching it so it has space on every side. Check the hanging hardware if your new backing is heavier.
Follow the Maker’s Method: Upcycle a Thrifted Picture Frame
25. Light a Shadow Box of Miniature Trees

A shadow box gives miniature trees room to stand on a flat ledge. Put the taller pieces toward the back and keep the foreground low. A strand of battery lights can run inside the upper edge. Place the switch somewhere you can reach without taking the trees out or pulling the frame off the wall.
Carry the Tree Motif Through the Room
Once you choose a frame, repeat one detail nearby. A bit of the same ribbon on a mantel or a second piece of wood in a tabletop display can connect the decorations. These projects offer more ways to use the materials you already have.
- Paper Christmas Trees for Small Spaces
- Christmas Wall Decor for Small Spaces
- Rustic Christmas Decorations With Wood Slices
- Handmade Baubles for Christmas Displays
- Fabric Decorations for Handmade Holiday Displays
What would you put in your framed tree: family photos, leftover ribbon, or a few favorite ornaments? Share the frame and spot you would use in the comments. If you have made one before, tell us what helped keep the pieces in place.





















0 Comments