20 Handmade Mirror Frame Ideas with Decorative Details
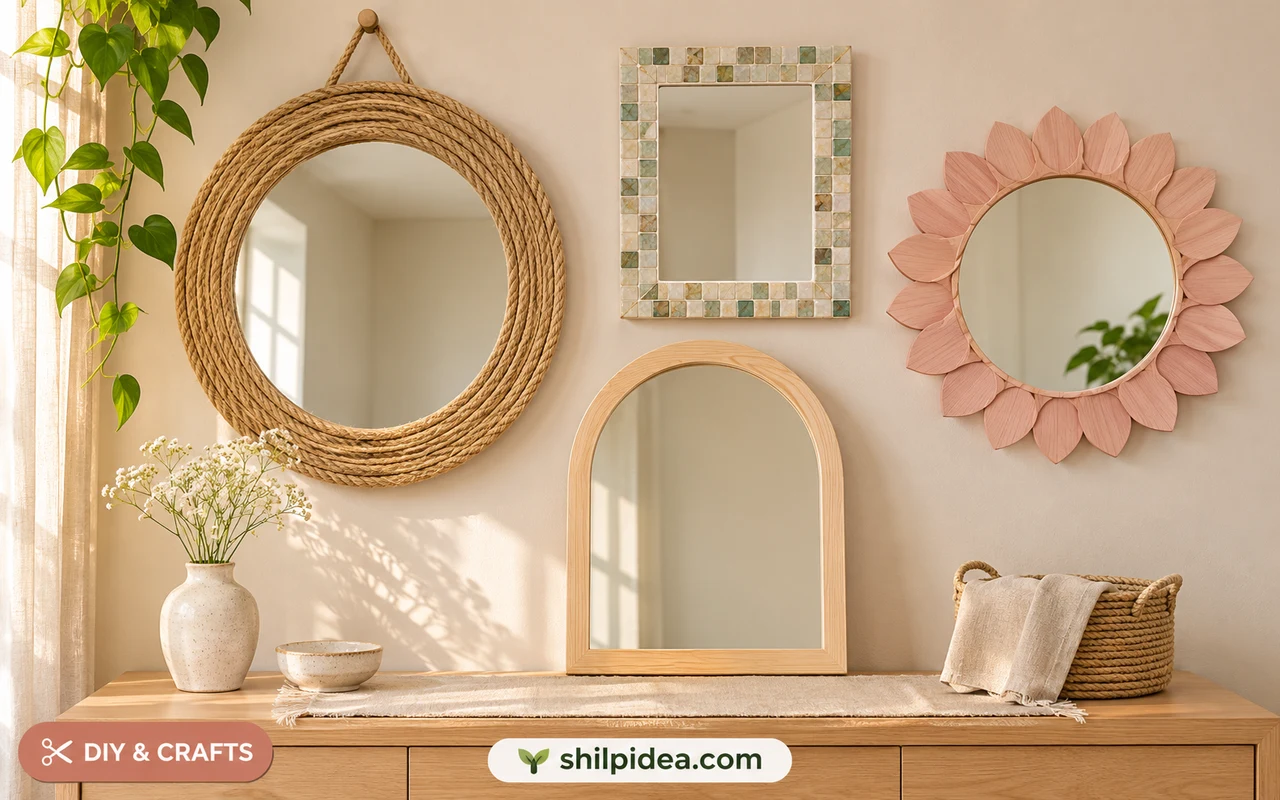
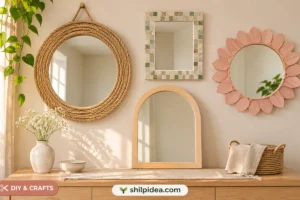
A handmade frame can change the character of a mirror without changing what it does. These 20 ideas explore texture, shape and small decorative details, from natural rope to mosaic borders and playful wooden petals.
If you are planning a room refresh, these interior design ideas can help you picture where a new frame will fit. Choose the mirror’s position before choosing its decoration.
For a more practical entryway arrangement, explore these corner entryway ideas. Follow each original project’s construction guidance and use hanging hardware appropriate to the completed mirror’s weight.
1. Copper-Line Geometry around a Wooden Hoop

Fine copper-colored lines turn a light wood surround into a graphic frame. The open pattern gives the mirror more presence without making its outer edge look heavy. A small grouping works particularly well because the repeated circles connect the different line arrangements. Keep the space around them fairly simple. The original project explains its particular wire and hoop construction; use suitable mirror support rather than treating decorative wire as a substitute for hanging hardware.
Get the tutorial: Copper-Line Geometry around a Wooden Hoop by Kara Whitten / A Beautiful Mess.
2. A Broad Coiled-Rope Border with Wrapped Accents

Several close rows of rope create a substantial border, while the wrapped sections break up the circular rhythm. The result feels textured enough to hold its own on a plain wall. Leave the mirror surface clear so the natural fibers do not make the whole piece look crowded. For more warmth nearby, these rustic wood accents can help connect the materials without filling the wall with matching rope objects.
Get the tutorial: A Broad Coiled-Rope Border with Wrapped Accents by Shellie Wilson / CraftBits.
3. A Fine Sunburst with an Airy Outline

Slender rays give this mirror a light, almost drawn quality. It suits a spot where a solid wide frame would feel too heavy, such as above a narrow console or between two curtains. The radiating pieces need a balanced layout, but they do not all need to create an identical length around the edge. Keep the center visually clear and follow the source method for attaching the decorative rays to their support.
Get the tutorial: A Fine Sunburst with an Airy Outline by Laura Gummerman / A Beautiful Mess.
4. A Simple Round Mirror with a Chain Detail

A narrow circular rim and a visible chain create a clean outline that feels closer to a hanging pendant than a bulky frame. The chain becomes part of the design, so its length and finish matter as much as the rim color. Check the original project’s attachment method and the finished weight before choosing hardware. A decorative chain should not be assumed to hold any mirror simply because the proportions look similar in a photograph.
Get the tutorial: A Simple Round Mirror with a Chain Detail by Laura Gummerman / A Beautiful Mess.
5. An Uneven Wooden Starburst

Short wooden pieces arranged at slightly different distances create a rough-edged halo around the glass. The small variations are what make the frame feel handmade, rather than a perfect machine-cut ring. A restrained finish lets the grain carry the detail. Give the whole outer shape enough wall space to read clearly. If your room already has several strong wood textures, use fewer nearby objects so the mirror can remain the main feature.
Get the tutorial: An Uneven Wooden Starburst by Rachel Denbow / A Beautiful Mess.
6. A Mirror Frame that Hides Jewelry Storage
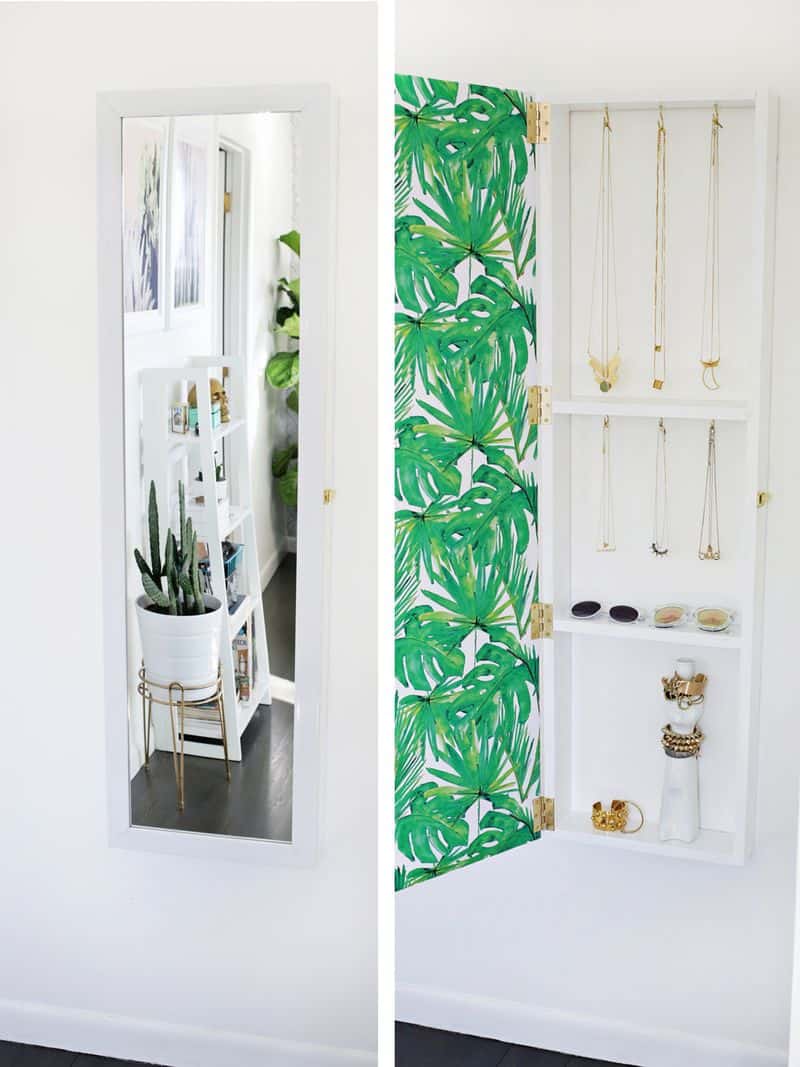
A shallow cabinet behind a full-length mirror adds a useful second layer to the project. The visible white surround stays quiet, while the inside can hold hooks, small shelves or another organizer arrangement suited to the construction. Our wooden shelf ideas offer other storage directions. This is a more involved build than decorating a ready-made frame, so review the hinge, mounting and weight details before treating it as a quick makeover.
Get the tutorial: A Mirror Frame that Hides Jewelry Storage by Laura Gummerman / A Beautiful Mess.
7. Colorful Washi Stripes on a Plain Frame
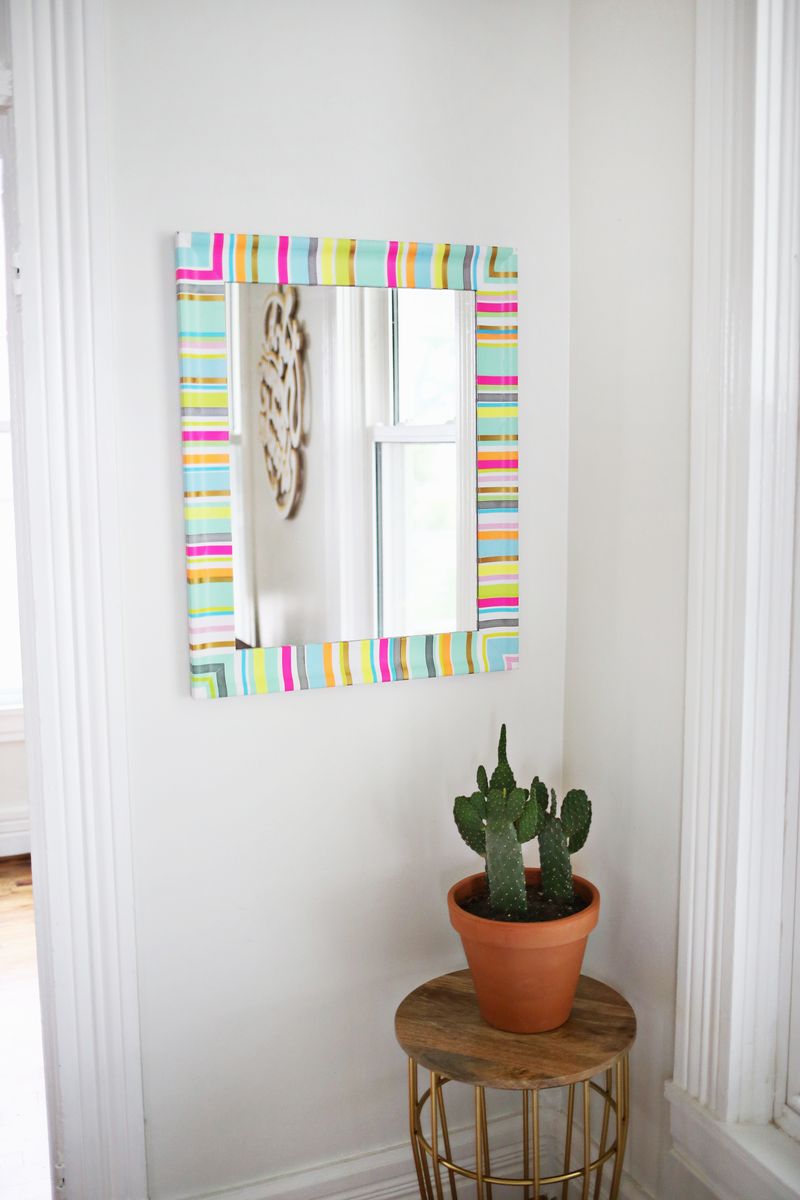
Washi tape can introduce a lively rhythm of narrow color bands without changing the mirror’s overall shape. It is a useful visual direction for an existing smooth frame that already has a sound structure. Test the tape on an inconspicuous area before covering a finished surface, and check how it behaves with cleaning or moisture. Repeating a few colors from the room makes the border feel intentional instead of like an assortment of leftover rolls.
Get the tutorial: Colorful Washi Stripes on a Plain Frame by Laura Gummerman / A Beautiful Mess.
8. A Driftwood Village across the Frame
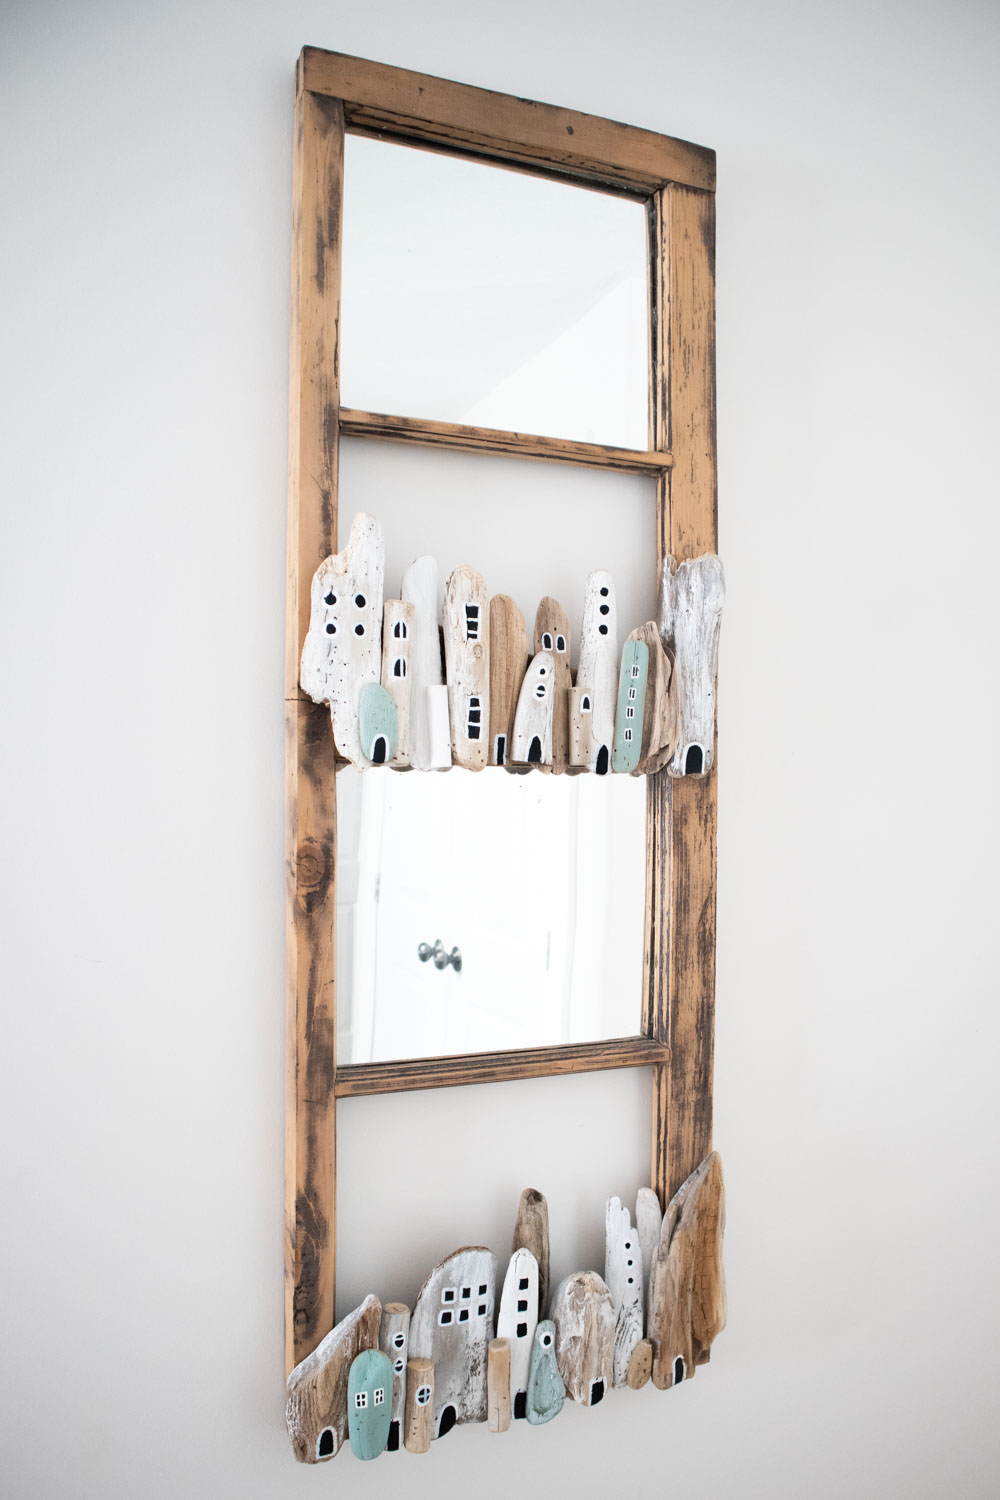
Tiny driftwood houses turn the mirror into a miniature scene. The small windows and pale painted walls provide detail along one section, leaving much of the original frame visible. That asymmetry makes the decoration feel collected rather than applied evenly around every edge. Keep the pieces lightweight and attach them to a suitable backing. A mirror above a work surface or a shelf can let viewers enjoy the little houses at a comfortable height.
Get the tutorial: A Driftwood Village across the Frame by Jane and Sonja / Sustain My Craft Habit.
9. Split-Bead Details on Thrifted Frames

Rounded beads can give a plain thrifted frame a more sculptural edge. Painting the additions with the frame helps the new texture read as one piece instead of separate objects stuck onto it. Check the original frame for damage before investing time in the finish. This treatment can suit a small group, especially when the mirrors share a paint color but have slightly different shapes. Keep the hanging fixings accessible throughout the makeover.
Get the tutorial: Split-Bead Details on Thrifted Frames by Rachel / The Ponds Farmhouse.
10. A Long Mirror with a Small-Tile Border
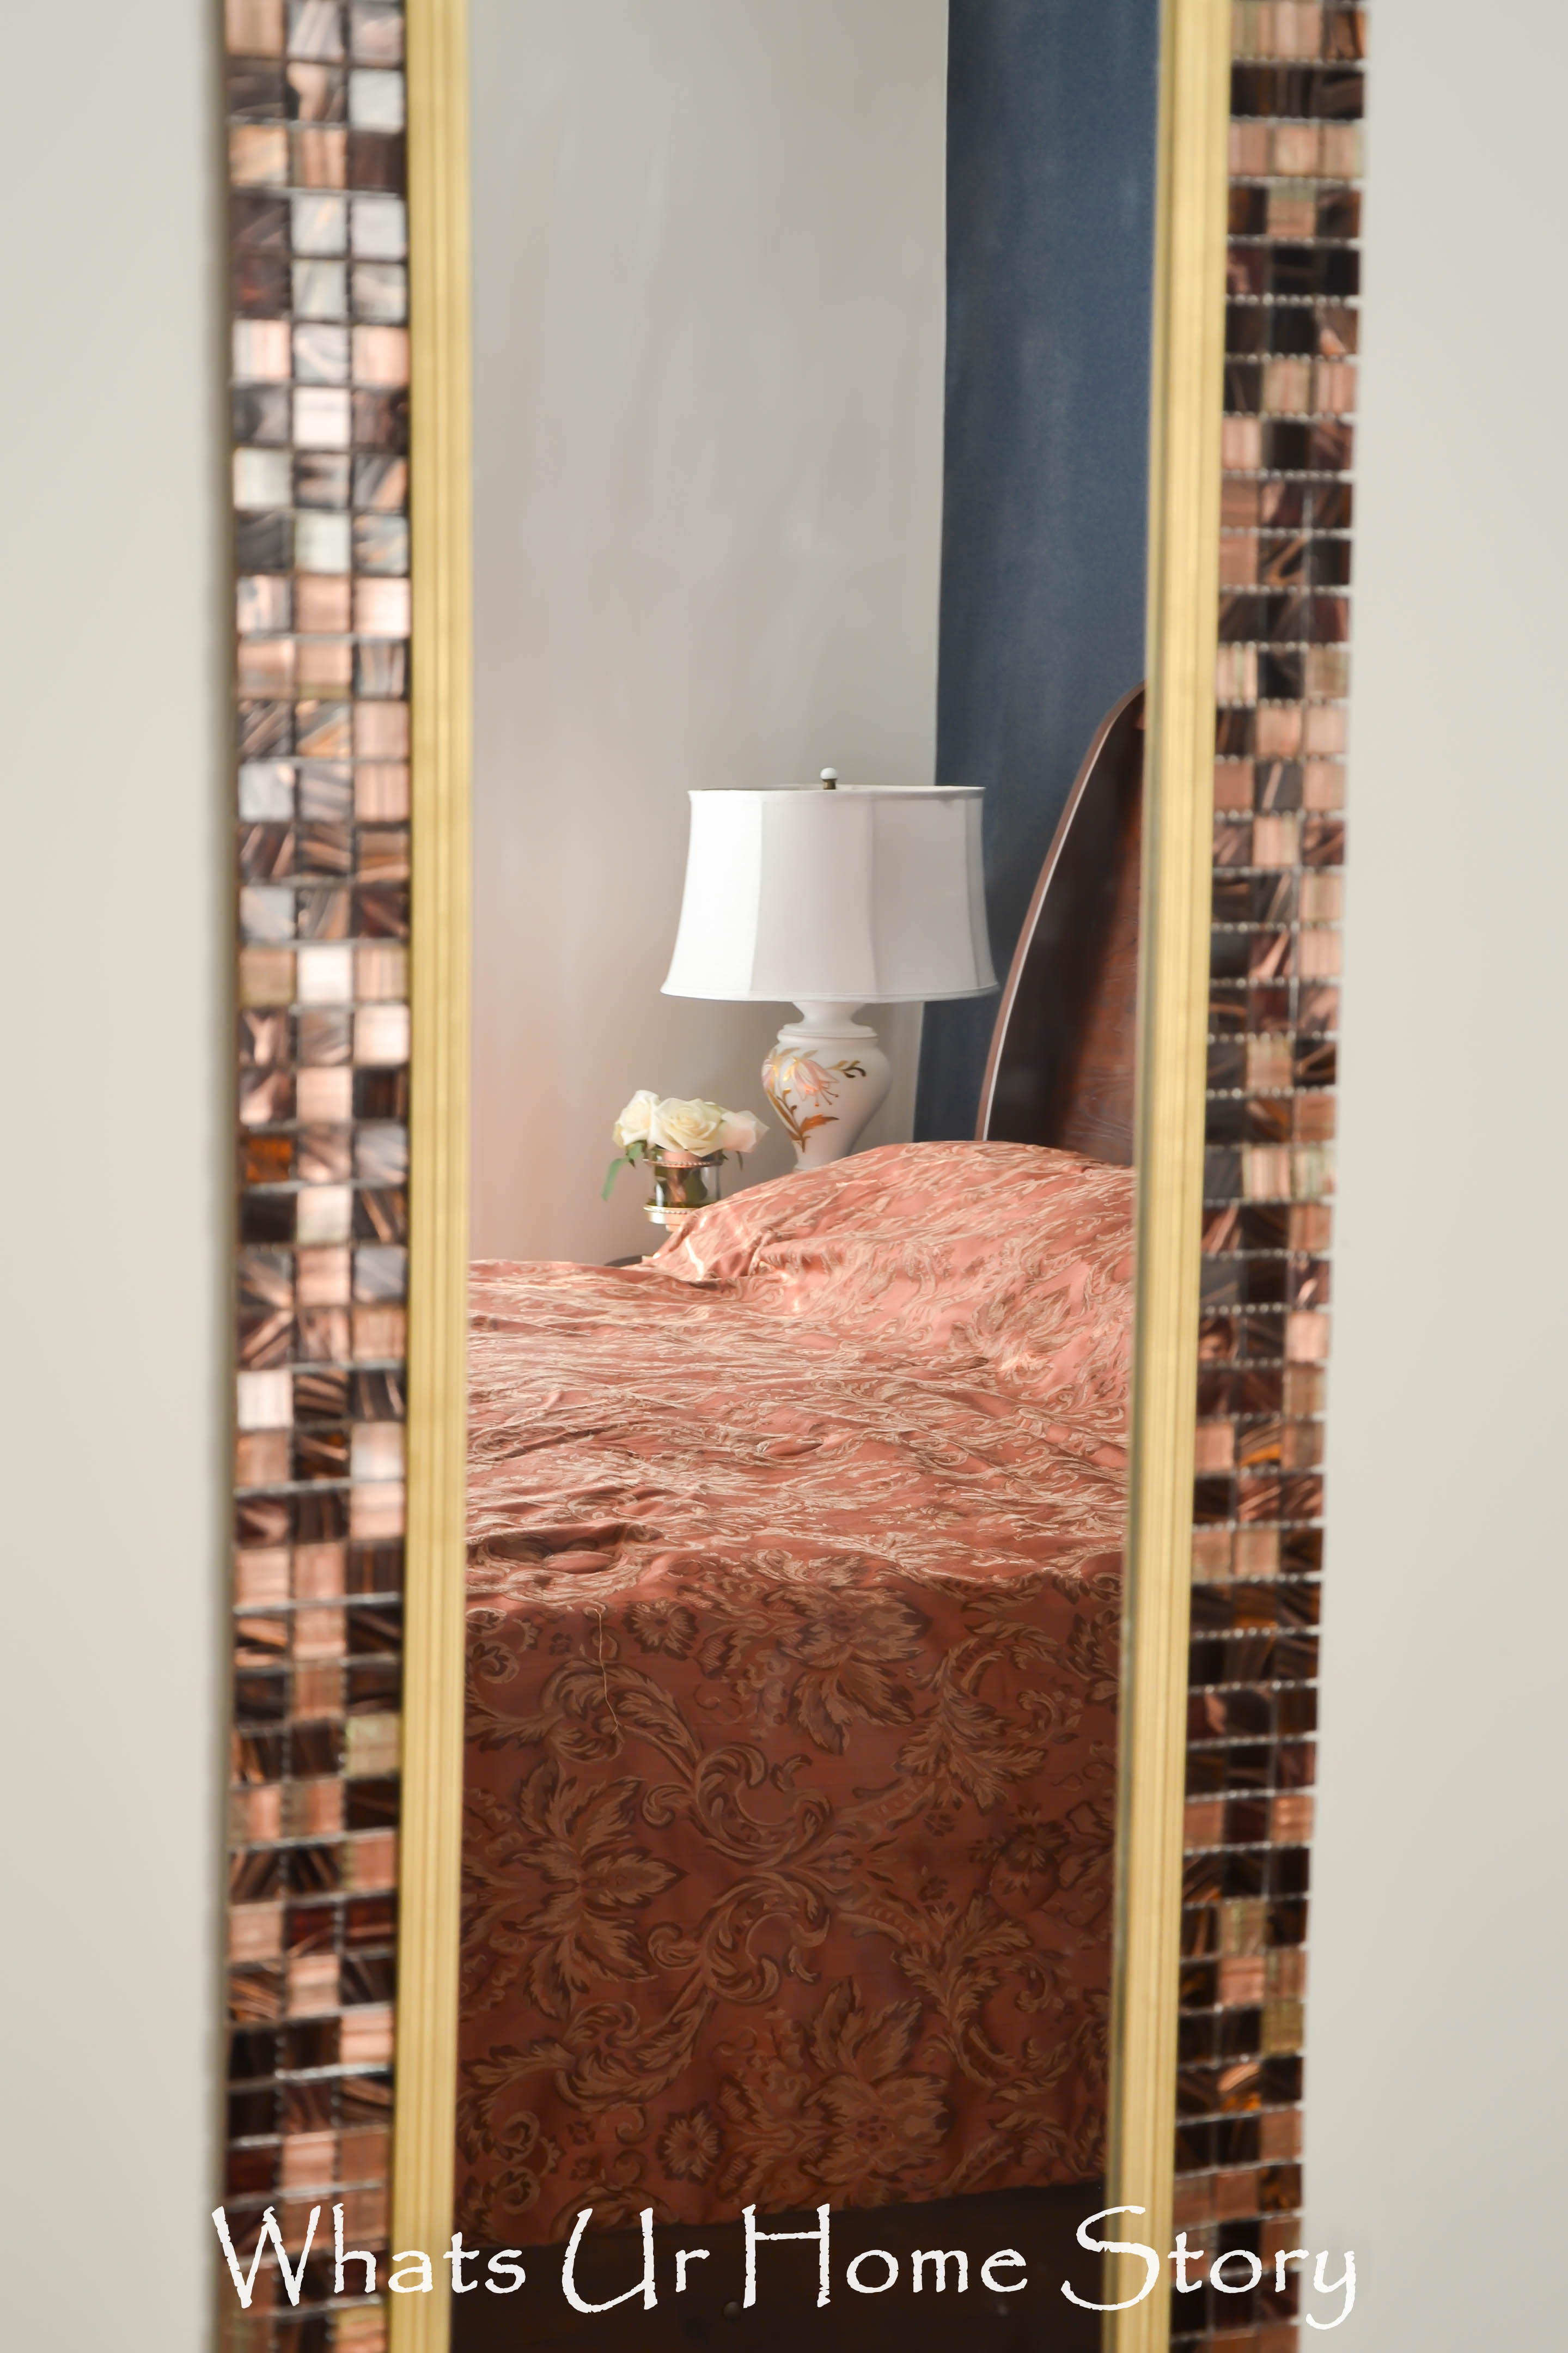
A narrow mosaic border can make a tall mirror look more finished while preserving its useful reflective area. Small pieces create texture along the length, so a limited mix of colors is usually easier to balance than many competing patterns. Plan the corners before fixing anything permanently. For placement inspiration, these small bedroom layouts can help you consider clearance around a full-length mirror and nearby furniture.
Get the tutorial: A Long Mirror with a Small-Tile Border by Vidya / What’s Ur Home Story.
11. A Raised Frame with a Recessed Mosaic Band
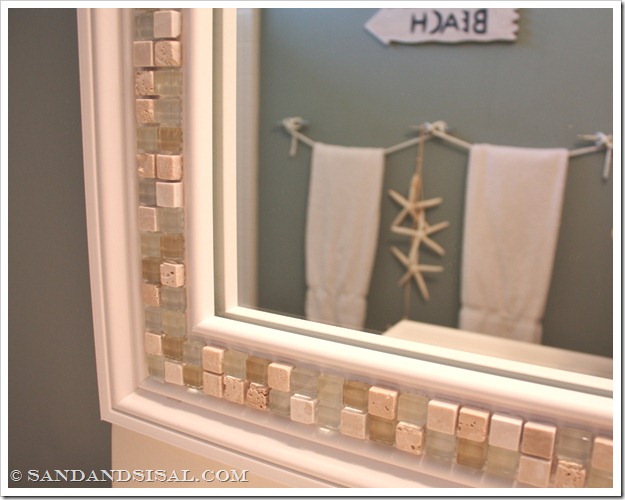
An existing molded surround gives mosaic tiles a natural place to sit. The outer profile still defines the mirror, while the inset strip adds sparkle and a smaller scale of detail. Match the adhesive and any grout to the actual frame materials and follow their instructions. Tile adds weight, so the original hanging arrangement may need reassessment. A restrained mosaic band can work better beside patterned wallpaper than a frame covered edge to edge.
Get the tutorial: A Raised Frame with a Recessed Mosaic Band by Kim / Sand and Sisal.
12. A Wavy Opening in a Painted Backing
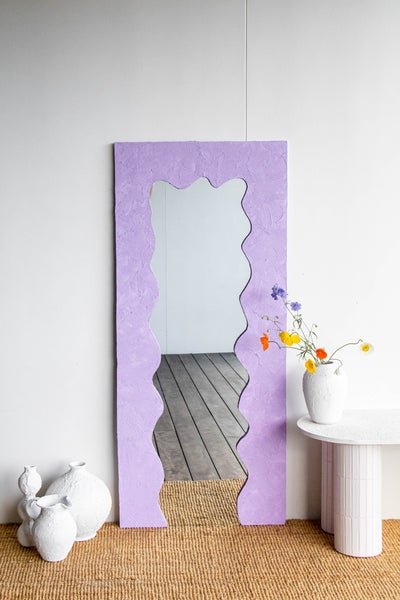
A wavy inner outline changes the mirror’s personality even when the outer board remains rectangular. The painted surround becomes a broad decorative surface, which can pick up one strong accent color from the room. Keep the reflected view in mind when deciding where it will go; the shape feels clearest against a fairly calm background. Use the original project for its cutting and assembly approach, and have the glass professionally prepared if resizing is necessary.
Get the tutorial: A Wavy Opening in a Painted Backing by Jaharn.
13. Shells, Pearls and Small Stones around the Edge

Different shell shapes can build a border with depth and a naturally uneven rhythm. Small pearl-like beads and stones fill selected gaps rather than requiring every space to disappear. Arrange the larger pieces first and check the balance before choosing an adhesive appropriate to the surfaces. Our wall display ideas offer another way to think about the surrounding wall. Keep the finished mirror dry unless all materials and fixings are suitable for a wetter setting.
Get the tutorial: Shells, Pearls and Small Stones around the Edge by Khadija / Creative Khadija.
14. A Rustic Wood Surround with Visible Corner Details

A broad wooden frame makes a large bathroom mirror look more like a piece of furniture. Visible corner hardware can become part of the style when its finish relates to nearby taps or light fittings. The source project uses a separate frame arrangement, so review how it fits around existing mirror clips before buying boards. Measure the full installation area, including lights and sockets, and avoid assuming the mirror itself can support the added frame.
Get the tutorial: A Rustic Wood Surround with Visible Corner Details by April / Love Our Real Life.
15. Wooden Circle Petals around a Round Mirror
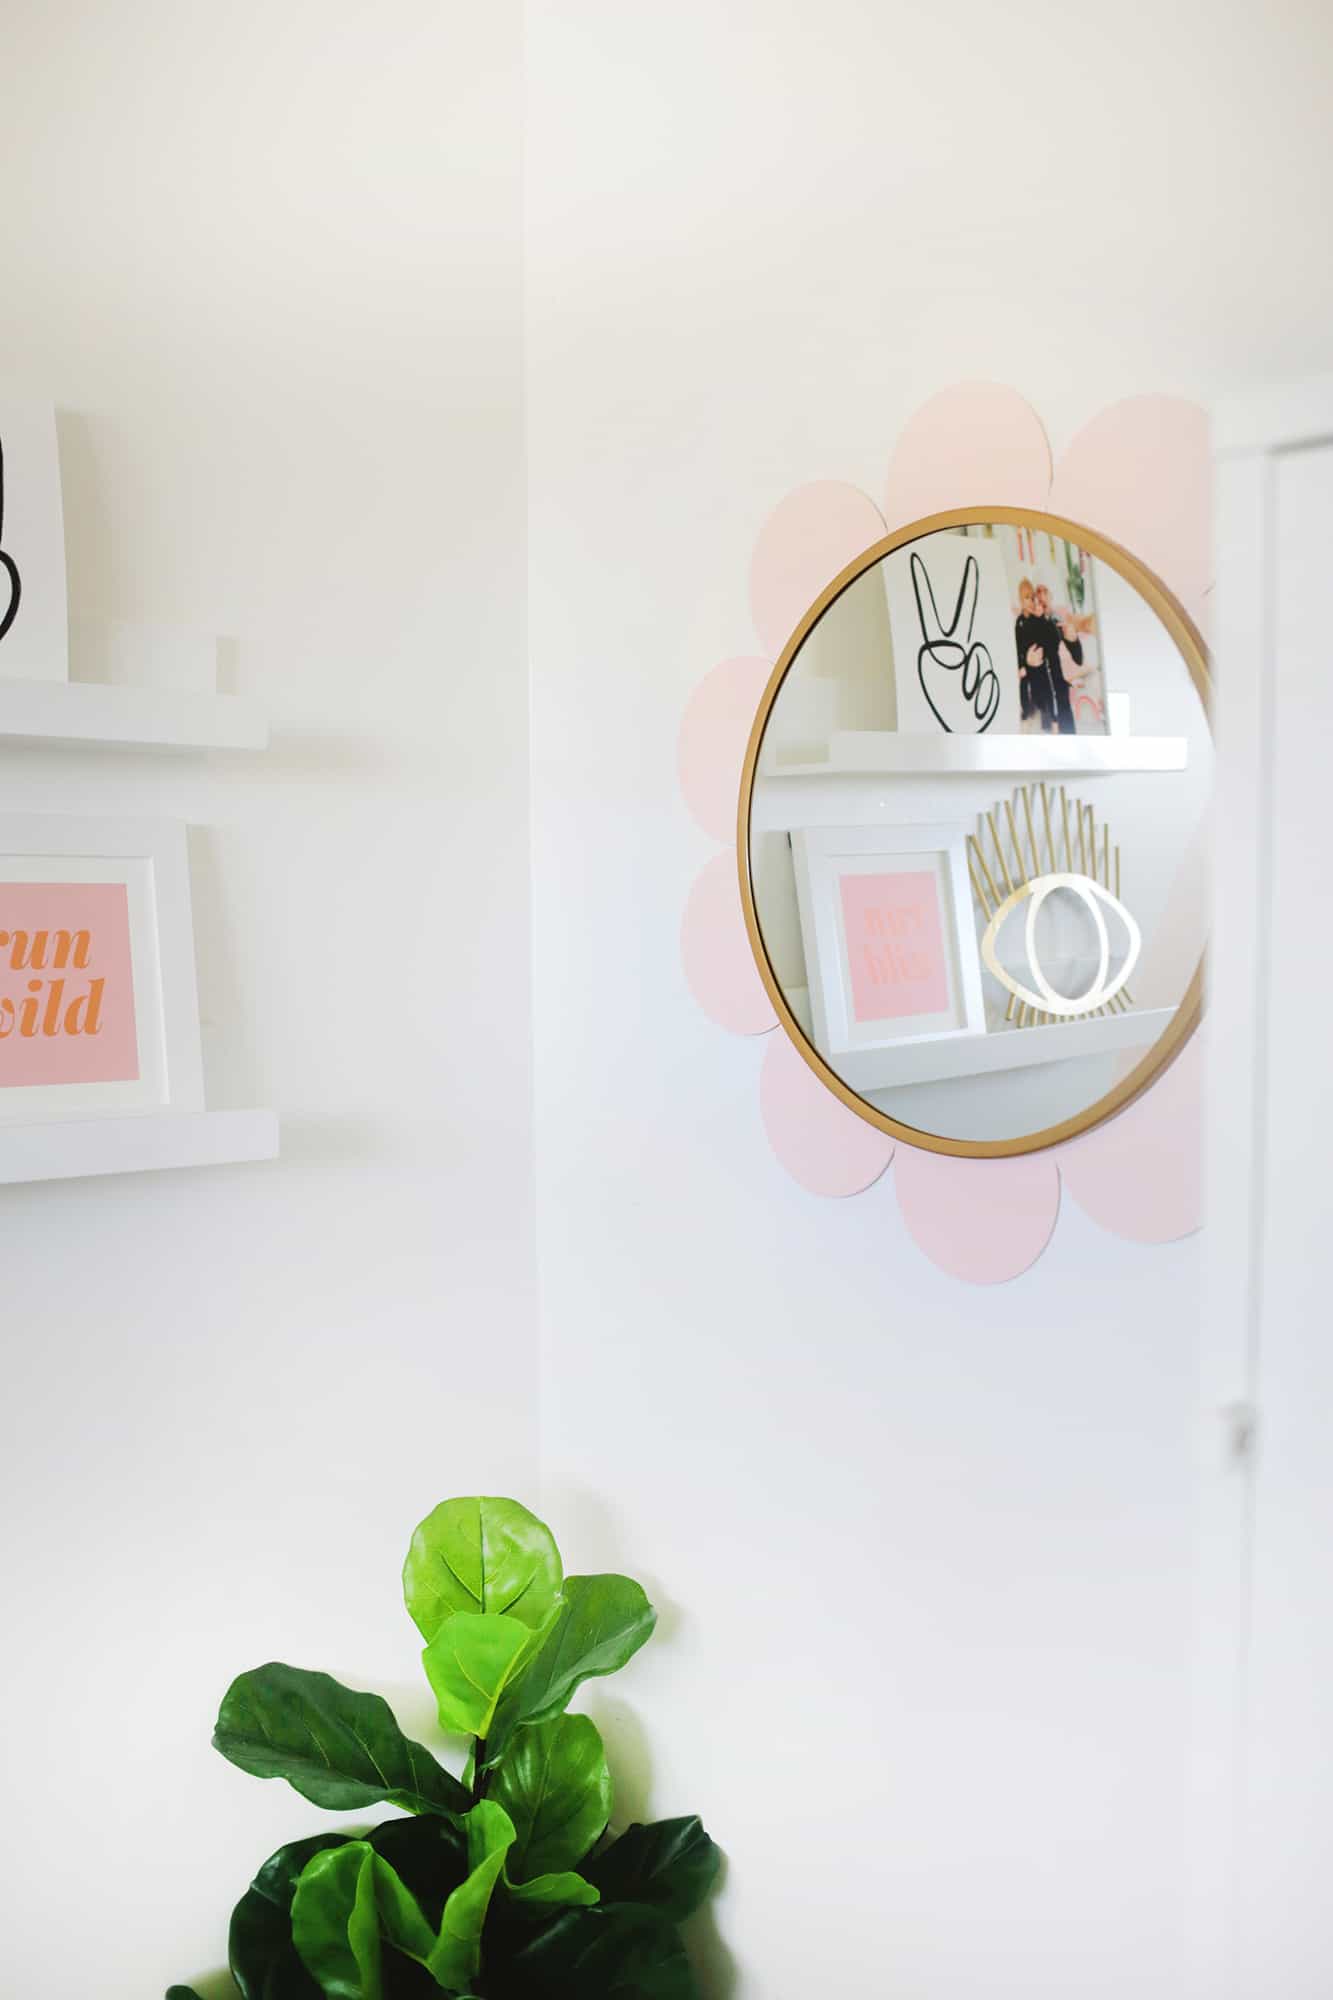
Large rounded petals give a small circular mirror an unmistakable flower outline. A pale paint color keeps it playful without making the frame overpower the reflection. Space the petals around a paper or cardboard stand-in before committing to their positions. This can work as a cheerful detail in a craft room or a reading corner. Use the source project’s construction guidance, and preserve access to the mirror’s proper hanging point.
Get the tutorial: Wooden Circle Petals around a Round Mirror by Laura Gummerman / A Beautiful Mess.
16. A Wooden-Bead Rim with a Little Greeting
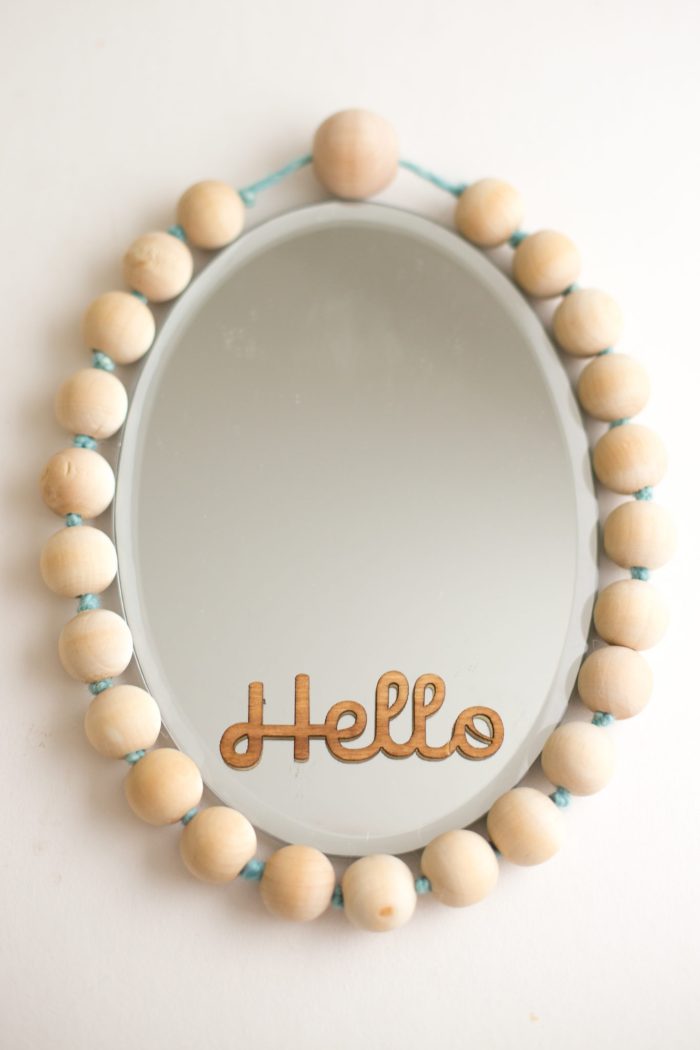
A ring of natural wooden beads gives a small mirror a soft, tactile outline. The short greeting along the lower edge adds personality without using much of the reflective area. This is a different effect from painting an entire frame: the individual rounded shapes remain visible. Consider a larger bead as a deliberate top detail, or keep all beads similar for a quieter finish. Keep the added pieces away from any clip or attachment mechanism.
Get the tutorial: A Wooden-Bead Rim with a Little Greeting by Anne Weil / Flax & Twine.
17. A Dowel Frame with Extended Corners

Round wooden rails create a simple architectural border, and their extended ends give the corners a recognizable detail. The natural wood stays prominent because there is very little other decoration. This suits a room that already has soft textiles and could use a clearer line. The project involves woodworking and fitting grooves for the mirror, so read it as a build requiring the right tools and skill rather than a glue-only frame embellishment.
Get the tutorial: A Dowel Frame with Extended Corners by Caitlin / The Merrythought.
18. A Rounded Plywood Backing with an Arch Silhouette

An arched plywood shape can give a round mirror a larger silhouette without surrounding every edge with trim. The exposed wood below the glass becomes part of the composition, so it helps to keep its grain and finish neat. For a calm room palette, these sage bedroom ideas provide another decorating direction. Choose mirror-rated attachment materials and arrange the finished piece securely rather than relying on a casual leaning position.
Get the tutorial: A Rounded Plywood Backing with an Arch Silhouette by Caitlin / The Merrythought.
19. Weathered Blind Slats as a Layered Wood Border

Upcycled blind slats create a broad border with varied lengths and a weathered finish. The repeated narrow pieces give it a different rhythm from solid boards or a round sunburst. Sort the slats for damage, and lay out the design before attaching them to a stable existing frame. A small rope accent can define the inner edge, but keep the center uncluttered. The original project shows the finishing process and how the slats are arranged.
Get the tutorial: Weathered Blind Slats as a Layered Wood Border by Blindster.
20. Hexagon Tiles with a Distinctive Outer Edge

A line of hexagons changes the outside contour of a mirror frame as well as its color. The repeated angles make the border feel geometric, especially when the surrounding room uses simpler rectangular shapes. Plan how the tile pattern ends at each corner before fixing it in place. Check the actual added weight and the supporting surface. This is a decorative framing idea, so follow the source for construction details and suitable attachment methods instead of treating the tiles as structural support.
Get the tutorial: Hexagon Tiles with a Distinctive Outer Edge by Marcia Socas.
Choose a Frame that Belongs in Your Room
Look at the materials already nearby before choosing your mirror treatment. Rope softens a plain wall, wood adds a clear outline, and tile or beads can introduce a finer decorative rhythm. These related collections can help connect the mirror to the rest of the space.
- Creative Interior Design Ideas
- Wall Shelf and Plant Display Ideas
- Rustic Wood Decoration Ideas
- Small Corner Entryway Ideas
- Wooden Crate and Pallet Shelves
- Sage Green and Cream Bedrooms
Which frame would you choose for your home? Tell us your favorite in the comments—or share how you have given an old mirror a new look. We would love to hear about the details that made it feel like yours.



















0 Comments