How to Make Kokedama: A Moss Ball Planter Guide
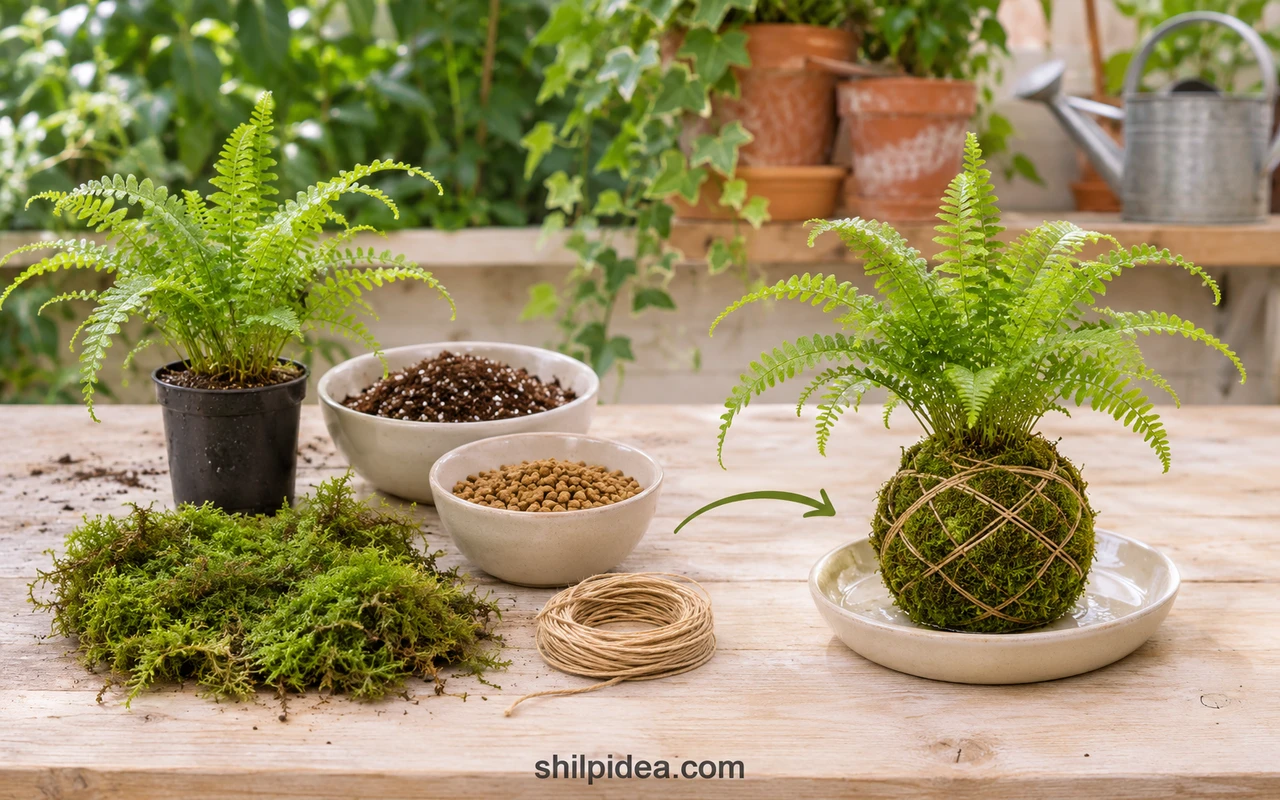
A kokedama holds a plant’s roots inside a ball of growing mix wrapped in moss and cord. This guide makes a small fern version for a waterproof saucer, with separate reference photos for other display styles.
Like our bamboo planter ideas, it changes how the plant is presented. The growing mix, light and watering still need to suit the plant.
You can explore our hanging planter ideas later. Begin with a tabletop kokedama so you can check its weight, moisture and binding easily.
Materials and Tools
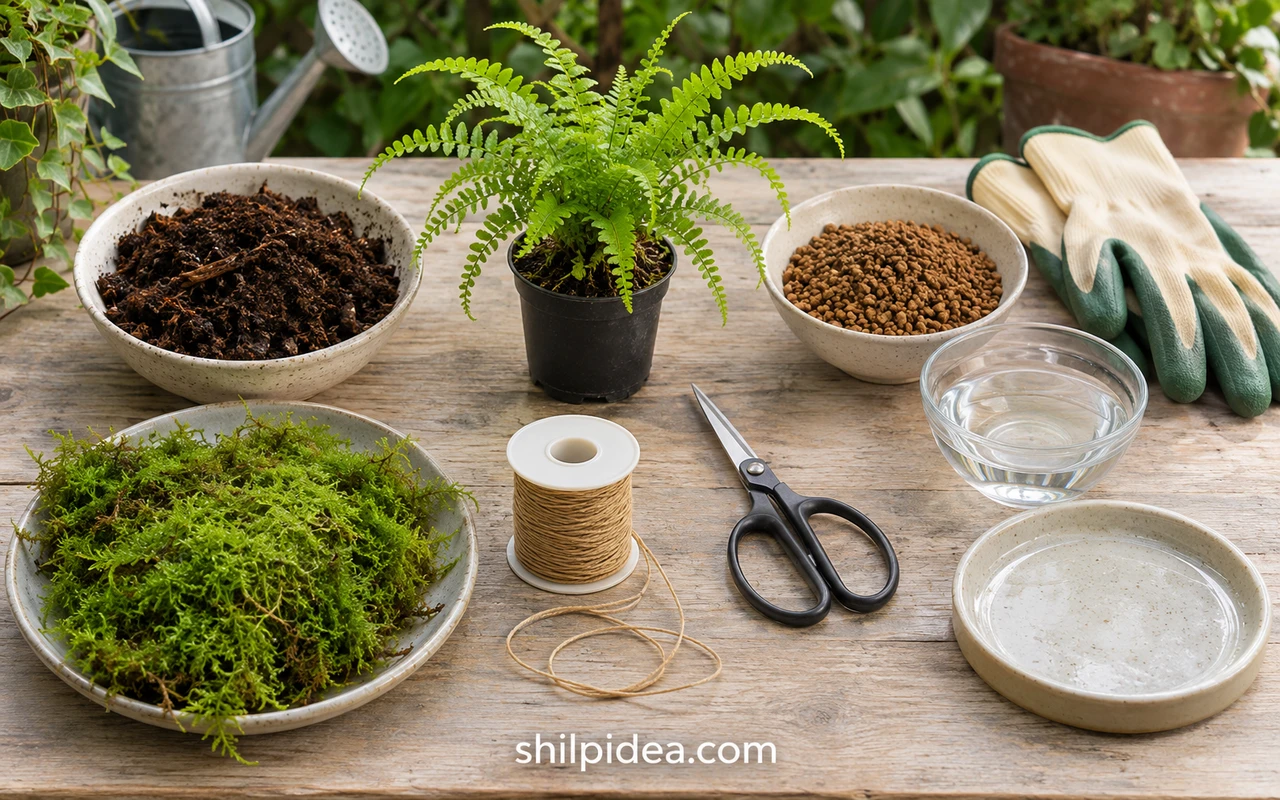
Gather these supplies before removing the fern from its pot.
- Small fern – A healthy Boston fern in an approximately 3-inch (8 cm) nursery pot, with a compact root ball.
- Growing mix – Lightweight houseplant potting mix and fine akadama bonsai soil, measured about seven parts to three by volume.
- Sheet moss – Enough horticultural moss to cover a roughly 4–5-inch (10–13 cm) ball; choose a legally sourced product suitable for watering, not dyed craft moss.
- Binding cord – Thin, rot-resistant garden cord or polyester string, with enough length to wrap the ball in several directions.
- Water and bowls – Room-temperature water, a mixing bowl and a soaking bowl deep enough for the moss ball.
- Tools and protection – Scissors, gloves, a measuring scoop and a washable work mat or tray.
- Display support – A shallow waterproof saucer and a rack or colander for draining after watering.
Precautions Before You Begin
Prepare a protected workspace and handle the living roots gently.
- Dampen dry mix and moss before handling to limit dust. Wear gloves and wash hands after working with potting materials.
- Keep the fern’s crown exposed; do not bury stems or wrap cord across the fronds.
- Use a saucer that protects furniture, and empty runoff. A moss ball should not sit continuously in water.
- Do not suspend the ball from decorative wrapping alone. Hanging needs a separate secure cradle and a fixing suitable for the fully soaked weight.
The potting-mix and akadama approach follows Illinois Extension’s kokedama guidance. This version uses a fern rather than a succulent; it does not treat sand, worm castings or any single recipe as suitable for every plant.
1. Moisten the Moss and Prepare the Mix
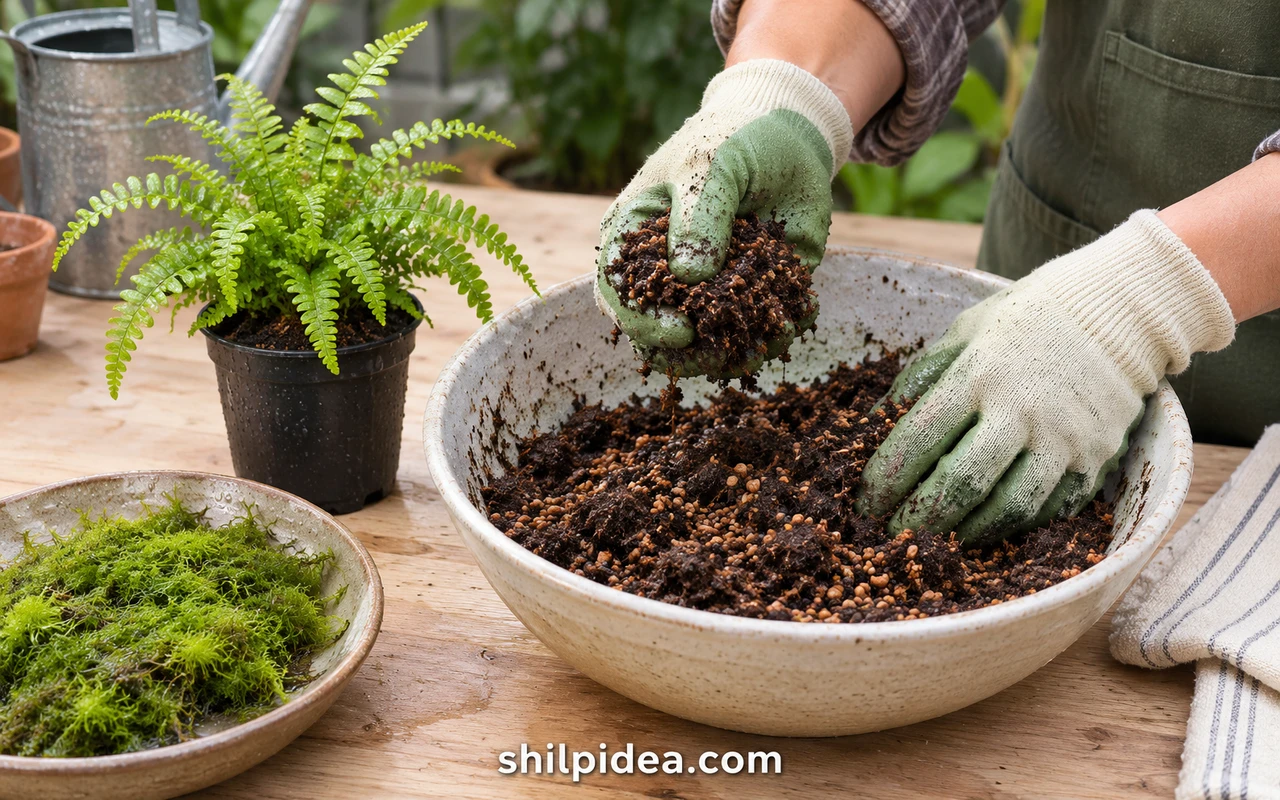
- Soften the moss. Soak dry horticultural sheet moss according to its package directions, then squeeze it gently until damp. Spread it on the tray with the green outer side facing down.
- Check the mixture. Combine seven scoops of potting mix with three scoops of fine akadama. Add water gradually until a handful holds together when squeezed without dripping; avoid turning it into dense mud.
2. Shape the Growing Mix Around the Roots
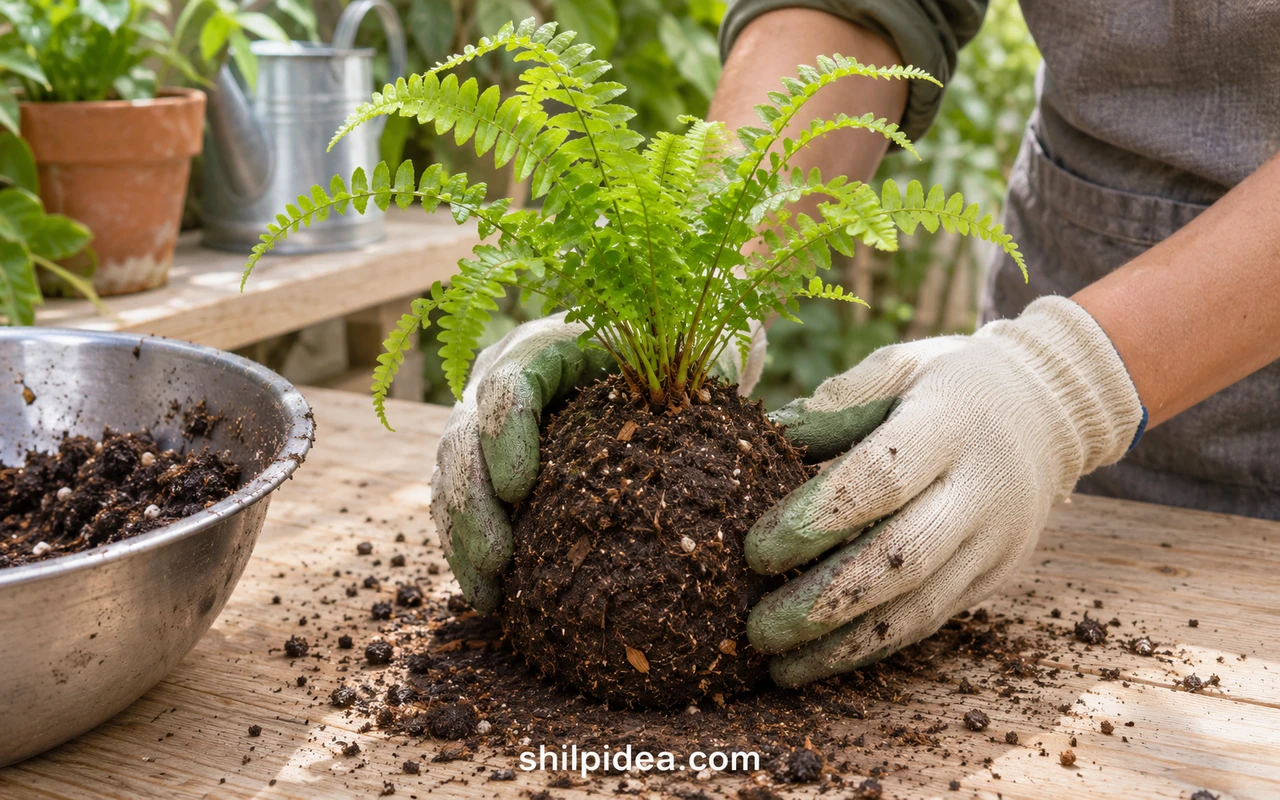
- Release the root ball. Water a dry nursery plant first and let it drain. Slide the fern from its pot, gently loosen circling roots and remove only loose excess mix; do not strip fine roots bare.
- Form a rounded core. Cup damp growing mix around the roots, supporting the fern upright. Aim for a ball only a little larger than its root system, leaving the crown at its original planting level.
3. Cover the Ball with Sheet Moss
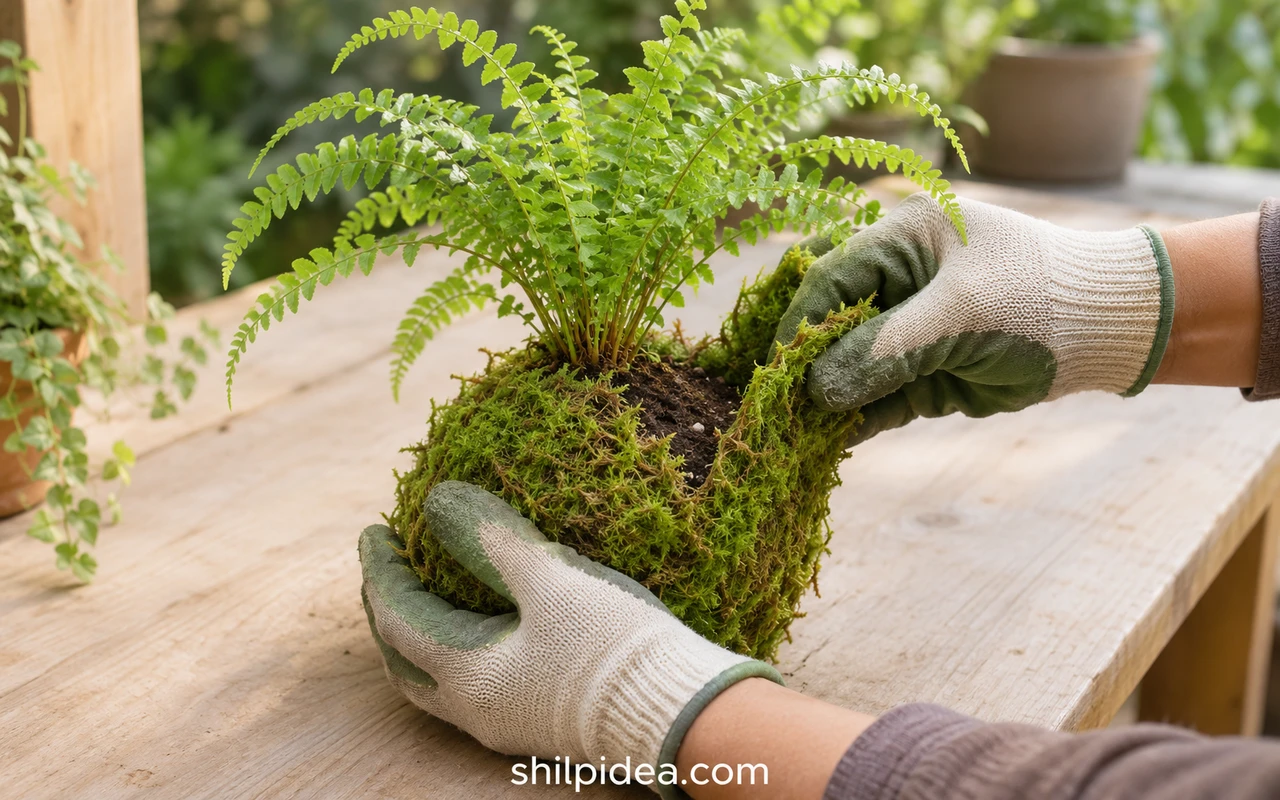
- Wrap the underside first. Set the soil ball on the damp moss. Bring the moss up around the bottom and sides, gently overlapping pieces until the growing mix is covered.
- Keep the crown clear. Add small moss patches to gaps without covering the stems or trapping fronds. Support the whole ball in your palm rather than lifting it by the foliage.
4. Bind the Moss Without Crushing the Ball
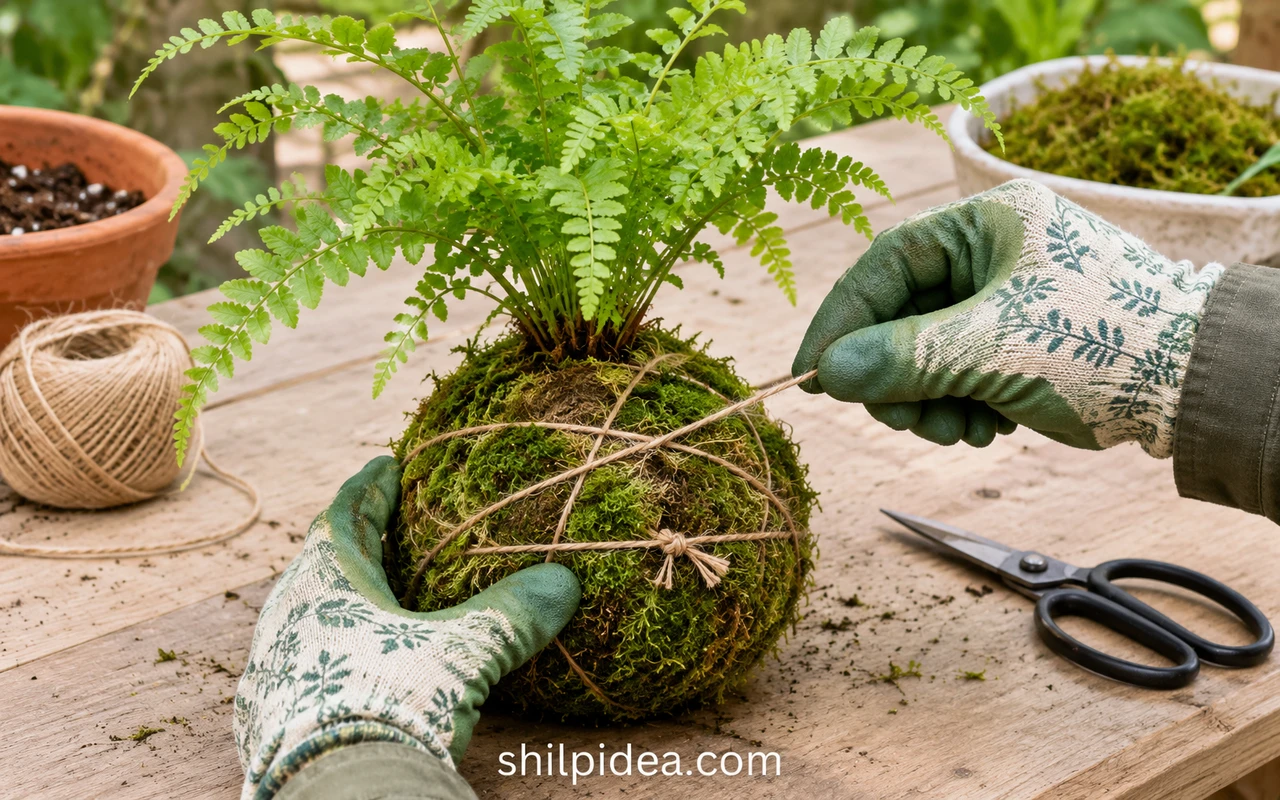
- Cross the cord. Leave a short tail, then wind cord around the moss in several directions. Rotate the ball as you wrap, using enough tension to hold the moss without cutting into it.
- Tie and inspect. Tie the working end securely to the starting tail and trim spare cord. Check for loose moss, uncovered growing mix and cord touching the crown; adjust these before watering.
5. Soak, Drain and Choose a Display Spot
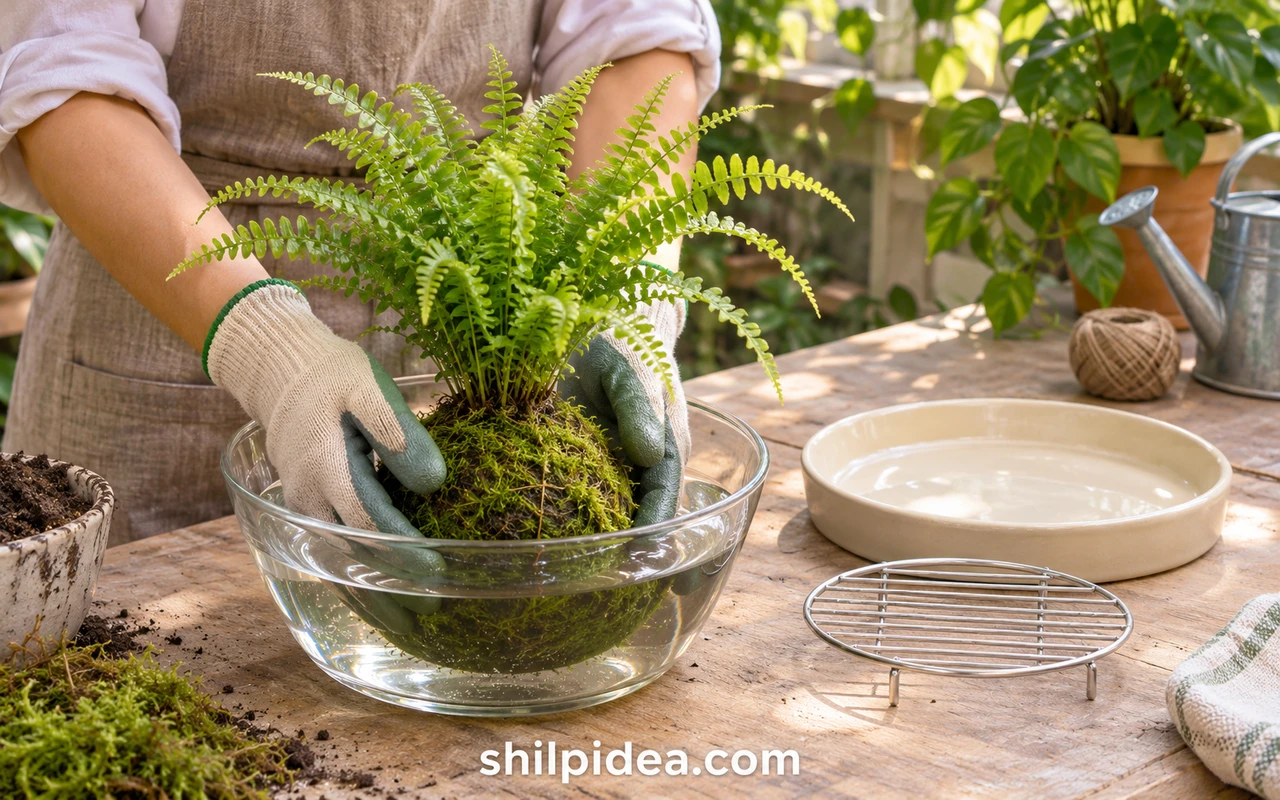
- Soak the moss ball. Hold the fern upright in room-temperature water with the crown above the surface. Let the ball absorb water until it feels evenly heavy and bubbling slows; timing varies with size and dryness.
- Drain before displaying. Lift the ball from below and let it drip on a rack or in a colander. Place it on a waterproof saucer only after runoff has stopped.
- Check moisture often. Choose bright indirect light, away from hot sun and heating vents. For this fern, rewater as the ball becomes noticeably lighter and the mix starts to dry; do not wait for severe wilting.
Keep the Fern and Moss in Balance
Check the ball’s weight and the mix near the crown instead of following a fixed weekly schedule. Misting may freshen the moss surface, but it does not replace watering the root ball. Drain after each soak, inspect the cord regularly and rebuild or pot up the fern when roots outgrow the ball.
Feed only as appropriate for the fern and the fertilizer label. The Illinois Extension care sheet covers moisture checks, feeding and repotting. For a separate container experiment, our bottle planter guide uses a different watering method.
The retained photos below show other makers’ work and alternative plants; succulent displays need their own light, mix and watering choices.
More Kokedama Photos for Display Inspiration
These reference photos from the original article are kept as a separate inspiration section. Compare the wrapping, grouping and presentation rather than applying the fern instructions unchanged to every plant shown.
Succulents from a Workshop Table

Different ball sizes and amounts of wrapping can give a group a more informal, handmade appearance.
A Group of Three Succulent Arrangements

Grouped spheres make a focal point. Check that plants sharing one ball have compatible care needs.
Moss Balls with Contrasting Cord

Visible cord can be part of the design, but it still needs to hold the wrapping securely.
A Rosette Above Pale String

The pale wrapping highlights the rosette shape. Its moisture requirements differ from the fern shown in the guide.
Two Contrasting Succulent Forms

A branching plant and a compact rosette create different silhouettes even with similar wrapping.
Two Sizes Displayed Together

A large and small sphere can be displayed together without making every arrangement the same size.
A Trio with Open Twine Wrapping

Space between the strands keeps the moss or growing material visible and gives the group a lighter appearance.
A Closer Look at the Wrapping

This tighter reference view shows how the crossing strands define the surface of the moss ball.
Give Your Moss Ball a Place That Suits the Plant
Choose the light first, then decide how the kokedama will sit within the room. A shallow dish keeps a first project easy to check and move, while a group needs enough space for foliage and watering. These related planter collections offer other display directions when a moss ball is not the right fit for the plant or location.
- Bamboo Planter Ideas for Home and Garden
- Concrete Planter Designs for Home and Garden
- Concrete Planters with Glass and Copper
- Hanging Planter Ideas for Home and Garden
- Plastic Bottle Planter Ideas for Your Garden
- DIY Cement Planter Ideas for Home Decor
Which display would you like to try—a single fern on a saucer or a small group of moss balls? Share your idea in the comments. If you have already made a kokedama, we would love to hear what worked for you or which part of the guide could be clearer.




















0 Comments