How to Make Felt Storyboard Craft for Kids
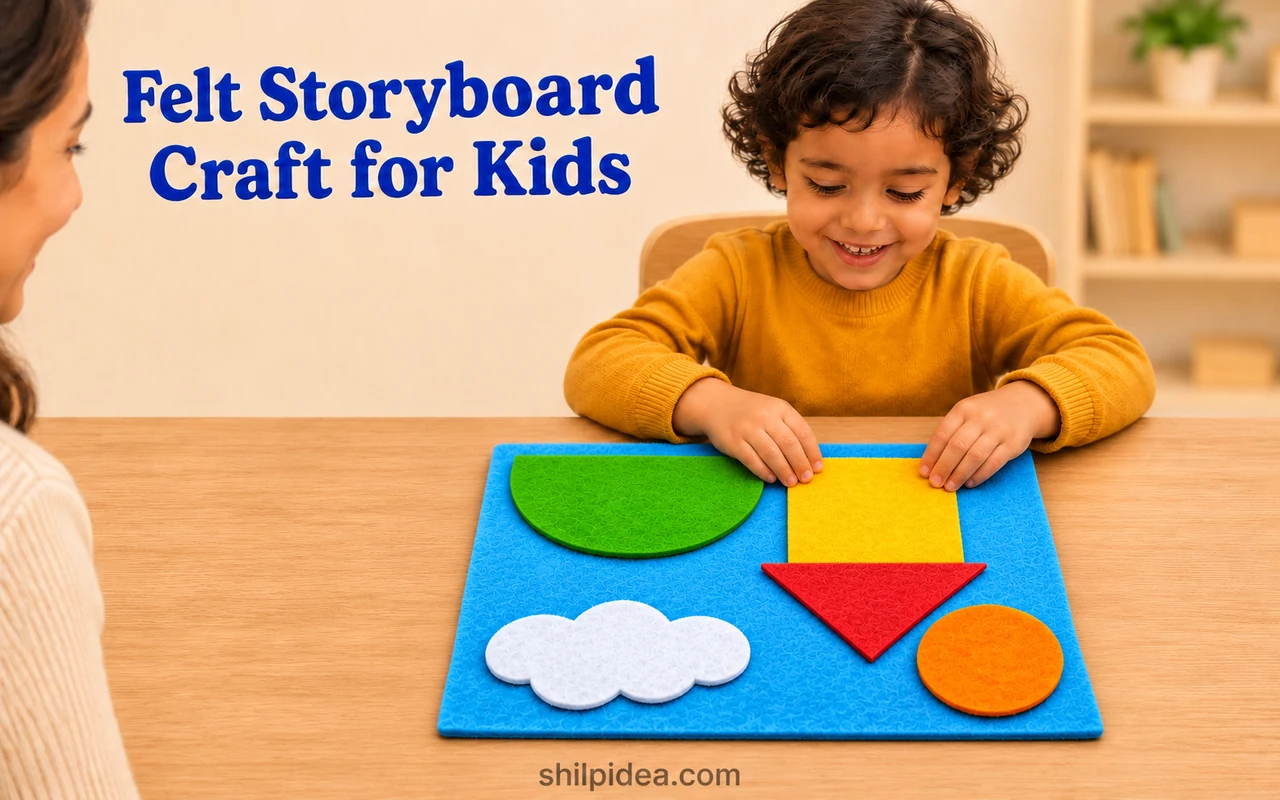
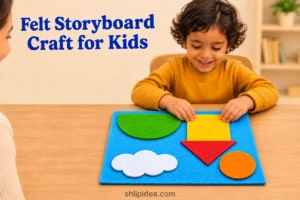
A felt storyboard lets kids build a little world, move the pieces, and decide what happens next. Five colorful shapes become a house, a sunny sky, and the beginning of a story.
Like our felt fruit ideas, this activity leaves room for children to invent their own pretend-play adventures.
An adult prepares the board and cuts the pieces; then your child takes the lead with arranging and storytelling. For another afternoon of making, explore these preschool craft activities using everyday materials.
Materials and Tools
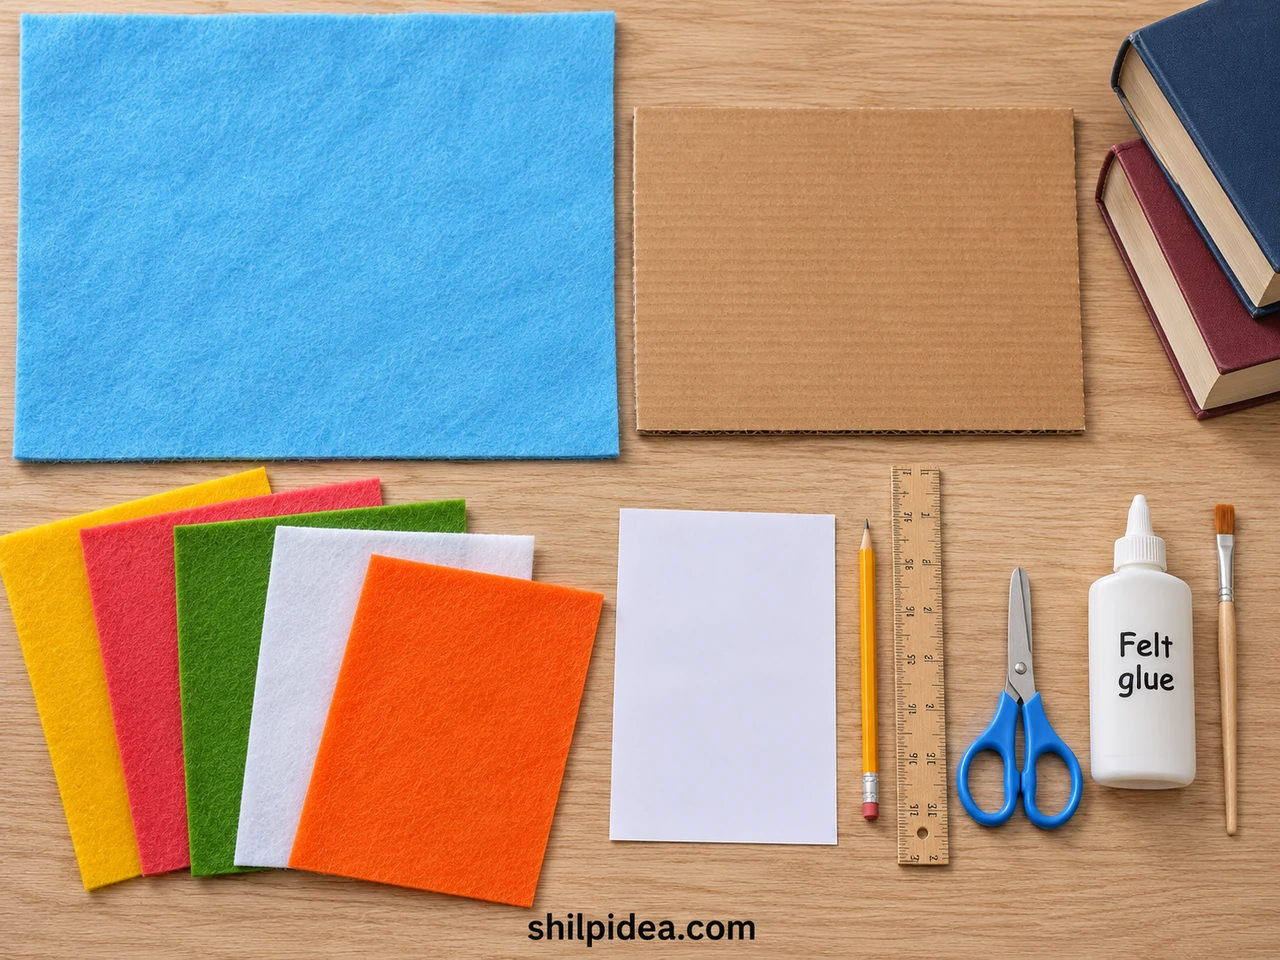
Gather these supplies for one landscape board and five removable shapes.
- Cardboard base – One clean, stiff, uncreased rectangle measuring 16.00 × 12.00 inches; use a precut piece if cutting thick cardboard is difficult.
- Sky-blue background felt – One soft, nonadhesive piece measuring 20.00 × 16.00 inches, leaving a 2.00-inch allowance around the board.
- Colored felt – Soft, nonadhesive sheets in yellow, red, orange, white, and green; each sheet must fit its shape in the cutting list in the adult setup section.
- Felt-compatible craft glue – A water-based adhesive suitable for felt and cardboard; check its label for handling, drying, and material instructions.
- Paper and pencil – Plain paper for full-size templates and a pencil or removable fabric marker for tracing.
- Ruler and scissors – An inch ruler and sharp craft scissors for adult preparation; keep cutting tools away during play.
- Brush, protective paper, and books – A small glue-spreading brush, paper to protect the table, and books to hold the wrapped edges flat while drying.
Choose flexible felt with a fuzzy surface rather than slick, stiffened, glitter-coated, or adhesive-backed sheets. Test a colored scrap against the blue felt before cutting everything. This is a proposed home craft layout; the illustrations do not establish that this particular board has been physically tested.
Precautions Before You Begin
An adult should prepare the board and supervise its use.
- Keep scissors, glue, paper templates, and offcuts out of the play area.
- Use large single-piece shapes without beads, magnets, buttons, googly eyes, staples, or loose hook-and-loop dots.
- Do not offer this homemade set to children who mouth materials; soft felt can fold, so a large flat shape is not a choking-safety guarantee.
- Let adhesive dry completely before handling or play, and inspect the wrapped edges for lifting.
- Use the board flat on a table or floor; do not add a hanging cord or leave it in a crib.
The CPSC toy safety guidance recommends keeping small parts away from children under 3. This homemade activity has not been certified as a toy.
1. Prepare the Board — Adult Setup
Complete this preparation before inviting your child to play. Children can choose their felt colors while you gather supplies; an adult handles cutting, glue, and drying checks.
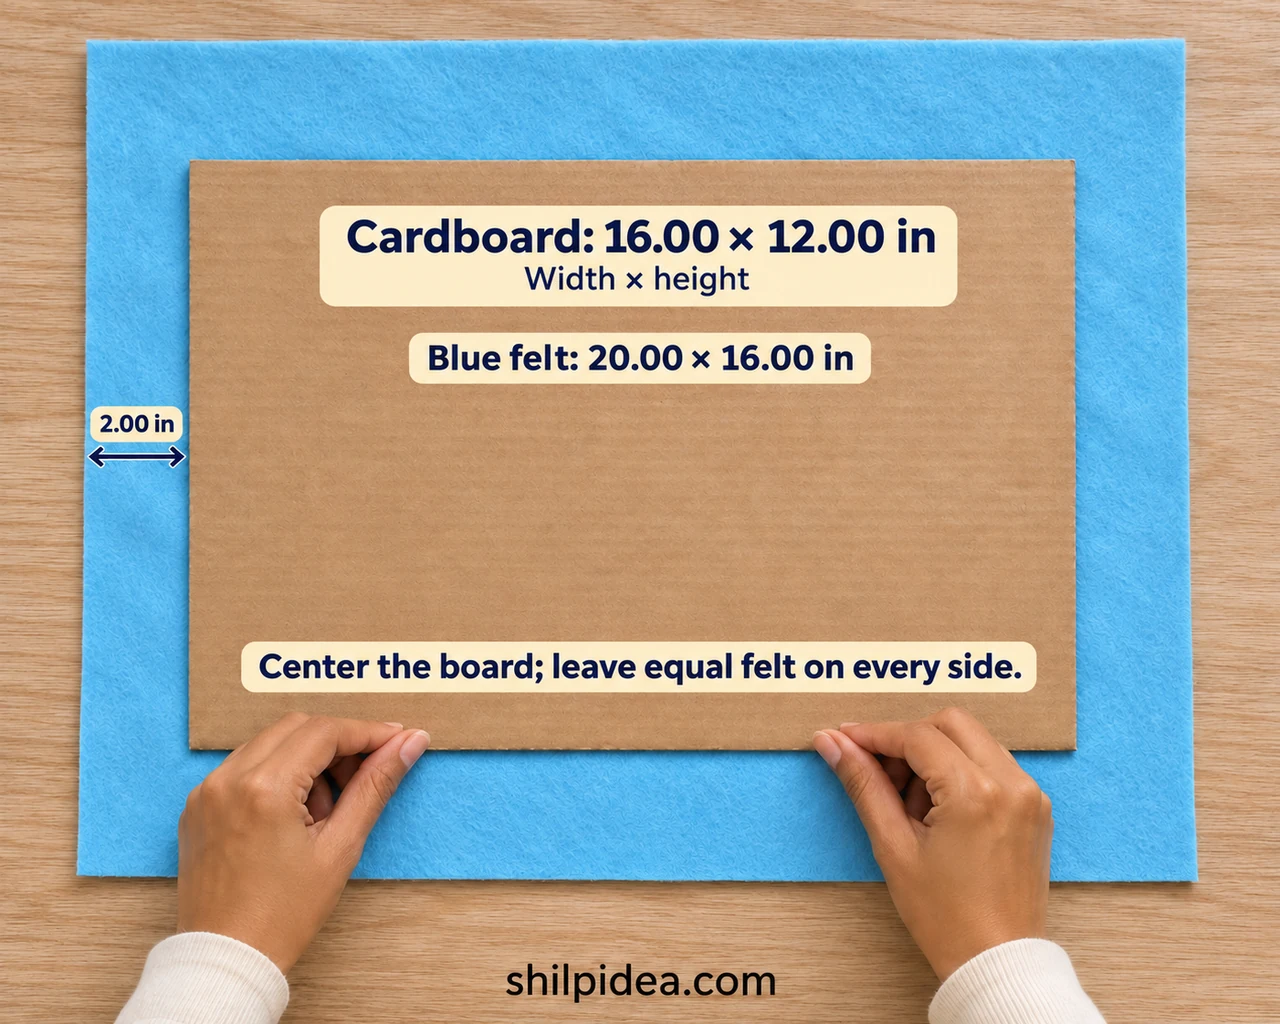
- Center the backing – Cut a stiff cardboard rectangle to 16.00 × 12.00 inches and blue felt to 20.00 × 16.00 inches. Lay the felt face down and center the cardboard, leaving a 2.00-inch wrap allowance on every side.
Wrap and secure the back
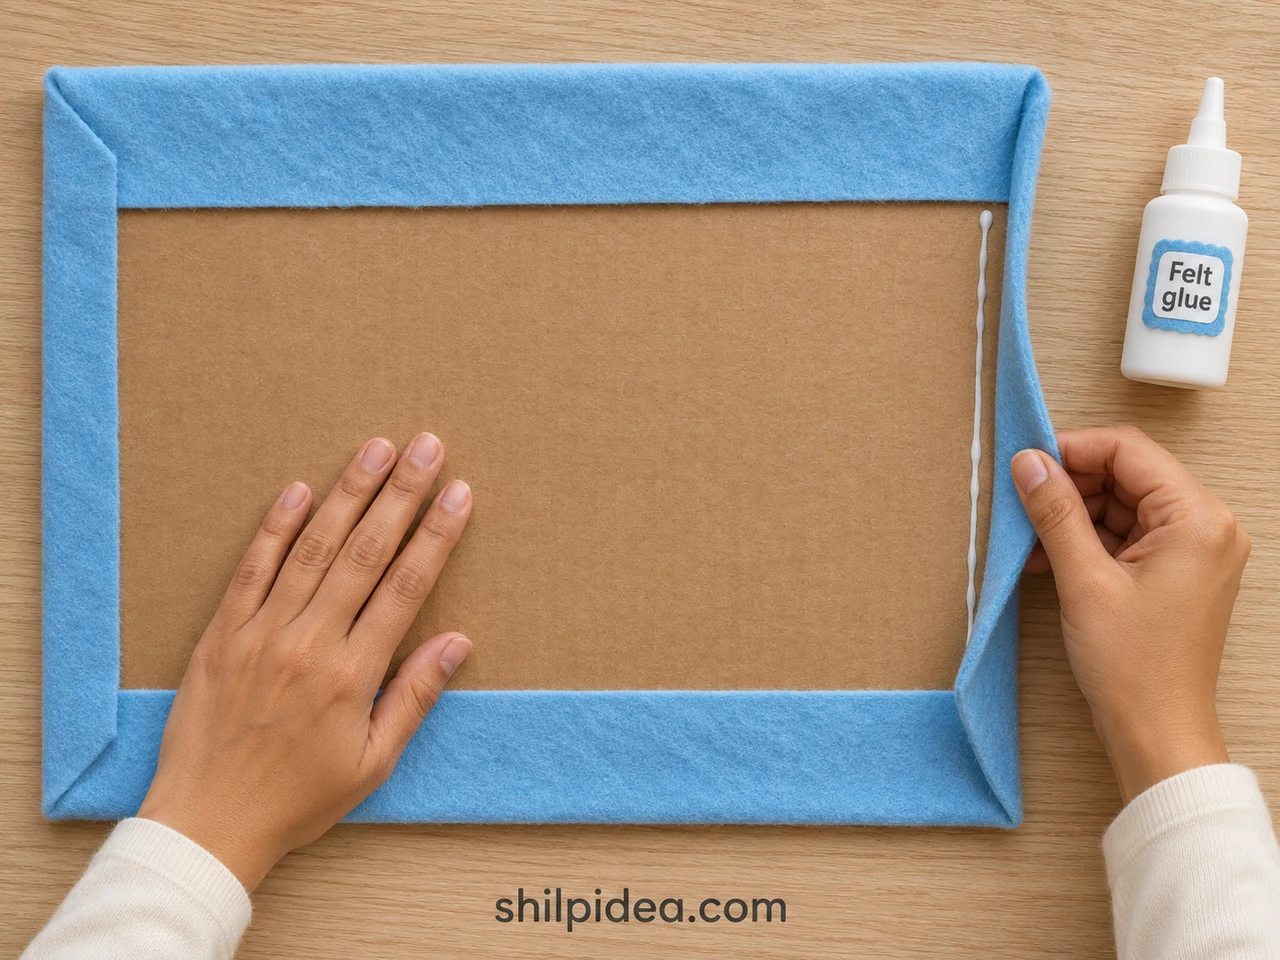
- Glue the folded edges – Fold and glue the long felt edges onto the cardboard back. Tuck the excess at each corner inward, then glue the short flaps down. Smooth the front without stretching, protect the glued edges, and weight them gently while drying.
- Wait and check – Follow your adhesive’s drying instructions. Once completely dry, inspect for loose flaps, hard glue spots, and exposed cardboard edges. Repair any lifting and dry again. Keep the front free of glue so shapes can be repositioned.
Cut five large play pieces
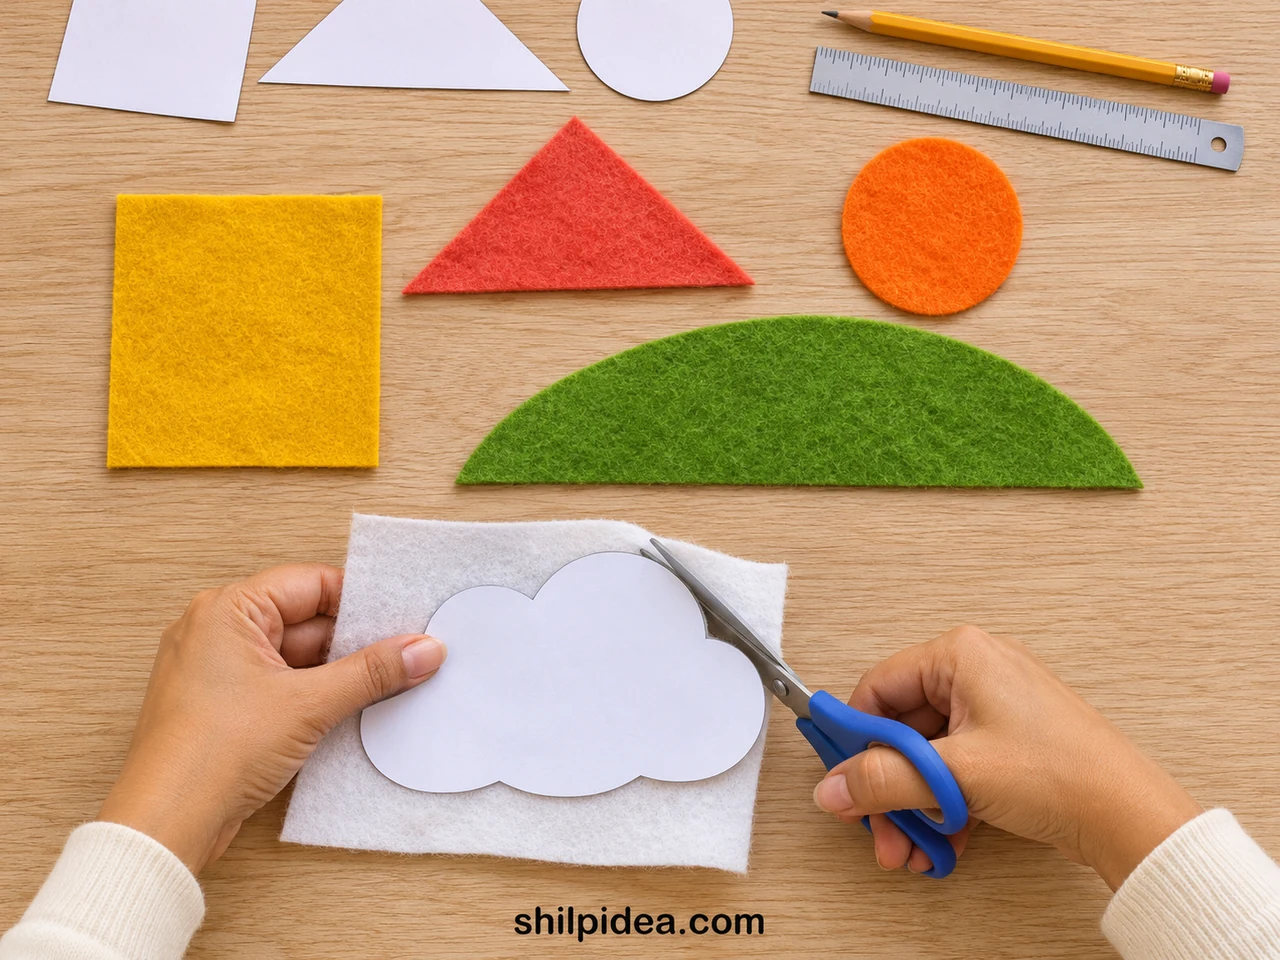
Use these suggested sizes, written as width × height in inches unless a diameter is given.
- Yellow house: 4.00 × 4.00-inch square.
- Red roof: 5.00 × 3.00-inch triangle.
- Orange sun: 3.00-inch-diameter circle.
- White cloud: broad curves inside a 5.00 × 3.00-inch rectangle.
- Green hill: a low rounded top inside an 8.00 × 3.00-inch rectangle, with a flat bottom.
- Make and cut templates – Draw paper templates and trace them onto the felt backs. For the roof, join the midpoint of a 5.00 × 3.00-inch rectangle’s top edge to both bottom corners. Cut smooth, single-piece shapes without tiny attached decorations.
- Test and clear the table – Press a felt piece onto the dry blue surface, then lift and replace it. Try the other felt face or a softer sheet if it slides. Put away all scissors, glue, templates, and scraps before your child begins.
Soft, fuzzy felt works better than slick or stiffened sheets. The Smithsonian’s felt board activity describes the reusable felt surface. Actual grip varies with your materials, so keep this board flat for play. The dimensions are a suggested layout, not a toy-safety standard.
2. Let Your Child Choose the Shapes
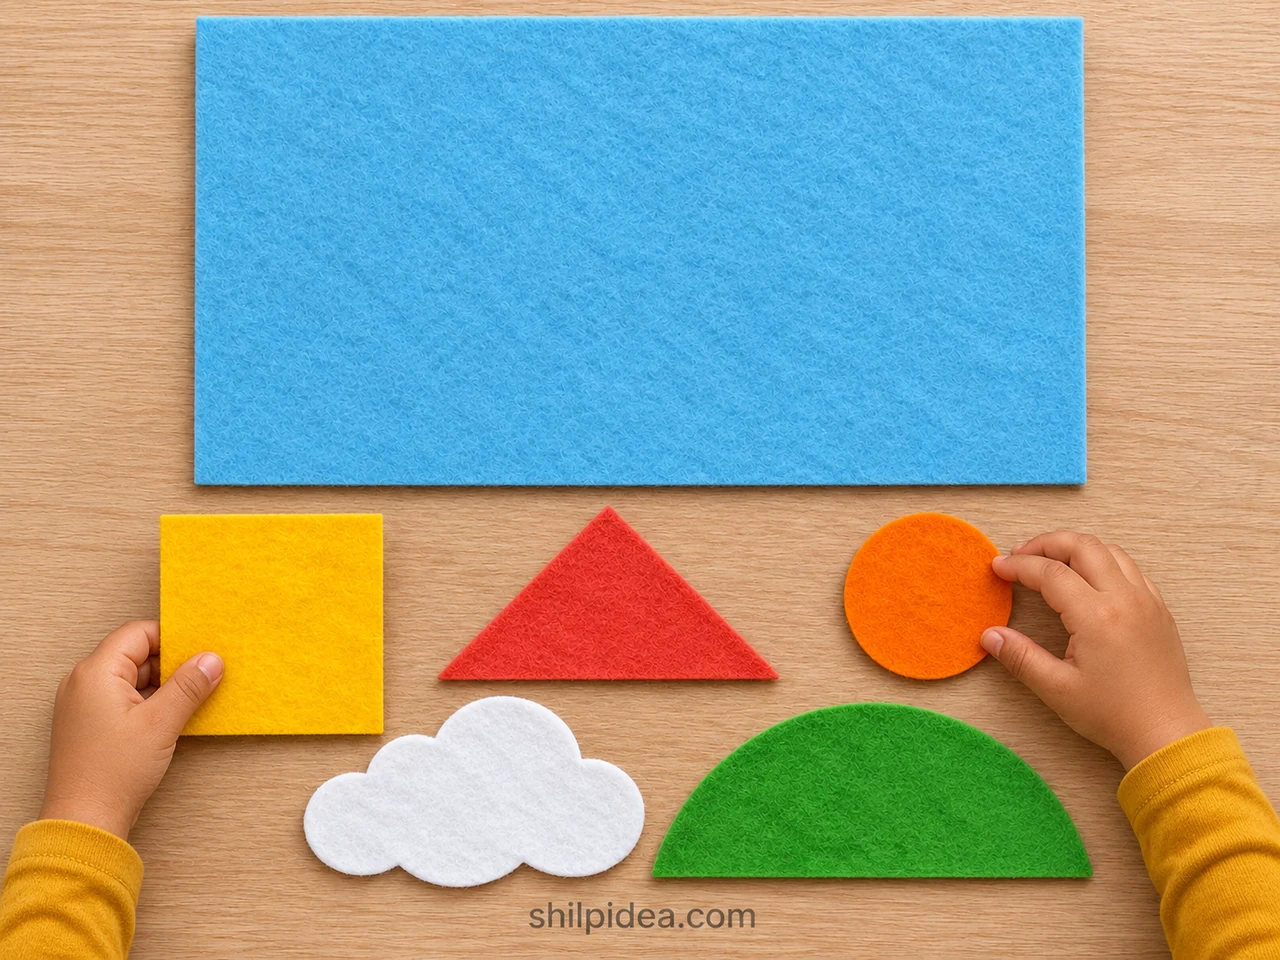
- Offer the five pieces – Set the empty board within easy reach and spread the precut shapes beside it. Invite your child to choose a piece to explore first. There is no required color order.
- Try lifting and replacing – Show one gentle press, then let your child put a shape down, lift it, and try another spot. Ask, “Which one would you like next?” Give them time to answer by pointing, moving, or speaking.
Let your child notice the fuzzy texture, bright colors, and different edges. You can name a shape as they pick it up, but there is no need to quiz them. If five choices feel overwhelming, start with the square and triangle and bring out the other pieces later.
3. Build a Little Felt House
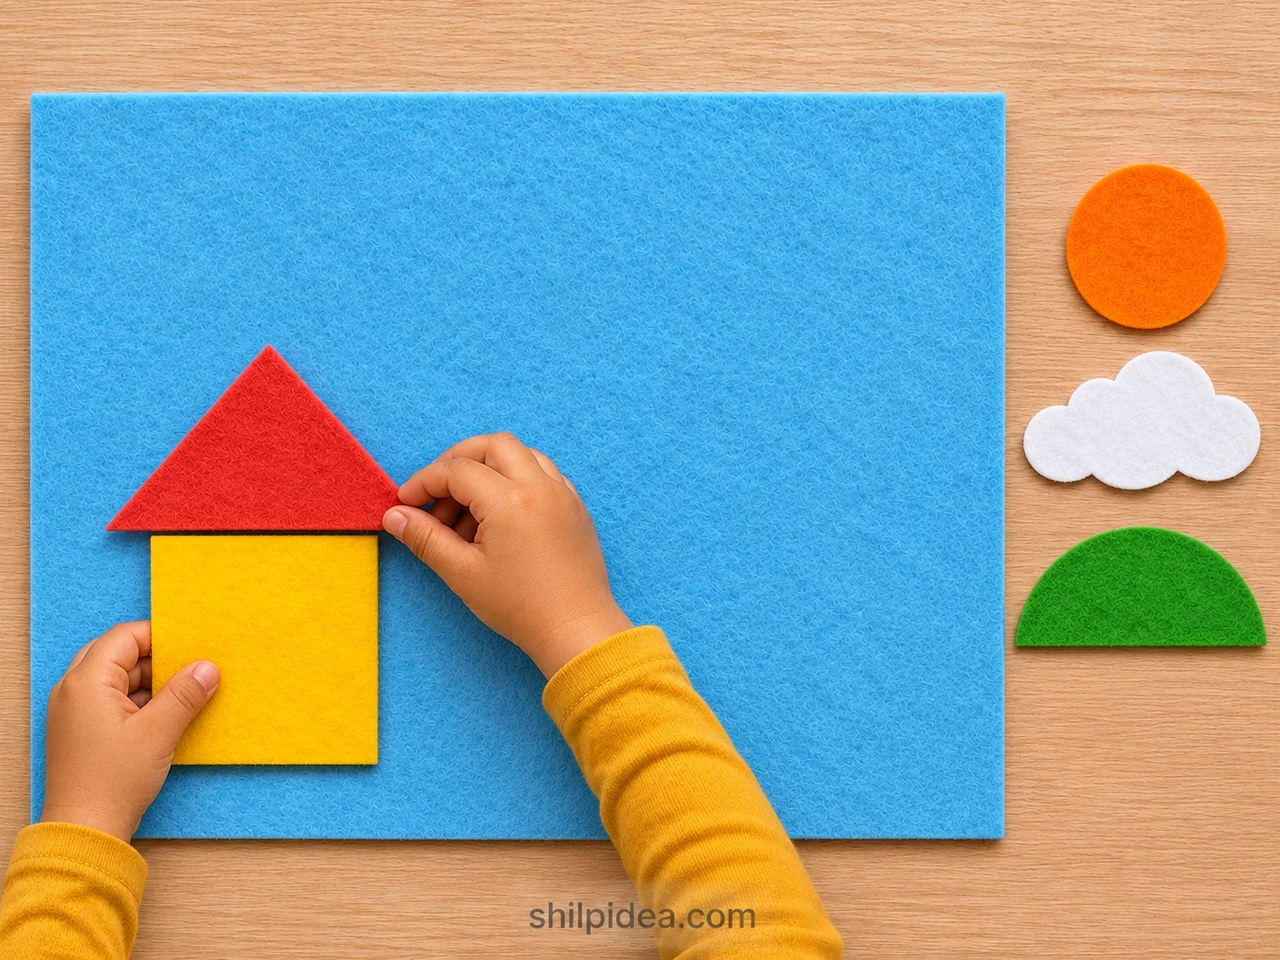
- Choose a place for the house – Invite your child to put the yellow square on the lower part of the board. Ask, “Where could your house go?” A different position from the picture is welcome.
- Add the roof – Offer the red triangle and ask what it could become. If your child wants a house, place its flat edge just above the square. Let them lift, turn, and adjust the pieces themselves.
A square and triangle can suggest a house without adding small windows or doors. Your child may call the triangle a mountain instead, and that can become the story. If help is needed, point to a possible spot or demonstrate beside the board rather than completing the whole scene for them.
4. Add Sunshine, a Cloud, and a Hill
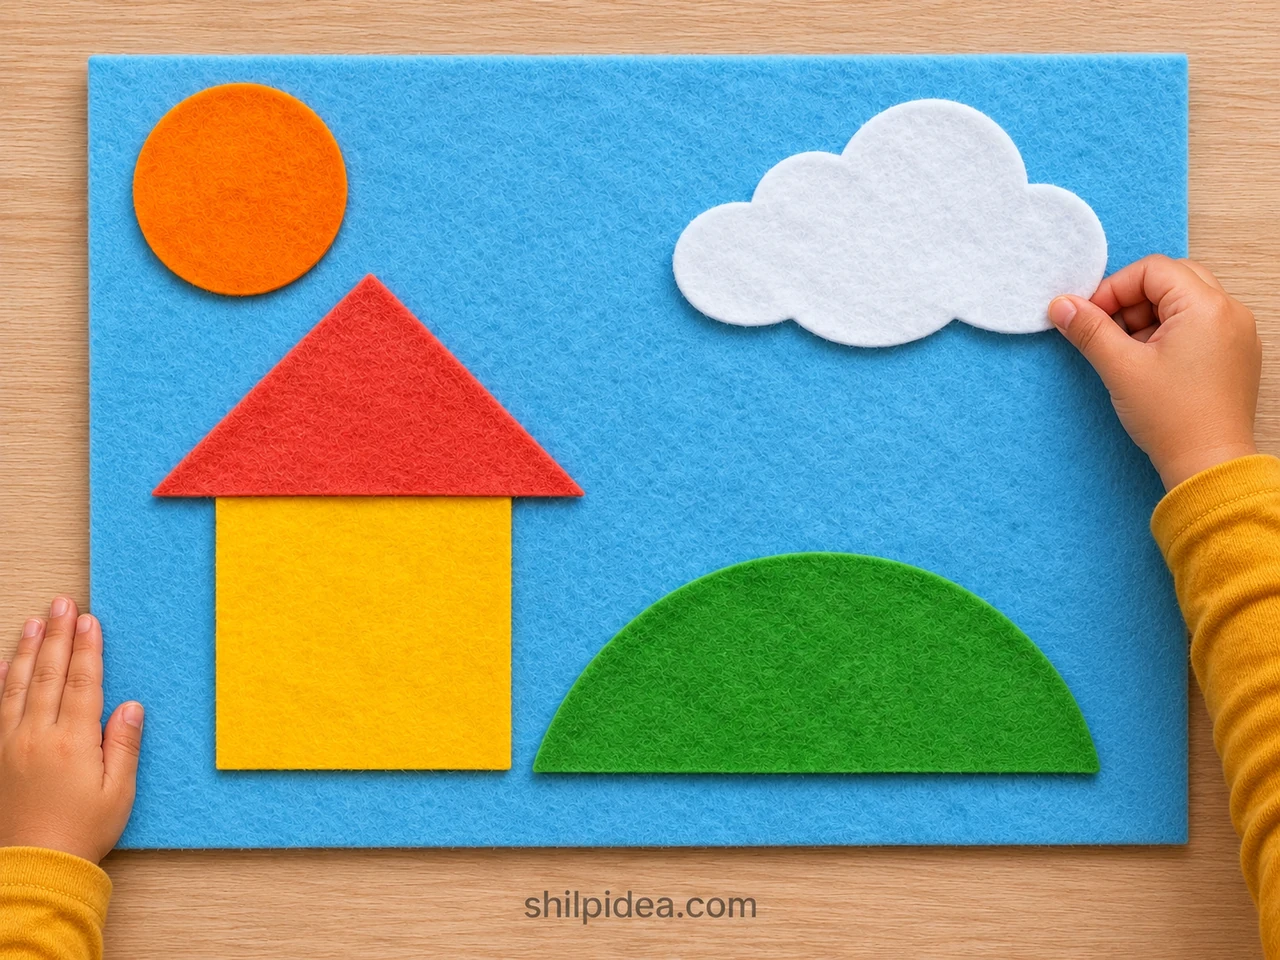
- Make the outdoor setting – Offer the green hill and orange circle. Your child can put the hill near the house and choose a place for the sun. Ask, “Is the sun high in the sky or near the hill?”
- Place the cloud – Let your child add the white cloud wherever the story needs it. Keep most of each piece touching the blue background rather than stacking several felt layers. Leave the pieces loose so they can move again.
Talk about above, below, beside, and near while following your child’s choices. A cloud beside the sun can suggest a sunny day; a cloud moving closer can suggest changing weather. These are conversation starters, not a test. You can also describe what you see and let your child decide whether to add a story.
5. Move a Piece and Tell a Story
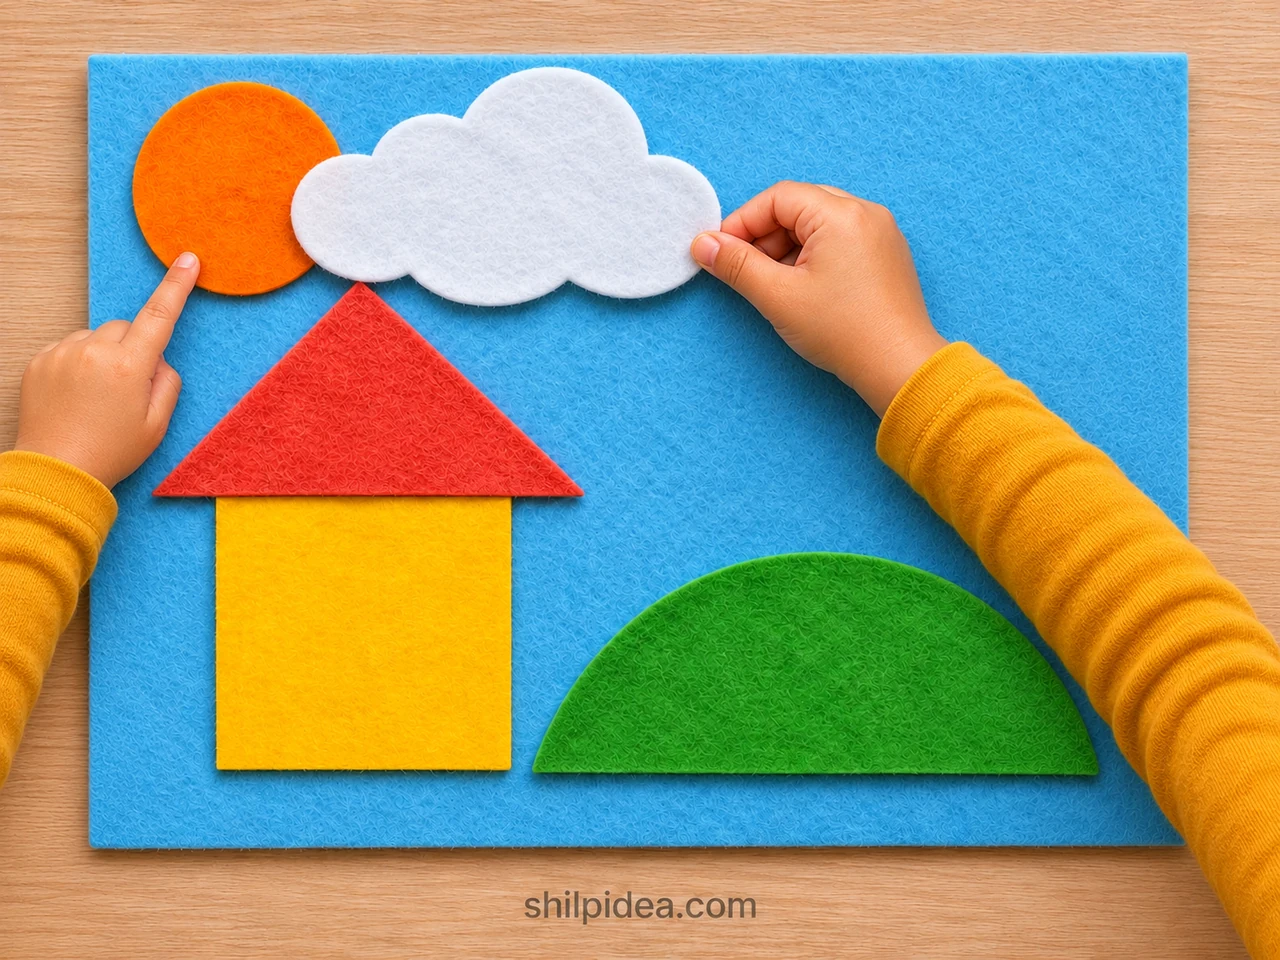
- Start with one sentence – Try, “One morning, someone looked out of this house.” Then pause. Ask your child who lives there or what they can see. A single word, gesture, or sound can be enough to continue.
- Let something change – Invite your child to move the cloud toward the sun or shift the hill to another place. Ask, “What happens now?” Follow their idea rather than steering every story toward the same ending.
- Reset for another adventure – When the story finishes, let your child lift off the shapes and choose a new arrangement. Count the five pieces together before putting them away. An adult checks the board and collects the set after play.
Your child does not need to produce a complete story. Moving the sun while saying “night,” pointing to a cloud, or inventing a silly sound all give you something to respond to. Take turns adding one idea, or let your child direct the whole scene while you listen.
Easy Prompts for Another Round
- A windy day: “Where will the cloud travel next?”
- A new neighbor: “Who might visit the little house?”
- A moving sun: “What changes when the sun goes over here?”
- A different picture: “Could these shapes become something else?”
Repeat a favorite story as often as your child likes. For a later pretend-play theme, our felt vegetable shapes offer another direction. Keep any new pieces large and simple, and check their suitability before introducing them.
When Play Does Not Go as Planned
- Pieces slide: Keep the board flat, remove loose lint, and try the other felt face. An adult should replace a poor-gripping sheet instead of adding small detachable fasteners.
- Your child only sorts: Sorting colors or moving one piece repeatedly can be the activity. Offer a story later rather than insisting on a finished house.
- The scene feels crowded: Remove a few pieces and let your child choose which ones return.
- A piece tears or a back flap lifts: Stop using the set until an adult replaces the piece or repairs and fully dries the join.
Put the Story Away Together
Invite your child to find all five shapes while you check their edges. Store them together in a box kept by an adult, with the board flat in a dry place. Do not soak the cardboard or assume the glue is washable. Before the next session, check for loose edges and damage, then offer the pieces on a clear table with supervision.
More Easy Crafts for Kids
If your child enjoyed choosing colors and changing the scene, try another activity with room for their own decisions. Felt pretend food, recycled materials, and simple animal shapes can all start a new conversation. Pick a project that fits your child’s interests and abilities, prepare the tricky parts yourself, and leave space for them to decide what their creation becomes.
- Felt Fruit Ideas for Pretend Play
- Felt Vegetables for Creative Play
- Recycled Crafts for Preschool Activity Time
- Egg Carton Crafts for Kids
- Paper Plate Animals to Make Together
What story did your child invent with the house, sun, and cloud? Share their favorite scene or a playful prompt that worked for your family in the comments.
















0 Comments