18 Outdoor Mud Kitchen Ideas for Creative Kids’ Play
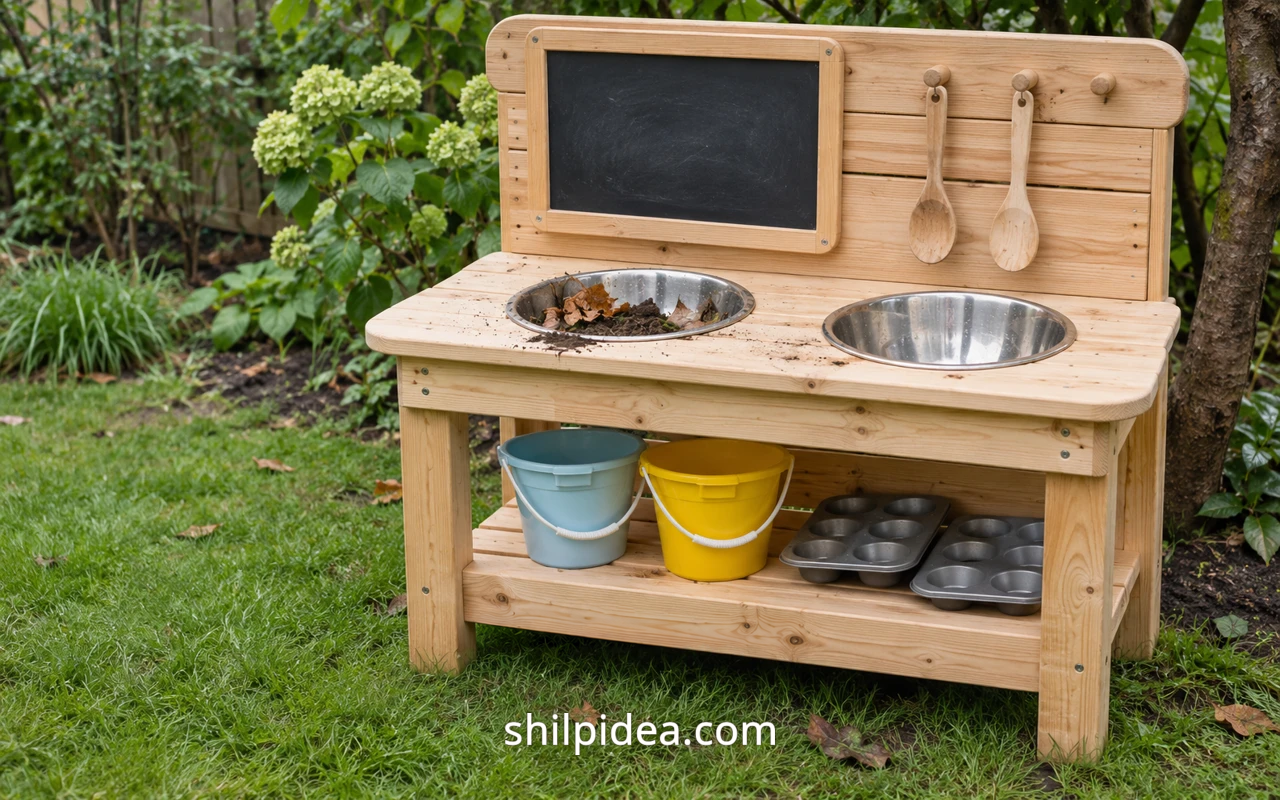
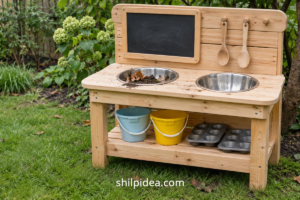
An outdoor mud kitchen gives children a place to scoop, stir and invent their own pretend meals. Start with a stable work surface, a few washable containers and room for the children who will use it.
These backyard play ideas help you plan the kitchen’s position without losing the garden’s paths and open space.
The 18 examples below combine complete kitchens with useful additions. Pair a shared worktable with these painted stone projects when older children want another supervised outdoor activity.
1. Give Nature Ingredients Their Own Shelf
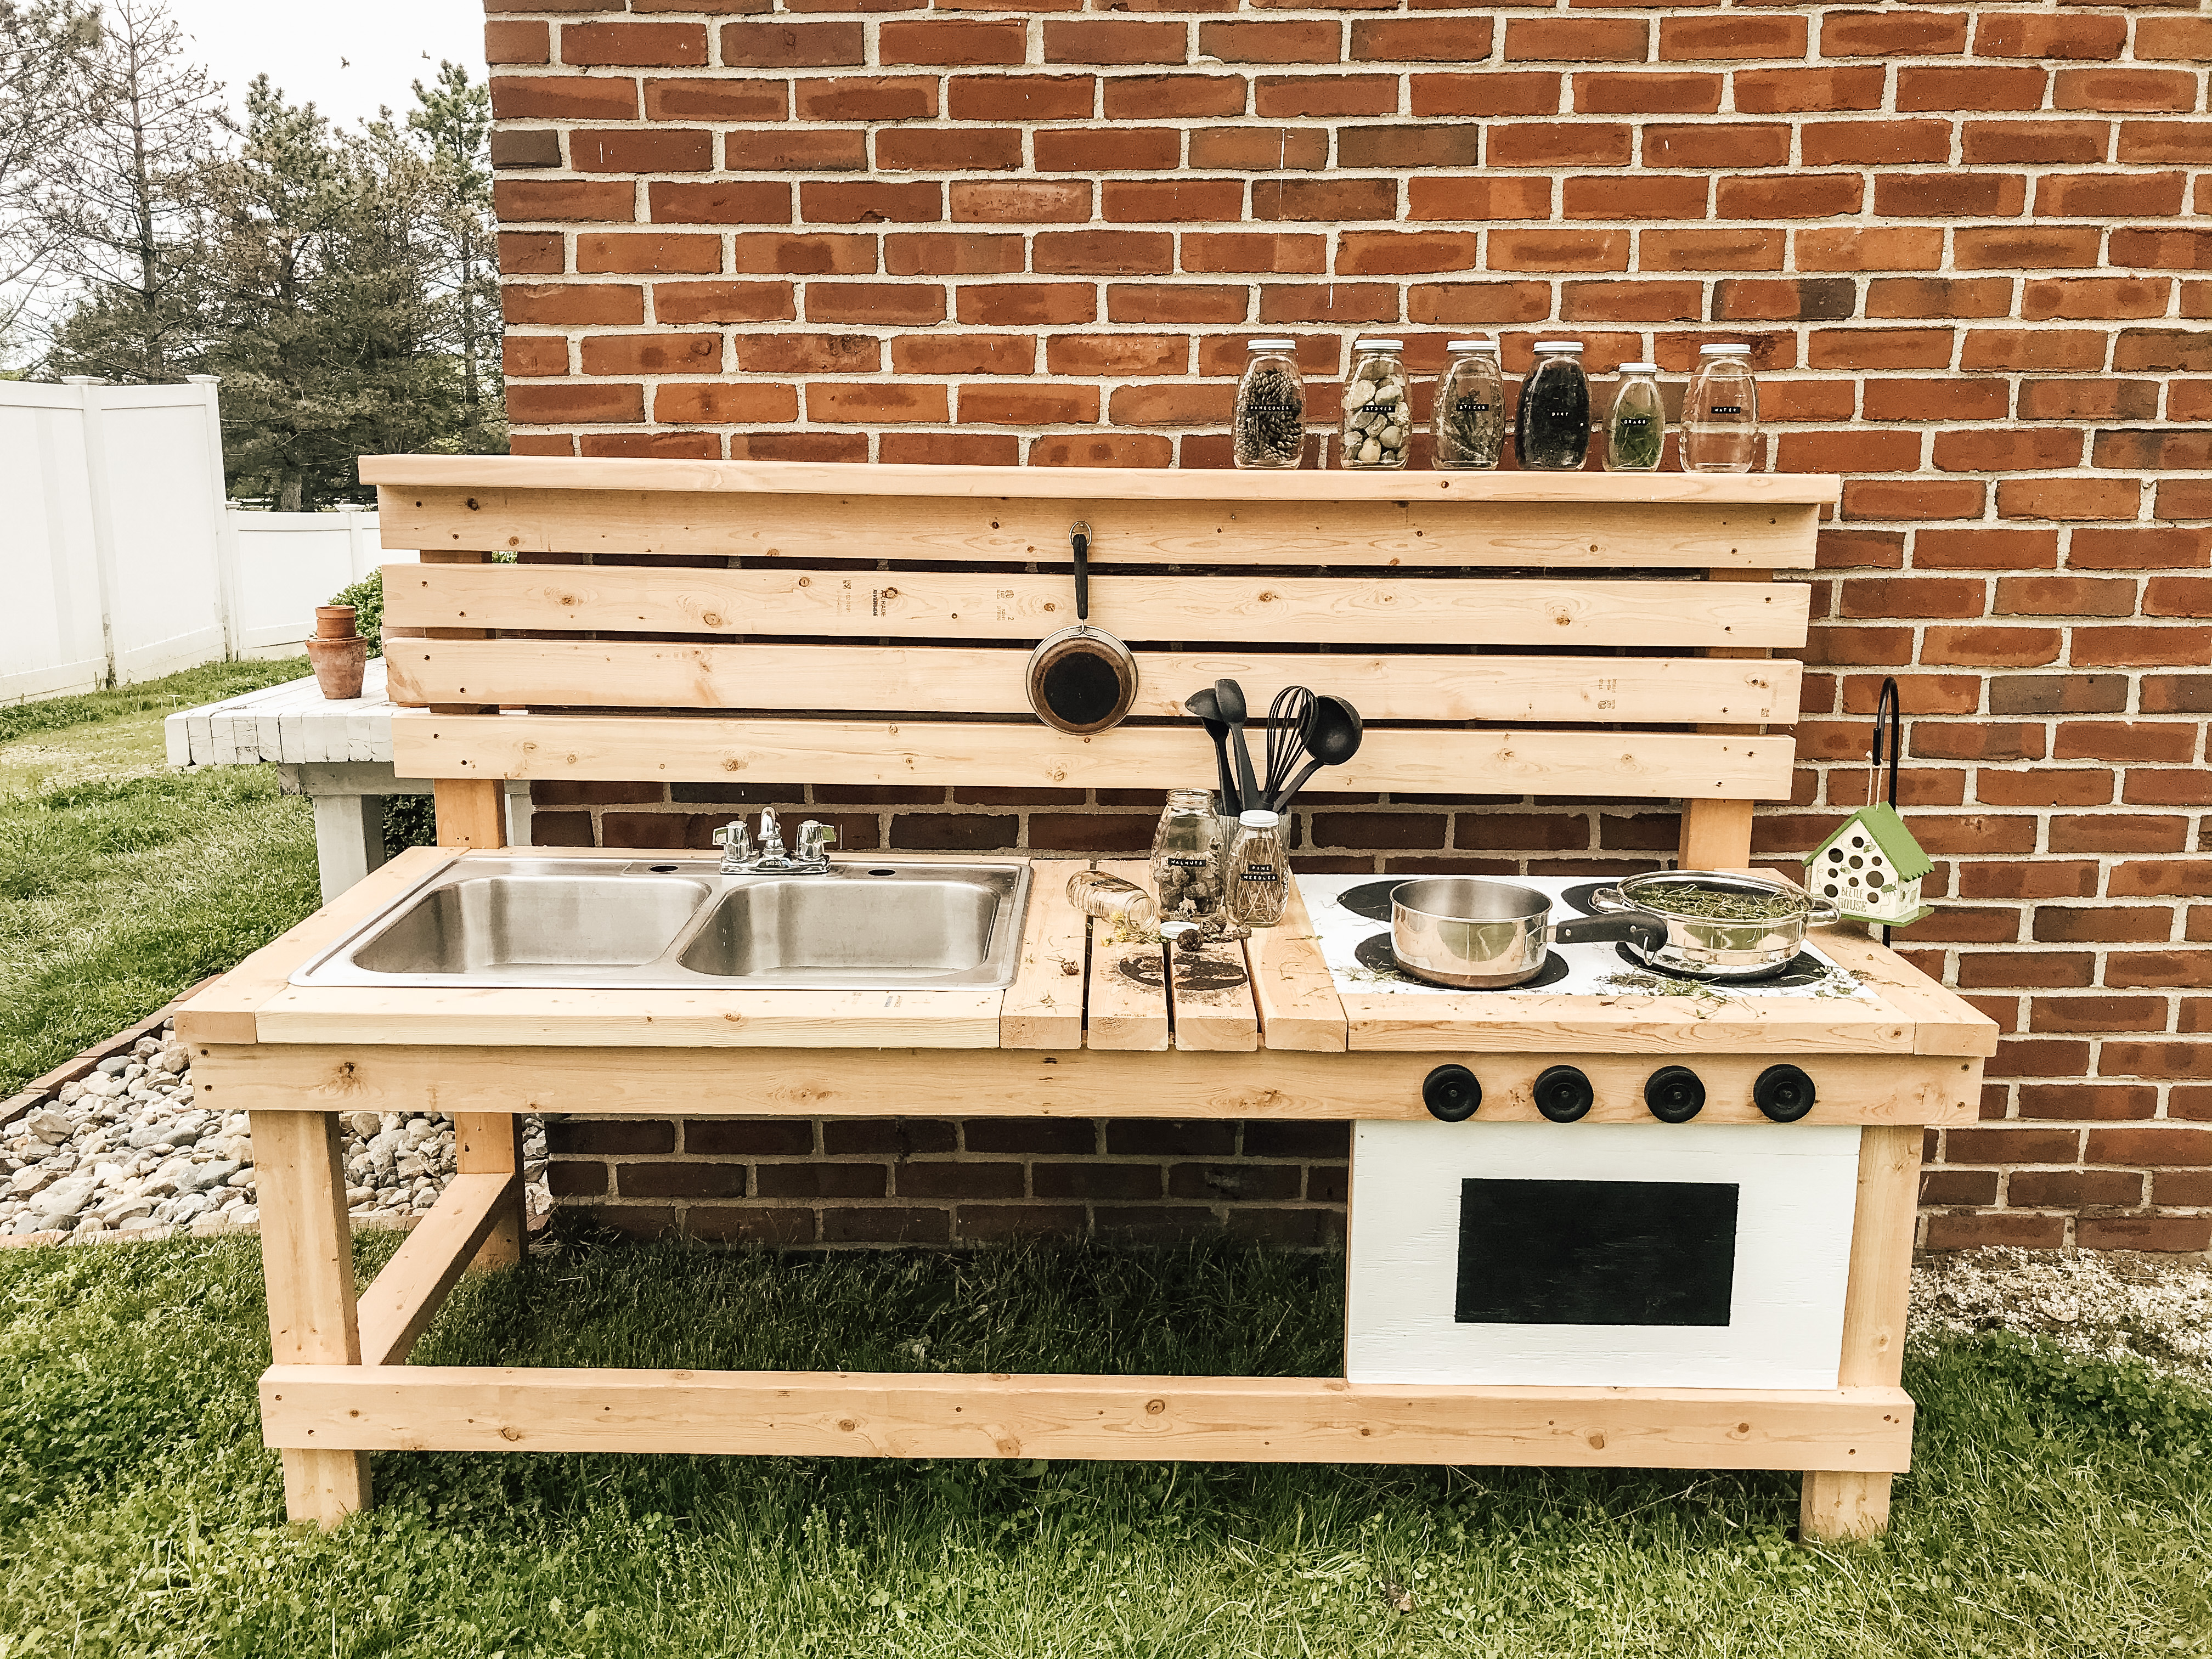
A narrow shelf gives collected play ingredients a home above the mixing area. This Old Brick House groups containers along the top of a long kitchen, with cooking tools hanging below. Borrow the clear organization, using sturdy plastic tubs instead of the glass jars shown. Choose leaves and other age-appropriate materials with an adult, and keep the highest shelf for supplies that children can request rather than climb to reach.
2. Catch Sink Water in Removable Buckets
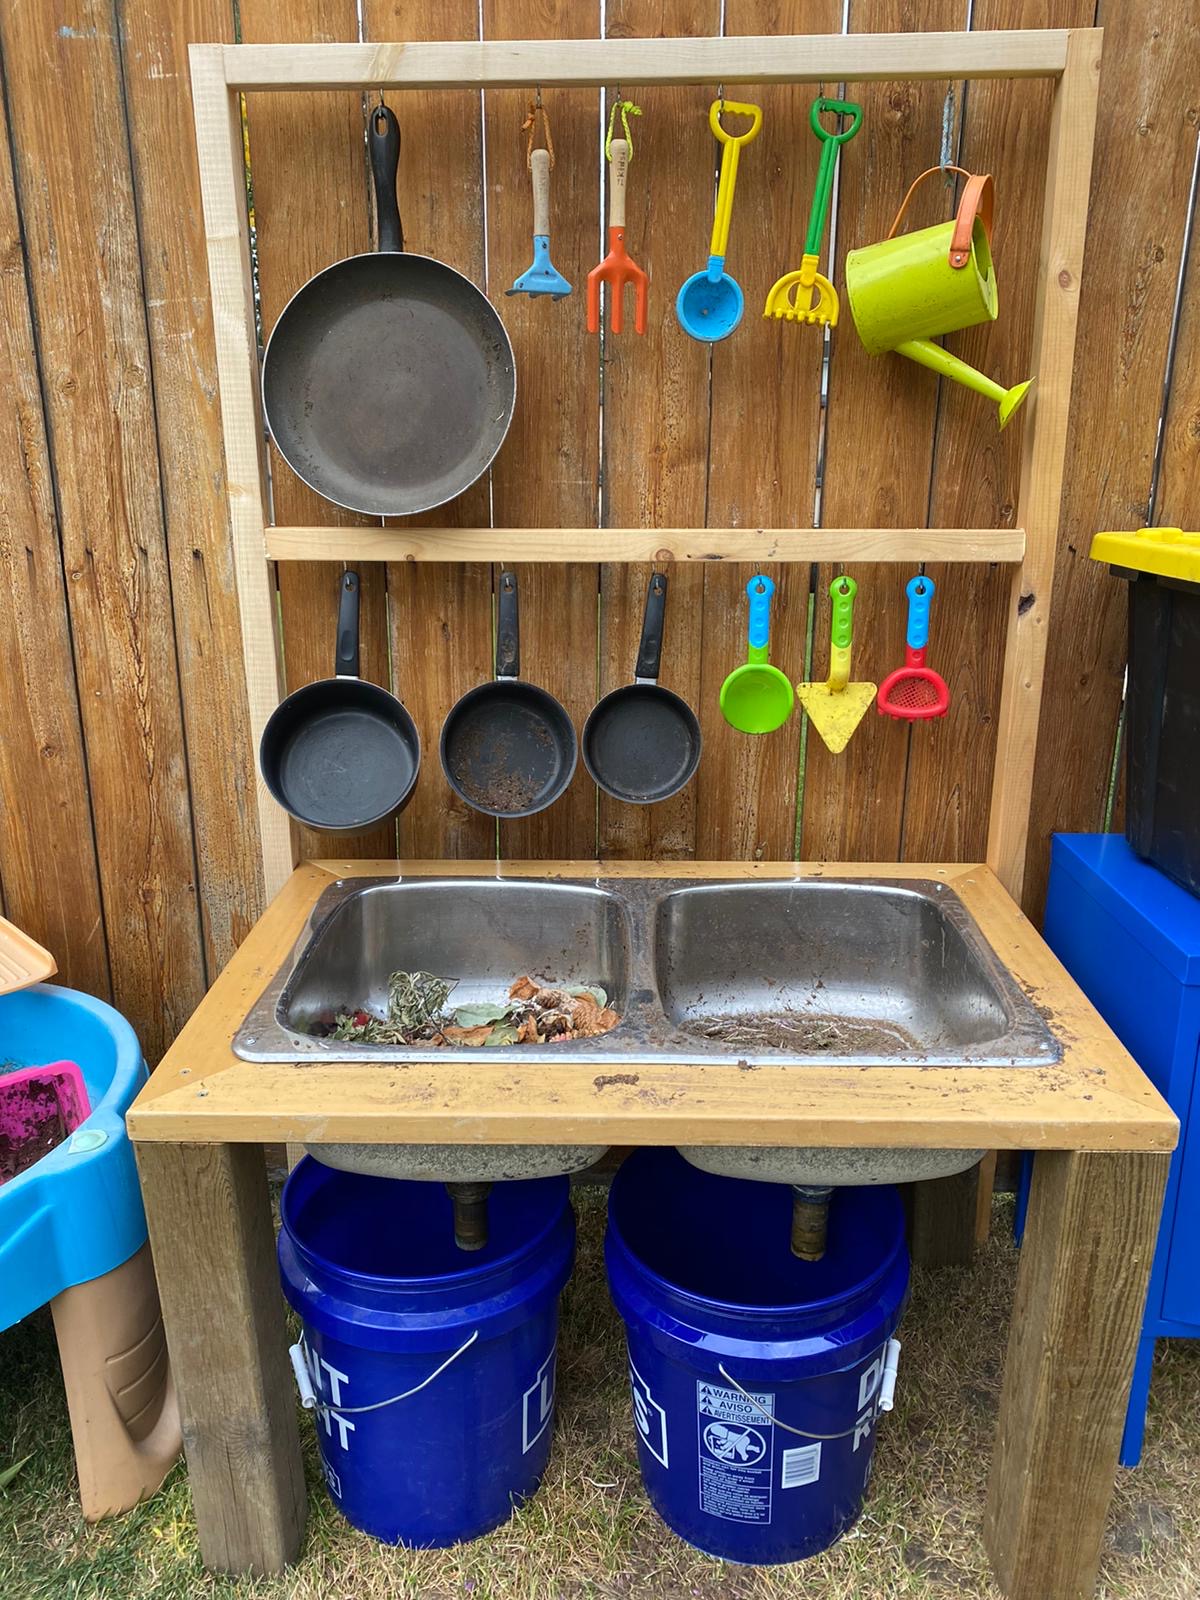
Removable buckets below a sink make it easier to see where the water goes. Creative Seeds places two blue buckets beneath a double basin, with utensils on the backboard. Keep the catch containers accessible to an adult and empty them after play. Use small amounts of water rather than filling a large reservoir, and check the work surface remains steady when children lean against the edge to stir.
3. Separate Mixing and Serving Stations

Two separate work surfaces give children more room to mix, arrange and serve their pretend meals. Homeschool Glue uses adjoining benches with colorful storage tubs and a lattice backdrop, keeping the layout open rather than enclosed. Plan the route between the stations so children do not need to squeeze past one another. These small backyard play ideas help you place the kitchen within the rest of the garden.
4. Give a Garden Kitchen a Cafe Counter

A cafe-style counter makes the kitchen feel like a little destination in the garden. Townsend River Walk & Arboretum combines a broad worktop, pretend cooker and chalkboard signs in its discovery area. Borrow the playful menu idea while adapting the height to your children. Use a reachable counter rather than relying on loose boxes to stand on, and replace glass display vessels with sturdy play containers at home.
5. Leave Room for Two Little Cooks
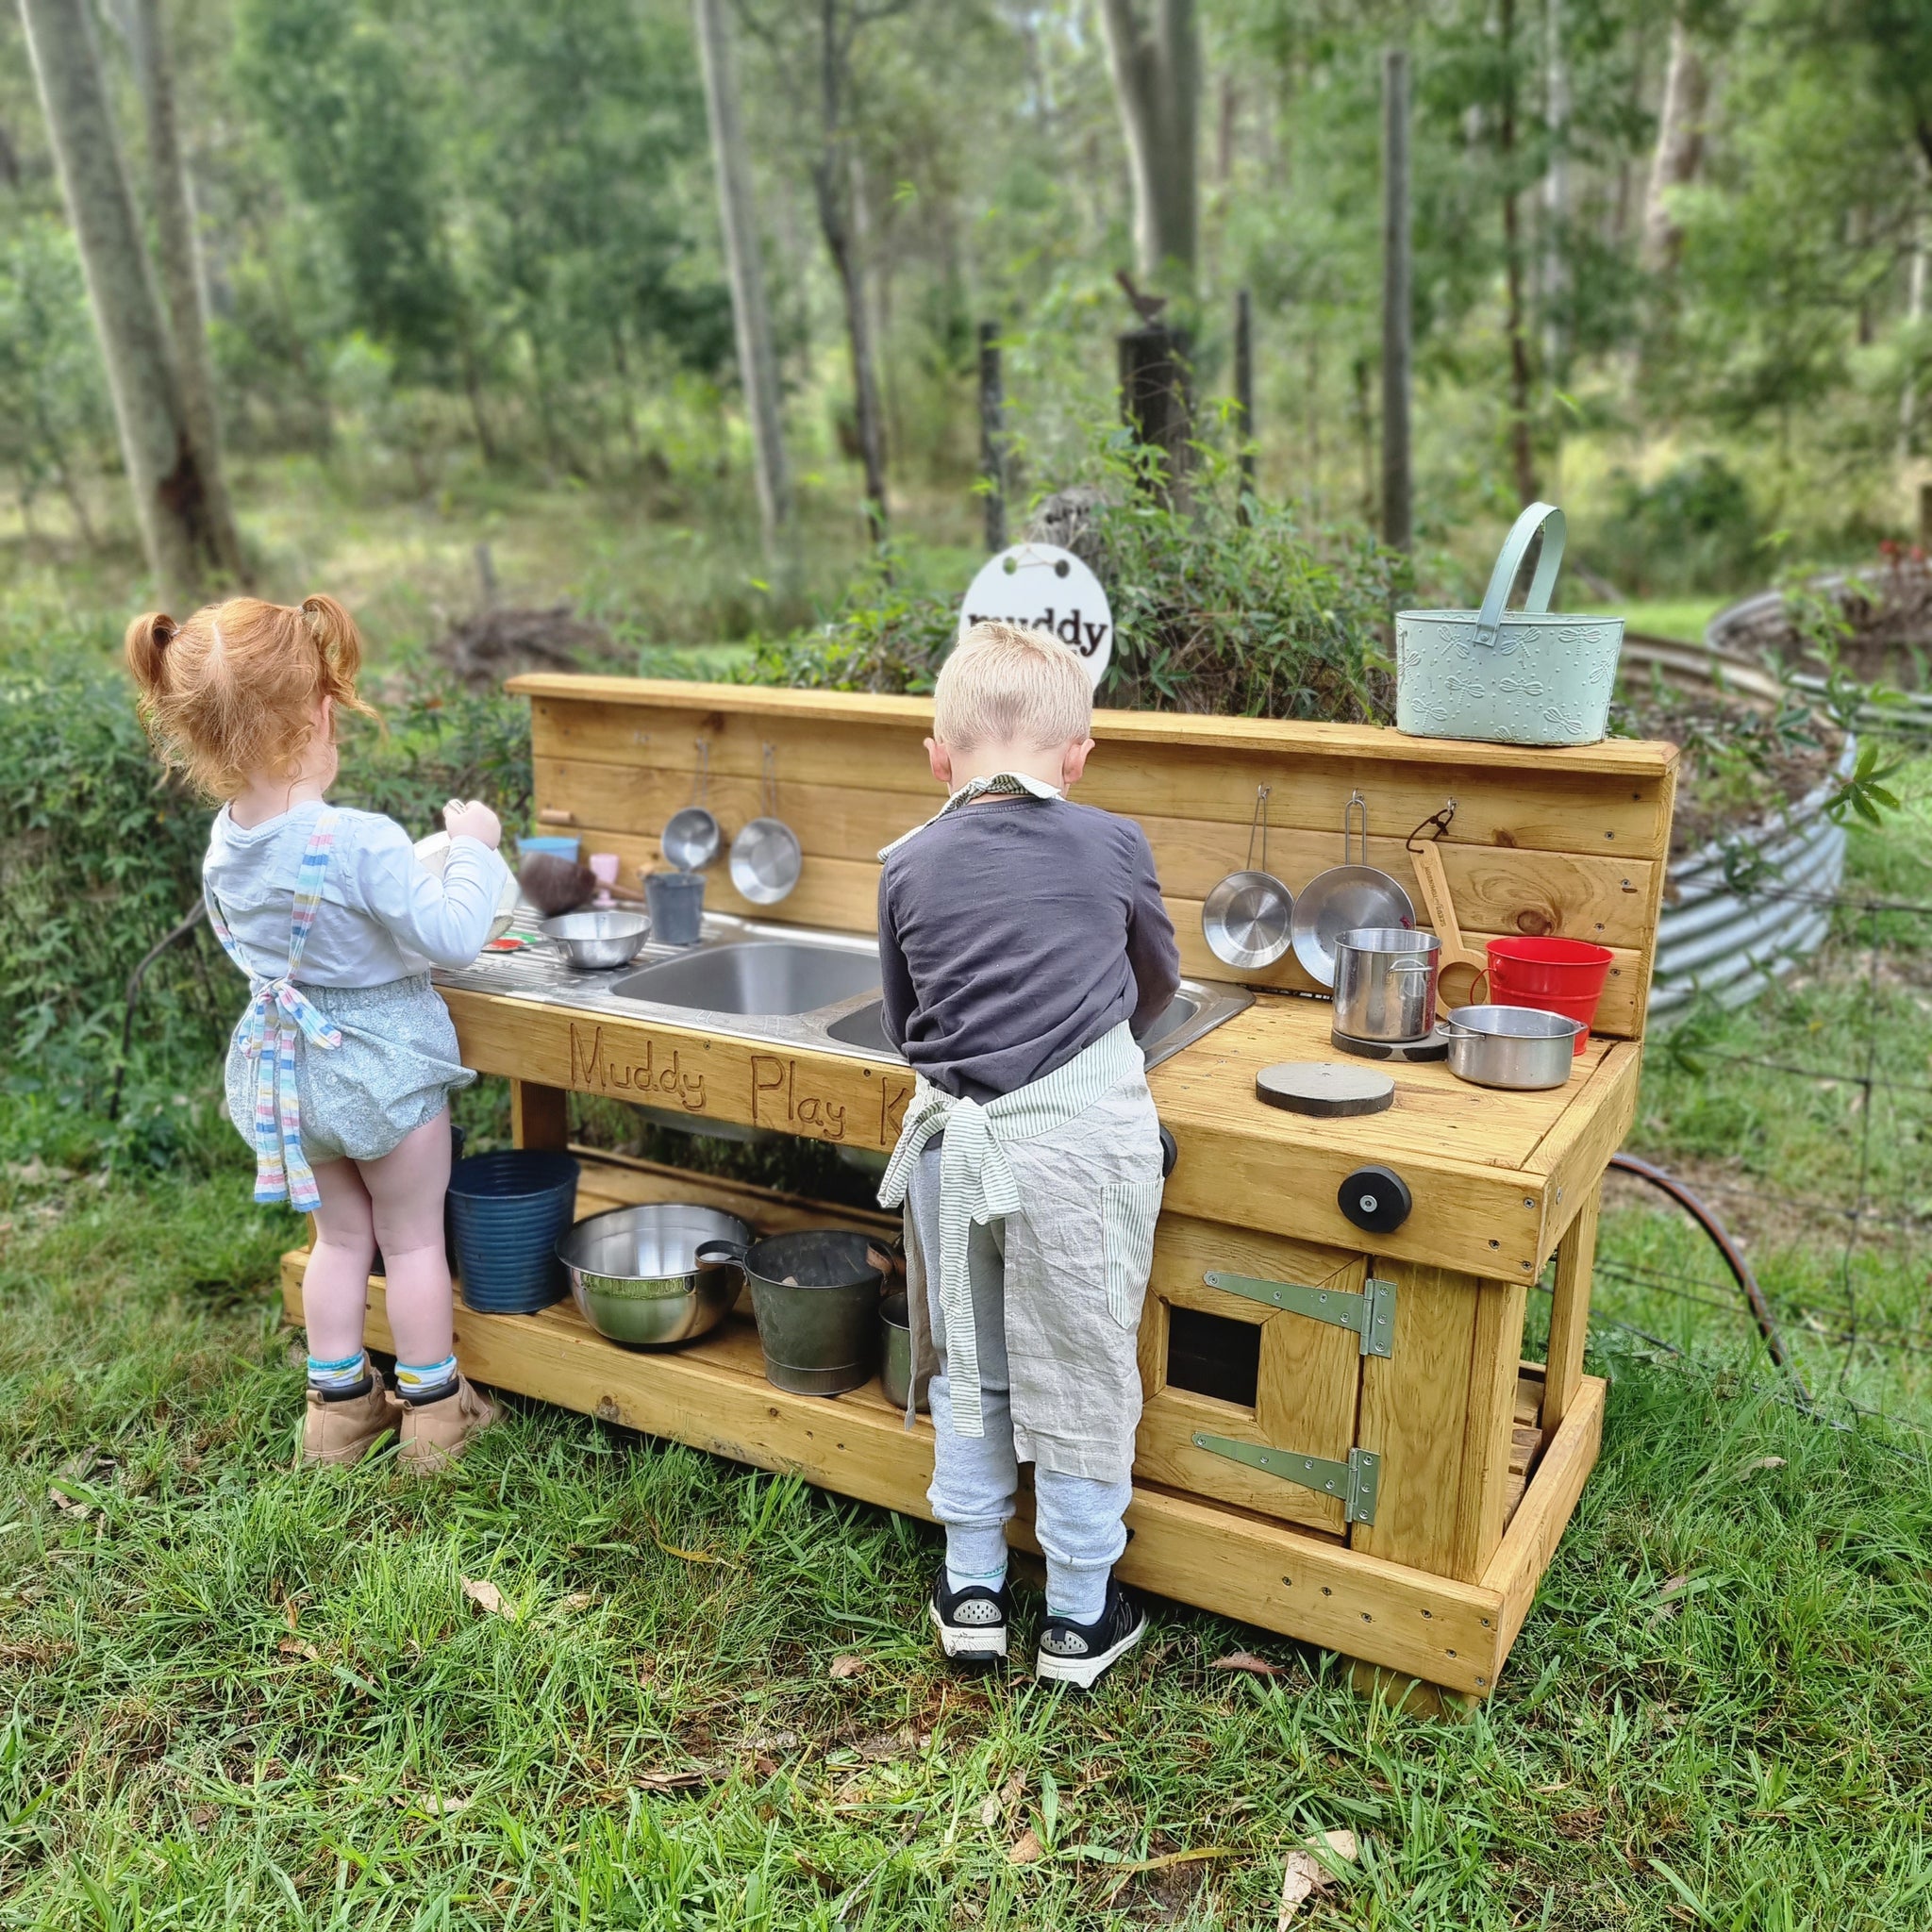
A longer counter gives two children their own bowl without dividing the kitchen into separate units. Muddy Play Kitchens shows children using a double-sink station with open storage below. Before choosing a size, compare the counter height with the children who will use it and allow space behind them. A little extra working width can be more useful than adding tall shelves that nobody can reach comfortably.
6. Start with a Modular Crate Counter

A modular crate-and-plank setup is a small starting point for a play kitchen. Muddy Faces keeps the surface simple, with a bowl, mug and teapot on top of two supporting crates. Follow the supplier’s assembly and stability guidance rather than balancing loose pieces together. Place the setup on level ground, keep heavy items low, and choose a few age-appropriate utensils instead of filling every open space with accessories.
7. Add Short Water Channels Above the Counter
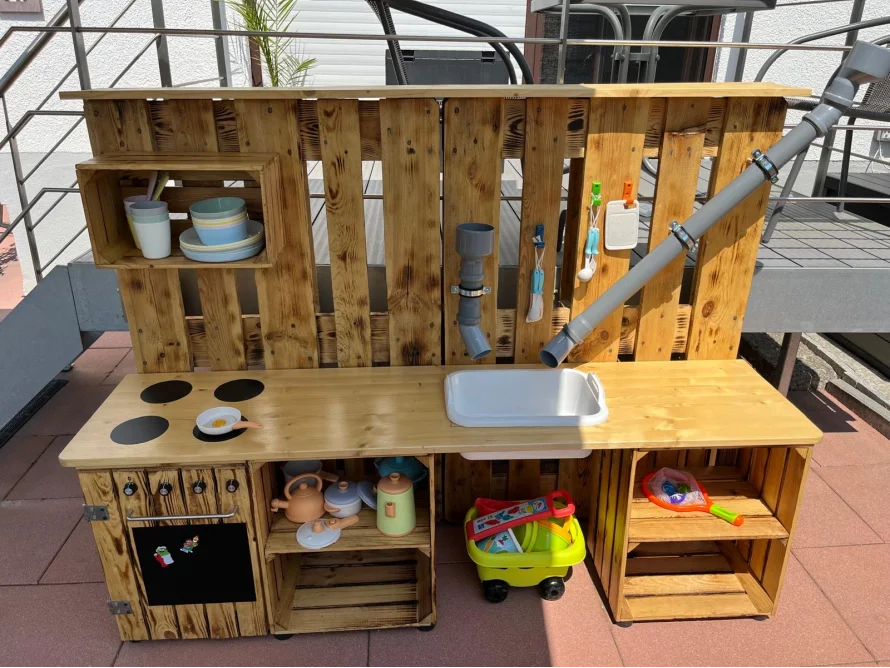
Short channels above the counter add a route for water before it reaches the basin. This toom project combines a wooden play kitchen with attached pipe sections, giving children something to pour into and watch. Use a securely fixed arrangement with smooth edges and adult supervision. Keep the amount of water modest, and position the final catch bowl where spills will not make the usual standing area slippery.
8. Pair Bowl Sinks with a Pretend Hob

A pretend hob can sit beside removable bowl sinks, offering two different kinds of play on one surface. This Pinterest kitchen uses flat circles and a small menu board rather than real cooking equipment. Make the hob decoration smooth and secure, with no heat source attached. Keep the bowls easy for an adult to lift out for cleaning, and use stable containers that will not drop through the countertop openings.
9. Use a Brick Wall as the Backdrop

A brick wall can give a freestanding mud kitchen a clear backdrop without taking over the whole garden. This Pinterest example keeps its broad counter and storage close to the wall, leaving the lawn open in front. Check that the kitchen is stable in its own right or properly secured as required. Leave space for water to drain and for an adult to inspect the back of the unit.
10. Combine a Mud Kitchen with a Sand Area

Placing the kitchen beside a sand area lets children move between scooping, mixing and pretend serving. This Pinterest reference combines a reclaimed sink with wooden storage and a pallet backboard. At home, use clean play materials appropriate to the children’s ages and keep the area free of animal waste. Cover or protect the play zone when needed, and keep a clear edge so sand and water do not spread across a busy path.
11. Use a Colorful Backdrop for a Play Corner

A painted wall or mural can make a simple kitchen feel like part of a larger play corner. The Pinterest example uses a colorful backdrop behind a long wooden counter, with open shelves below. Choose one part of the mural palette for a few washable containers. Keep the working area easy to see and clear, rather than adding so many decorative objects that children have no room left to make their own arrangements.
12. Refresh a Plain Kitchen with Outdoor Color

Outdoor color can unify a kitchen built from different reclaimed pieces. West Exe Nursery School uses blue-painted timber around metal sinks and hanging pans, bringing the separate parts together visually. Check any reused wood for condition, protruding fixings and smooth edges before finishing it. Use a finish suitable for the intended children’s item and outdoor exposure, following its instructions for preparation and full curing before play begins.
13. Make a Shared Art and Mud Worktable
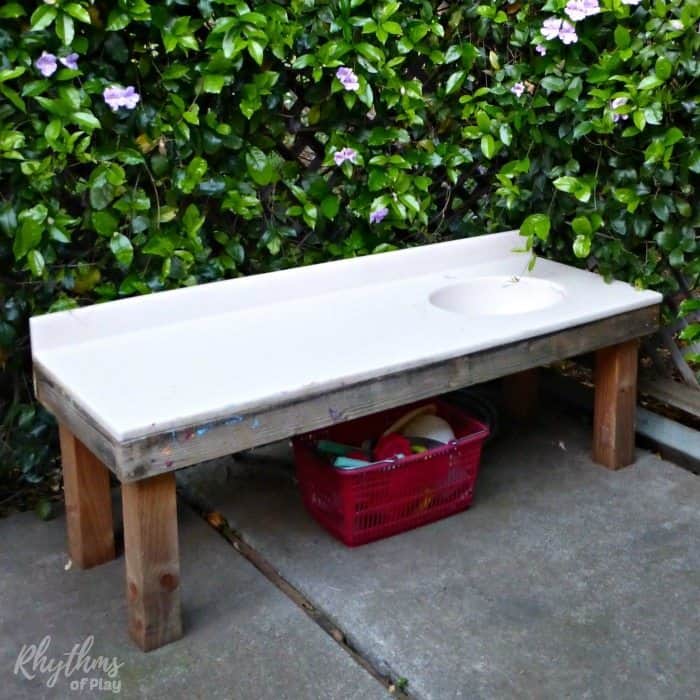
A broad, plain worktable can switch between mud play and outdoor making. Rhythms of Play uses an inset sink with generous clear surface beside it, so the setup is not limited to pretend cooking. Clear and clean the table between activities, and store supplies in separate tubs. On a dry afternoon, these painted stone projects offer another supervised activity for older children at the same table.
Make This at Home: Outdoor Art and Mud Worktable
14. Keep a Portable Kitchen in One Tub
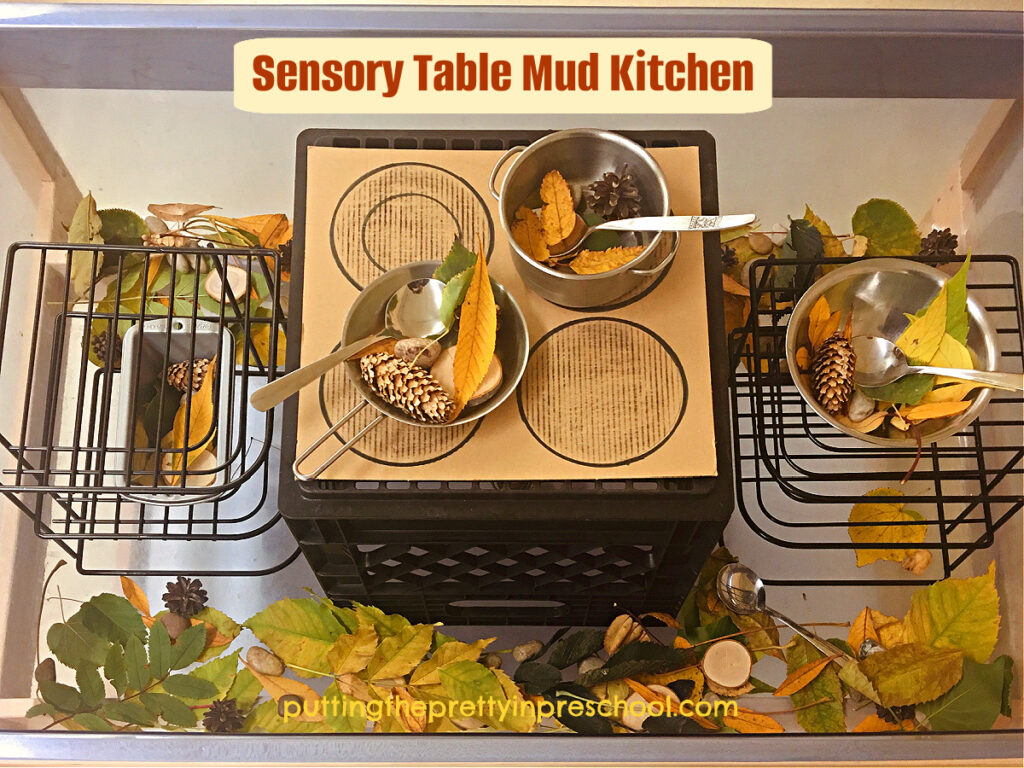
A portable tub setup suits a family that cannot keep a large timber kitchen outside. Putting the Pretty in Preschool arranges small mixing vessels and pretend cooking surfaces in a movable sensory station. Take out only the supplies needed for that session, then clean and dry them before packing away. These paper plate crafts give you an indoor alternative when outdoor play needs to move inside.
15. Try an Open Timber Frame with a Low Shelf

An open timber frame keeps the lower storage easy to see and reach. Tylynn M’s kitchen has a straightforward counter, a compact backboard and a low shelf for play supplies. Plan the structure around the actual basin before cutting its opening, using the maker’s measured plan. Keep the surrounding space free for movement, and give frequently used bowls one consistent storage position so children can help tidy them away.
Make This at Home: Open Frame Mud Kitchen Plan
16. Make a Modular Wire-Cube Station
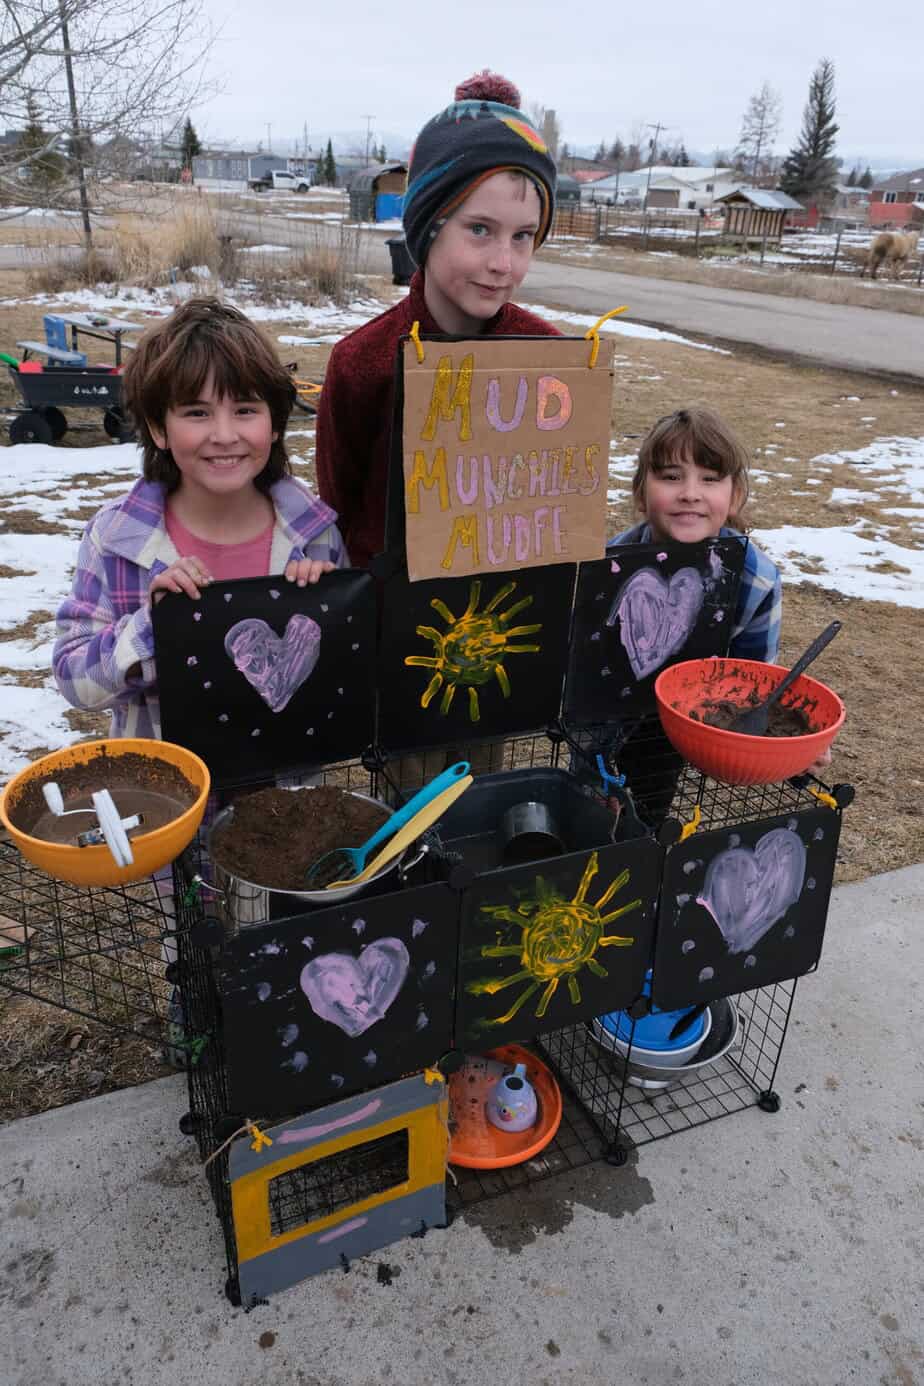
Wire cubes can form a modular play station where timber construction is not the best fit. The Crazy Outdoor Mama groups the cubes around mixing containers and a handmade sign, creating an alternative to a traditional bench. Follow the original assembly method and check every connector and cut edge. Keep the unit stable, and select a sheltered level position where children can use it without pulling themselves up on the frame.
17. Set a Kitchen in a Leafy Play Area
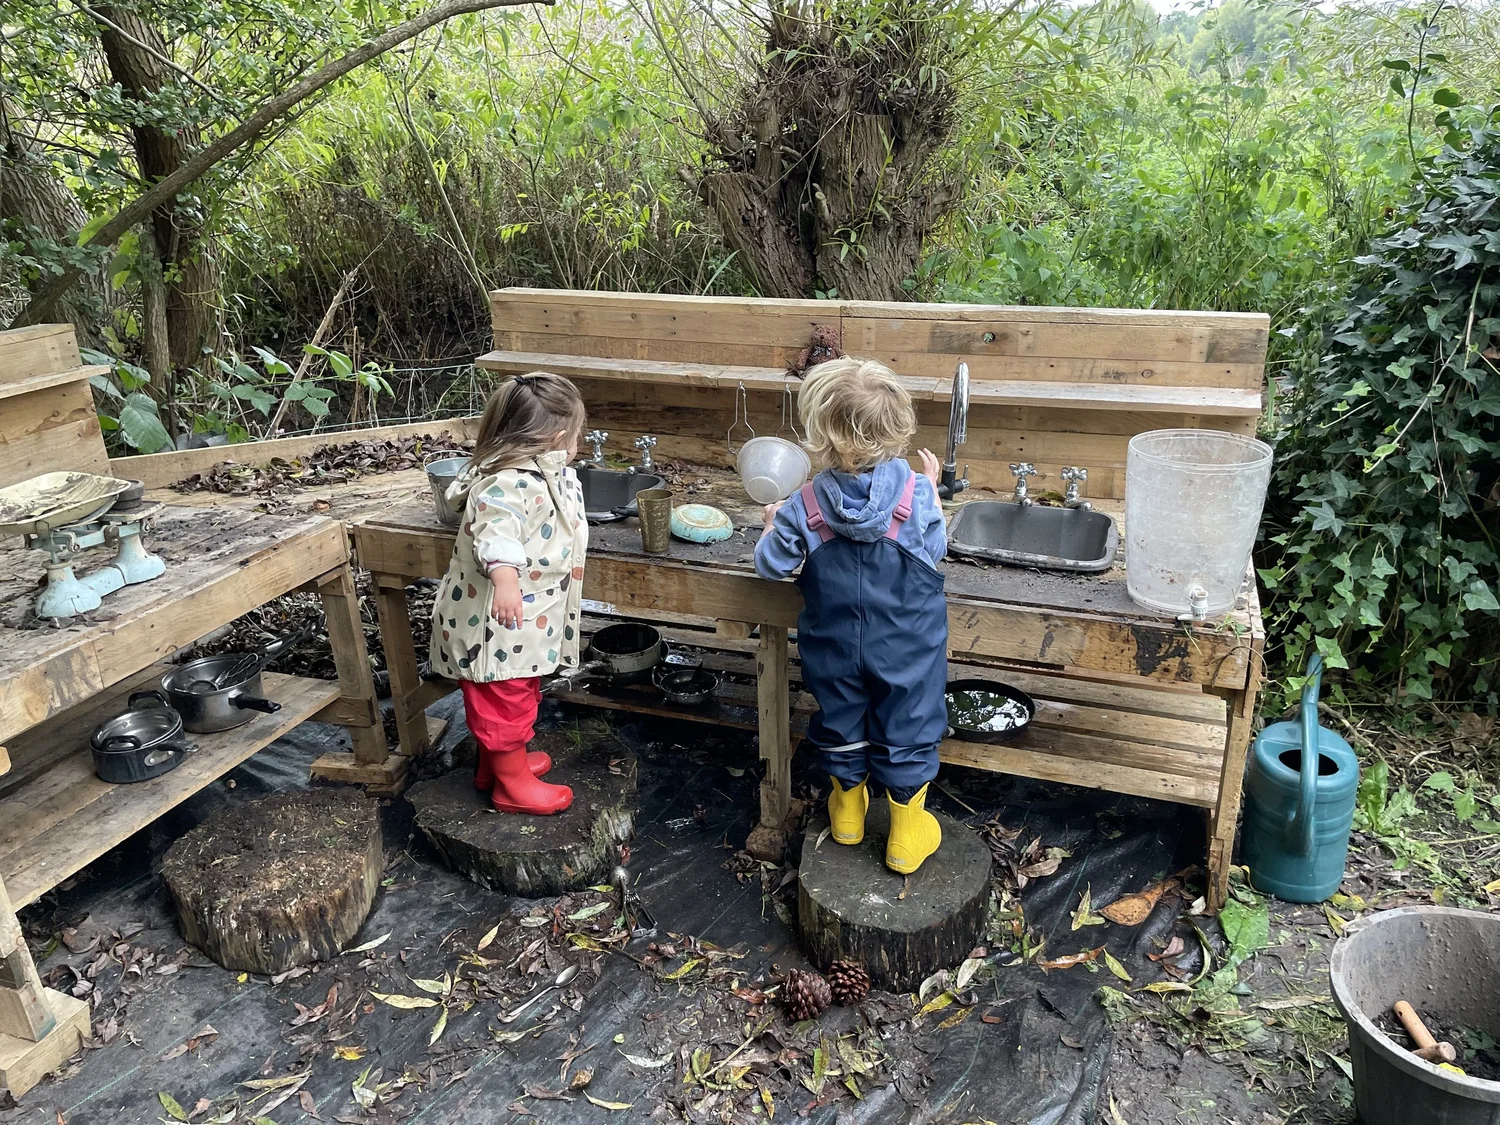
A leafy setting gives a mud kitchen plenty of natural material to explore nearby. space2grow places a simple wooden station in its outdoor play area, where children can work with bowls and collected leaves. Borrow the garden setting while choosing a counter height children can reach directly from level ground. Check plants with an adult, avoid unknown berries or mushrooms, and keep all pretend mixtures clearly separate from real snacks.
18. Add a Water Wall Beside the Kitchen

A water wall beside the kitchen gives pouring its own place, leaving more counter room for mixing. Cardiff Mummy Says shows a freestanding wall with funnels, channels and a catch bucket used during supervised play. Follow the equipment maker’s setup guidance and keep loose hoses out of walking routes. Empty the water containers afterward, and finish the session with handwashing using soap and clean running water before children eat.
Reset the Kitchen After Messy Play
Empty water containers, remove spoiled play mixtures, and wash and dry the utensils before storing them. Check timber, fixings and loose parts regularly, especially after wet weather. Use age-appropriate materials and supervise water play. Finish with handwashing before snacks; the CDC handwashing guide explains washing with soap and clean running water, including scrubbing for at least 20 seconds.
Choose the Features Your Children Will Use
Start with one mixing bowl and a clear surface, then add storage or a pretend cooking detail when you see how the children play. A portable setup may suit a small patio, while a shared counter needs more standing room. Use these related ideas to plan the wider play area and choose other activities for the same table without crowding the kitchen.
- Small Backyard Ideas for Creative Play
- Painted Stone Projects for Older Children
- Paper Plate Crafts for Indoor Afternoons
Would your children enjoy a cafe counter, a water wall, or a simple bowl-and-bucket station? Share the space you have and the feature you would add first in the comments.


















0 Comments