How to Make Self-Watering Planters from Plastic Bottles
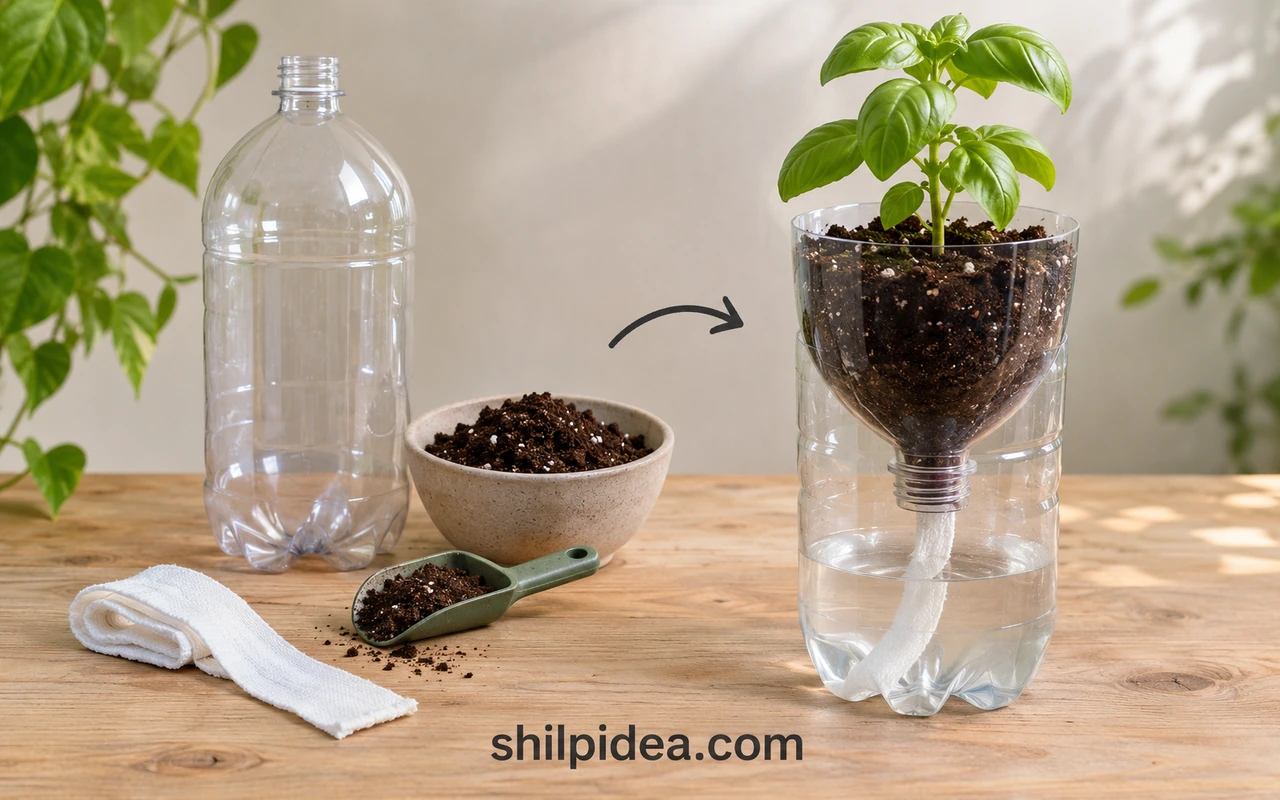
Turn one clean plastic bottle into a small planter with a water reservoir underneath. A cotton wick carries moisture into the potting mix, but you still need to check the plant and refill the base.
Unlike our DIY cement planters, this version lets you see the water level. Start with one small rooted basil plant and observe how the setup behaves.
Explore recycled planter ideas for other containers. This guide uses a cap-free cloth wick; this guide does not document a Shilpidea growing trial.
Materials and Tools
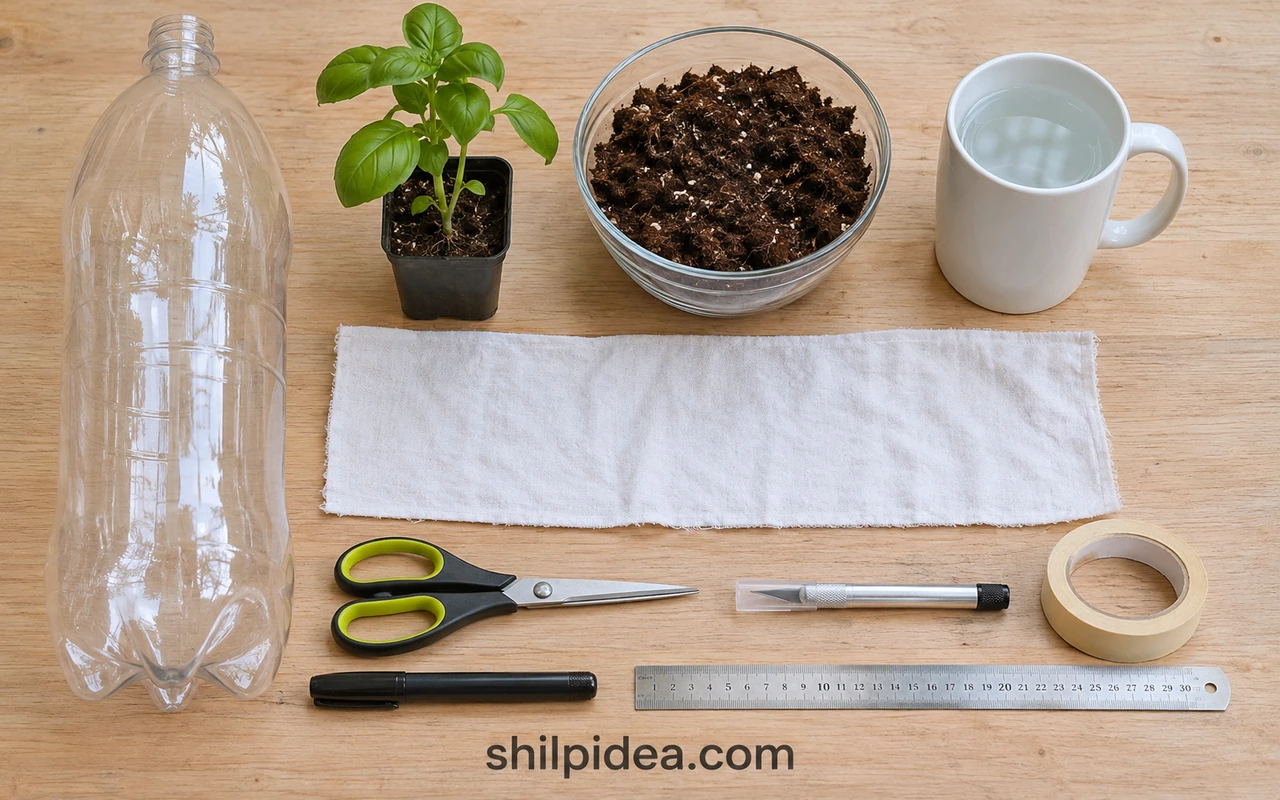
Gather these supplies for one small bottle planter.
- Plastic bottle – One clean, clear 2-liter drink bottle, with label and cap removed; avoid damaged bottles or containers that held chemicals.
- Cotton wick – One absorbent cotton fabric strip about 12 × 4 inches (30 × 10 cm); avoid coated ribbon or fabric that repels water.
- Potting mix – Fresh container potting mix, enough to fill the inverted top around the small root ball; do not use dense garden soil.
- Small plant – One rooted basil seedling that fits comfortably; this small, moist setup is not a default choice for cacti or succulents.
- Cutting tools – Scissors and an adult-use craft knife for starting the cut, plus a protected cutting surface.
- Marking and edging – A marker, ruler and a little paper tape to cover cut rims.
- Water and tray – Clean water, a small pouring cup and a tray to catch drips while assembling.
Precautions Before You Begin
Prepare the cutting area and choose a stable spot for the finished planter.
- An adult should cut the bottle on a protected surface. Keep hands clear of the blade and cover any sharp rim before handling.
- Use clean drink containers only. Wash and rinse the bottle before planting; keep soil and tools away from food preparation surfaces.
- Keep the planter stable, away from children who may pull it over and from hot glass or strong heat.
- Keep reservoir water below the bottle neck. The cloth reaches the water; the potting chamber must not sit submerged.
1. Cut the Bottle and Check the Fit
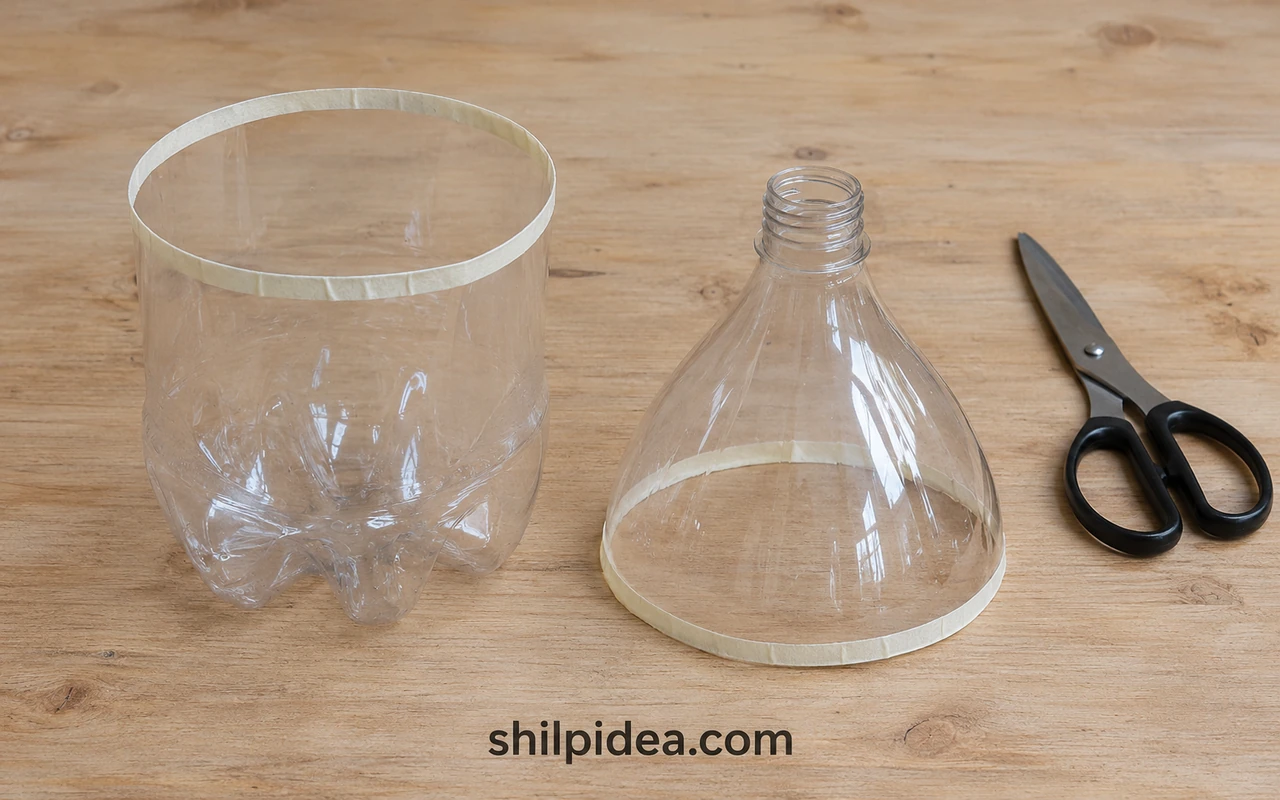
- Prepare the bottle. Wash, rinse and dry it. Remove the label and cap, then mark a level line around the middle. An adult should start and finish the cut carefully.
- Test the two sections. Cover sharp rims with narrow tape. Invert the funnel-shaped top into the lower base; it must sit steadily with its uncapped neck clear of the reservoir floor.
2. Tie and Wet the Cotton Wick
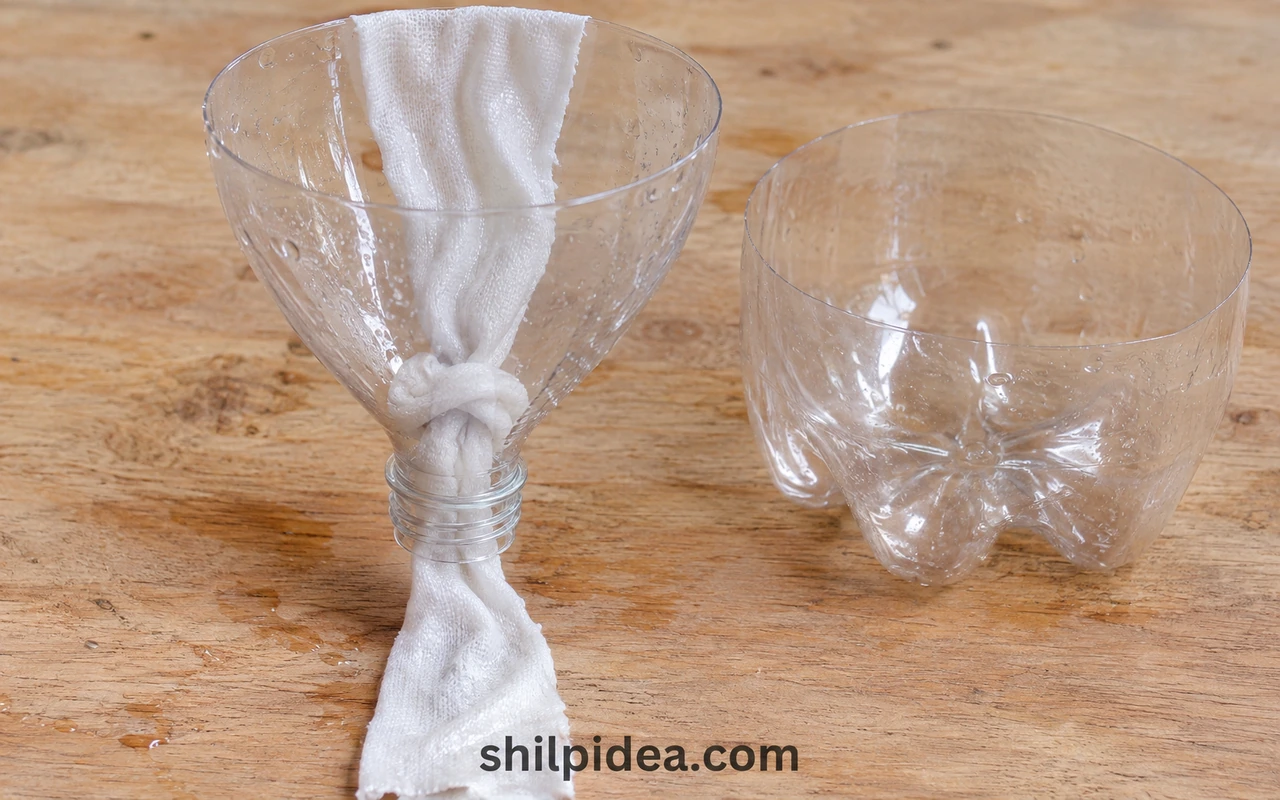
- Make a cloth stopper. Tie a loose, bulky knot halfway along the cotton strip. Feed one end through the open neck from inside; the knot should stop it falling through.
- Check the length. Wet the whole strip thoroughly. Leave enough below the neck to reach the reservoir floor and enough above to pass through the potting mix. Retie if the fit slips.
3. Set the Wick into Moist Potting Mix
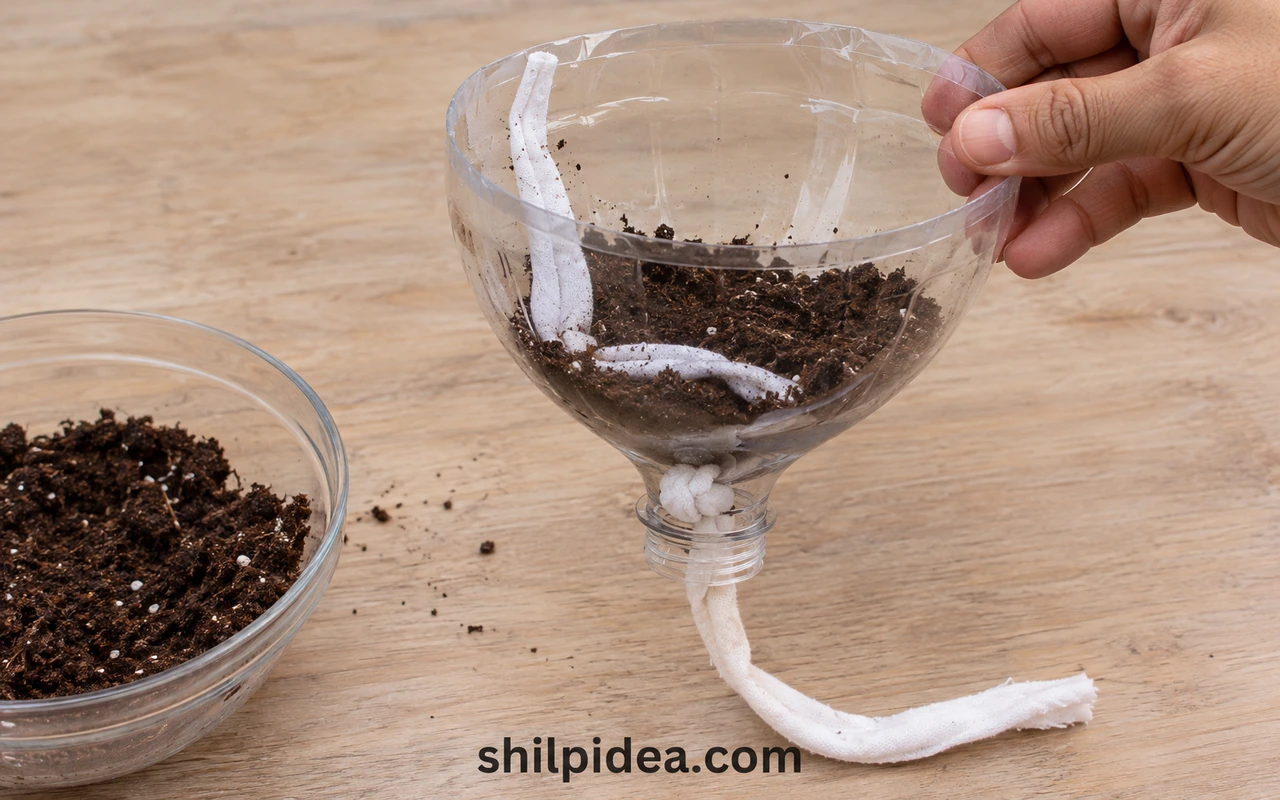
- Prepare the mix. Moisten potting mix in a bowl until evenly damp, not dripping. Add a little to the inverted top, keeping the upper cloth length supported rather than buried at the neck.
- Position the wick. Run the upper cloth through the rooting area and cover it with mix. Leave space for the root ball and about half an inch (1–2 cm) below the rim.
4. Plant and Water from the Top
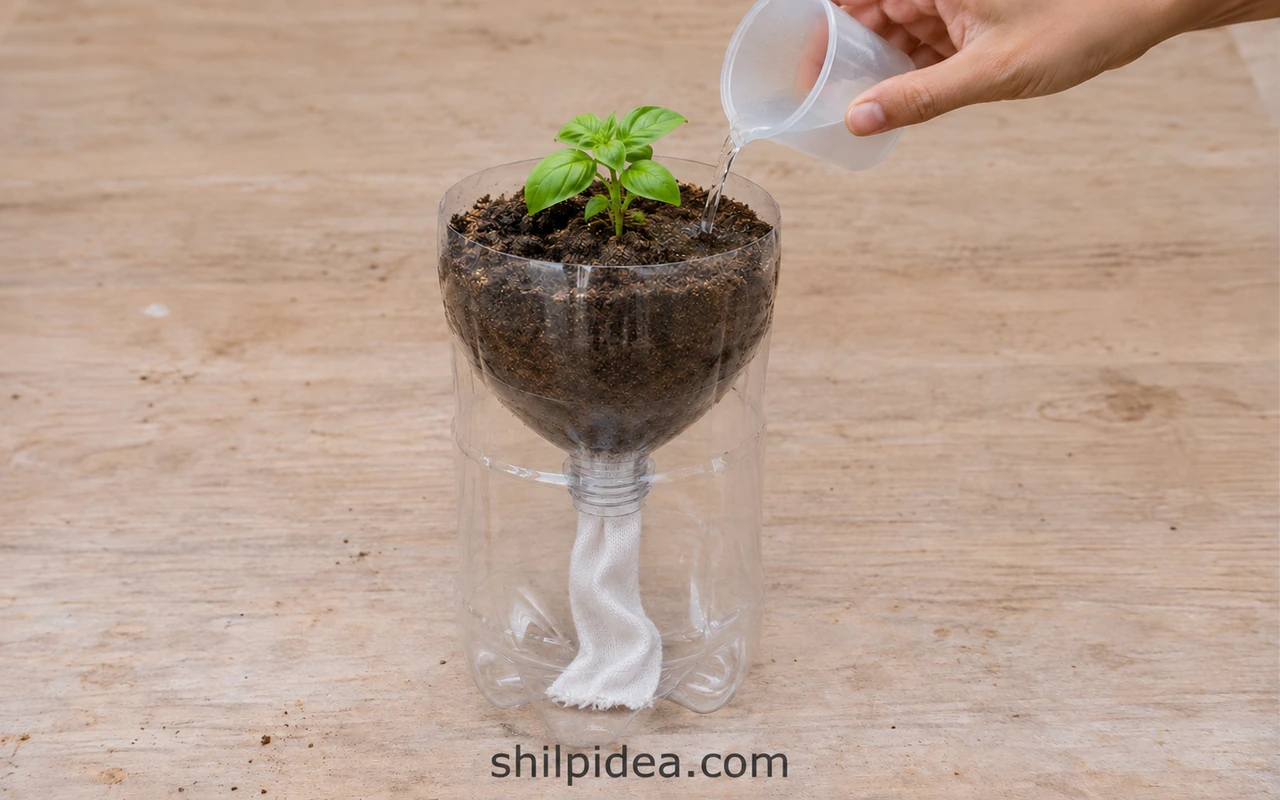
- Set in the seedling. Ease the small basil plant from its nursery pot. Place it at its existing soil depth, fill around the roots and settle the mix gently without packing it hard.
- Start with damp soil. Water gently from above, letting excess drain into a tray or the empty base. Empty that runoff before adding reservoir water; do not leave the root zone flooded.
5. Fill the Reservoir and Check Moisture
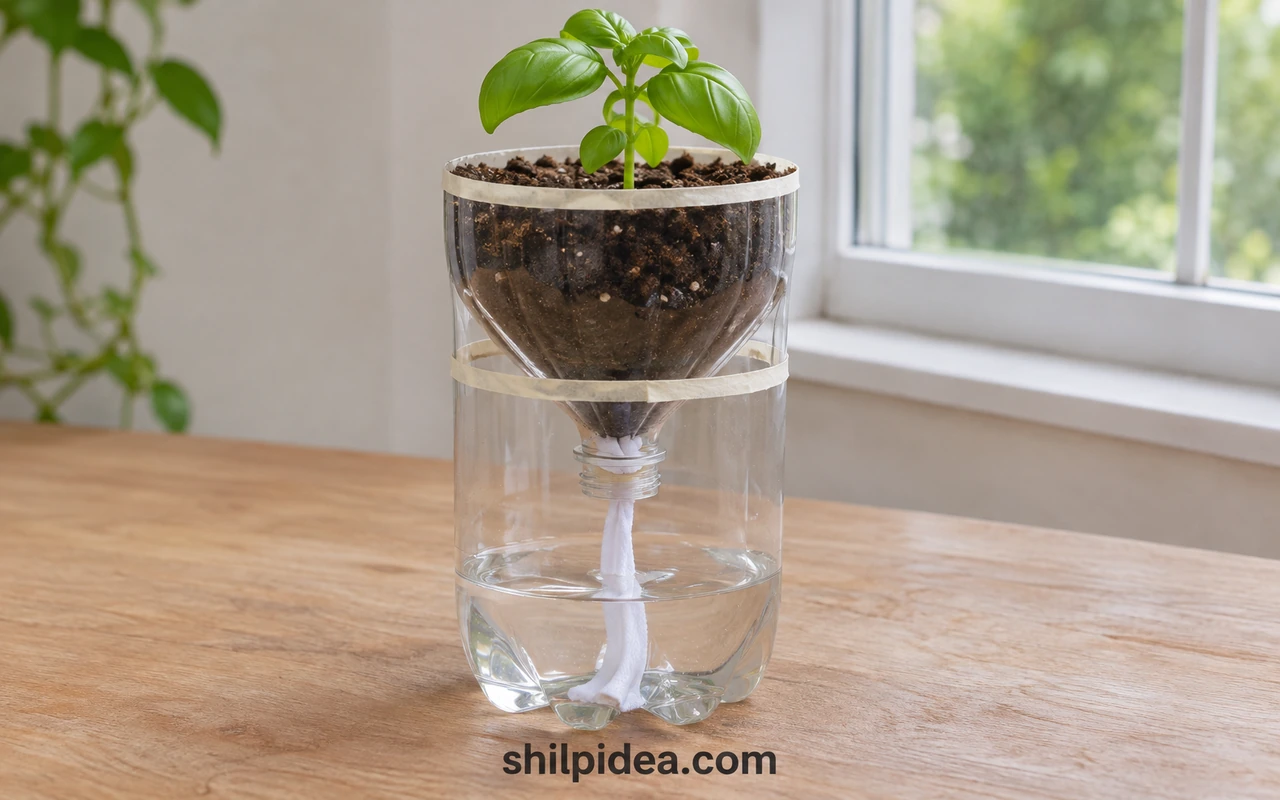
- Set the water level. Lift out the planted top and add clean water to the base. Refit it with a visible air gap below the neck; only the lower cotton tail should reach the water.
- Watch the first few days. Give basil suitable light and check both soil moisture and water level daily at first. Refill as needed by lifting the top; there is no fixed weekly interval.
- Adjust as the plant grows. If the mix stays soggy, empty the reservoir and let excess drain. If it dries, rewet the wick and mix. Move the plant into a larger suitable pot when crowded.
Rinse the reservoir when it becomes dirty or algae appears, and replace a deteriorating wick. If you prefer another vessel, browse our concrete planter ideas, then choose drainage and watering to suit the plant rather than copying this wick setup automatically.
Watch the Original Shilpidea Video
This earlier Shilpidea demonstration shows the bottle-and-wick idea. The revised instructions above specify the cap-free cotton-strip version; bottle shapes, tools and details in the video may vary.

Watch on YouTube: Recycle Plastic Bottle And Make Self-Watering Plant Pots by Shilpidea.
How the Wick Moves Water
Water moves through tiny spaces in the damp cotton by capillary action, carrying moisture from the reservoir into the mix. Roots take up water from that mix; they do not mechanically squeeze the wick. Science World explains the principle. Naples Botanical Garden also demonstrates a cap-free cotton-strip method.
The wick helps maintain moisture; it does not decide how much water every plant needs. Test your particular cloth, mix, plant and location before relying on it while away.
Choose the Next Planter to Match Your Plant
A bottle planter is a useful small-scale growing experiment, but it is only one way to reuse a container. For a larger plant or a species that needs its mix to dry between waterings, choose a suitable pot with drainage instead. These collections show other container styles; their plants and watering arrangements differ from this wick system.
- DIY Cement Planter Ideas for Home Decor
- Concrete Planters with Glass and Copper
- Recycled Tire Planter Ideas for Your Garden
- Animal-Shaped Succulent Planter Ideas
- Coconut Shell Succulent Planter Ideas
- Colander Succulent Planter Ideas for Upcycled Gardens
Would you try this bottle planter with basil or another small plant? Tell us your plan in the comments. If you make one, share how the wick worked and anything you changed—we would love to hear what you learned.























0 Comments