Warli Painting Tutorial: How to Draw Men and Women
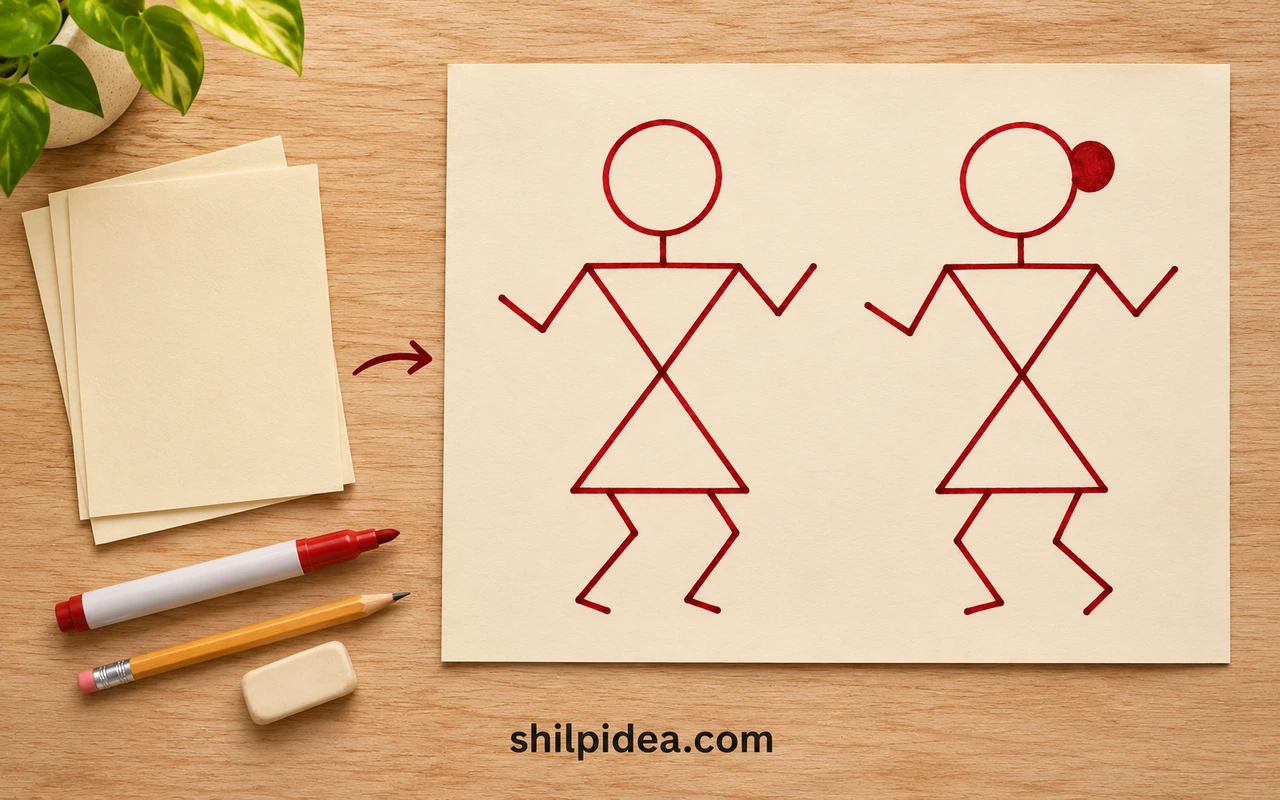
Learn to draw simple Warli-inspired people with a circle, two triangles and bent lines. This beginner exercise uses a red marker on cream paper, following the shapes in this guide’s original chart.
Explore our Warli painting ideas to see how figures work together in a scene. Practice one person first, then draw a second with a different pose.
Our Warli painting designs offer display inspiration. This is a modern paper practice exercise.
Materials and Tools

Gather these basic supplies for a small sheet of practice figures.
- Practice paper – Two or three smooth white or cream sheets, with a spare sheet underneath to protect the table.
- Red marker – One fine-tip, water-based felt marker; choose an age-appropriate, labeled non-toxic product for children.
- Pencil – A standard graphite pencil for light practice outlines before tracing in red.
- Eraser – A clean, soft eraser for removing pencil guides after the marker is completely dry.
- Ruler (optional) – Use it to compare heights or plan spacing; the finished figures can stay freehand.
Precautions Before You Begin
Prepare the work surface and test your marker before drawing.
- Test the marker on a scrap first; protect the surface in case ink bleeds through.
- Keep marker caps away from young children, and supervise children using art supplies.
- Let ink dry before erasing or resting your hand on it. Follow the marker’s label for safe use and cleanup.
Warli art belongs to the Warli community of western India. Traditional painting uses white pigment on earthen surfaces; this red-marker exercise simplifies the figure construction for practice. Learn about the tradition through the Incredible India. The Seattle Art Museum explains the two opposing triangles used for the human body.
1. Draw the Crossing Body Lines
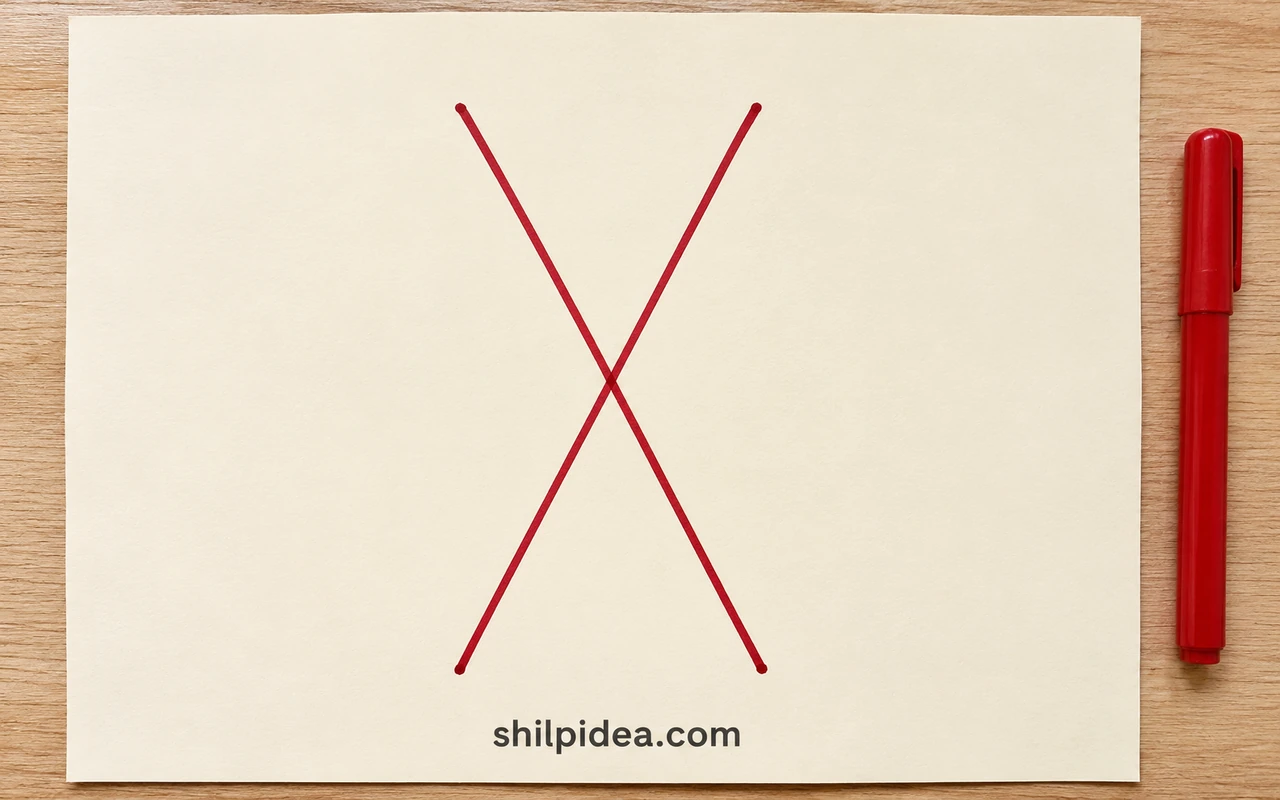
- Plan the space. Leave room above the body for a head and below it for legs. Lightly sketch one diagonal line in pencil, keeping the figure large enough to trace easily.
- Make an X. Add a second diagonal through the first line’s midpoint. Keep the top endpoints level and the bottom endpoints level; their crossing will become the figure’s narrow waist.
2. Close the Two Triangles
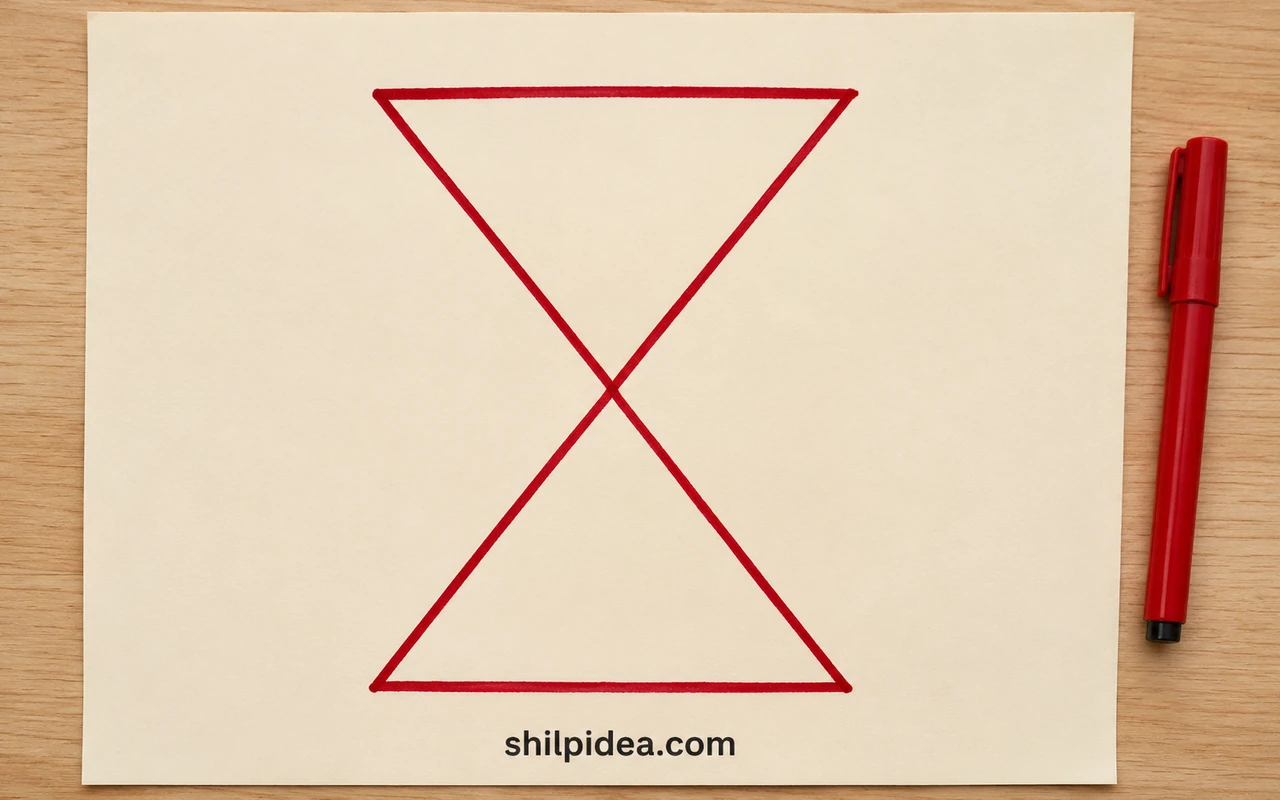
- Join the upper ends. Draw a straight line between the X’s top endpoints. This closes a downward-pointing triangle, with the crossing point as its lower tip and the top edge as the shoulders.
- Join the lower ends. Connect the bottom endpoints to close an upward-pointing triangle. The triangles should touch at their tips, not overlap broadly. Trace the outline in red and leave both centers unfilled.
3. Add a Short Neck and Round Head
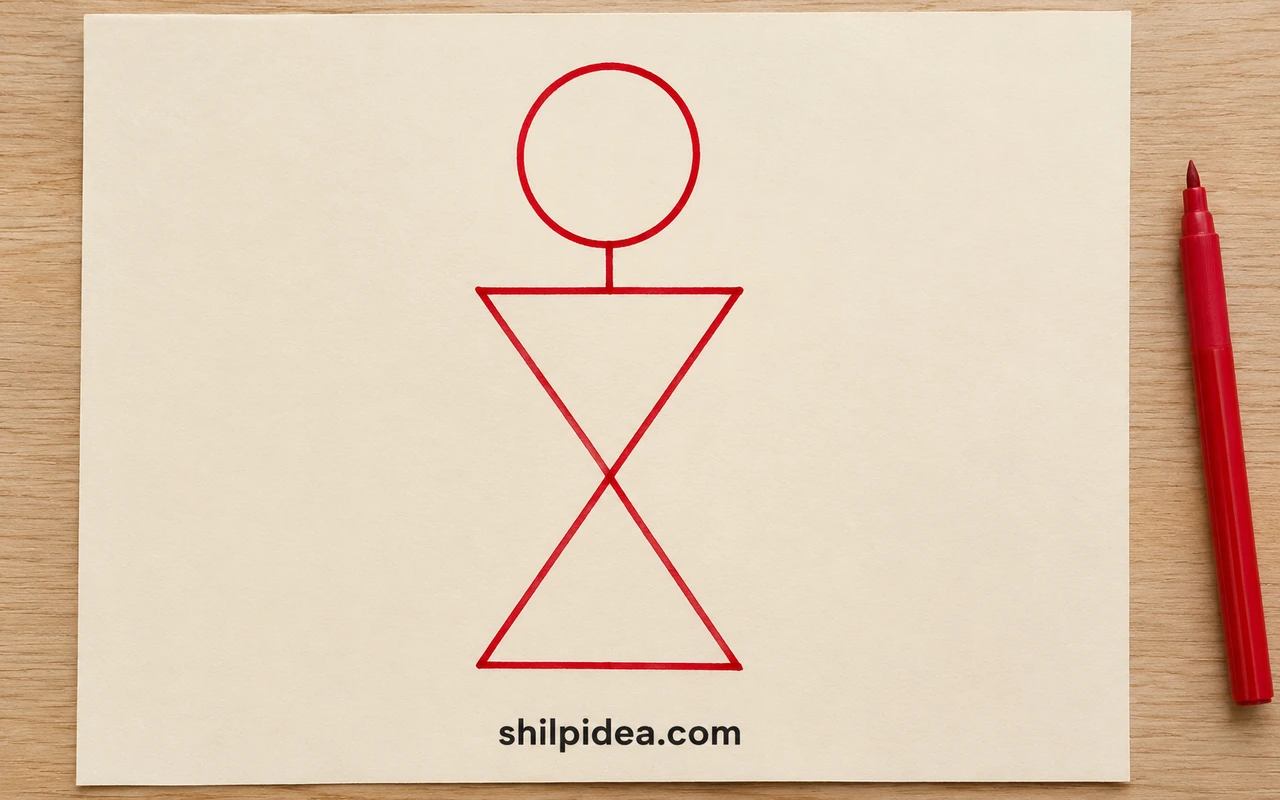
- Place the neck and head. Draw a short vertical neck upward from the shoulder edge’s center. Add a small circle above it, touching the neck. Keep the circle centered over the waist.
- Check the shape. Leave a little breathing room between the head and shoulders. A slightly uneven circle is fine; keep the neck short and use the same red line weight throughout.
4. Give the Figure Arms and Legs

- Bend the arms. Start one line at each shoulder corner. Add an elbow by changing direction once, then end with a small dot or short stroke. Try matching raised arms first.
- Add two legs. Start at two spaced points along the lower triangle’s broad bottom edge. Give each leg a knee bend and a short foot. Keep the limbs clear of the waist.
5. Draw a Second Person and Vary the Pose
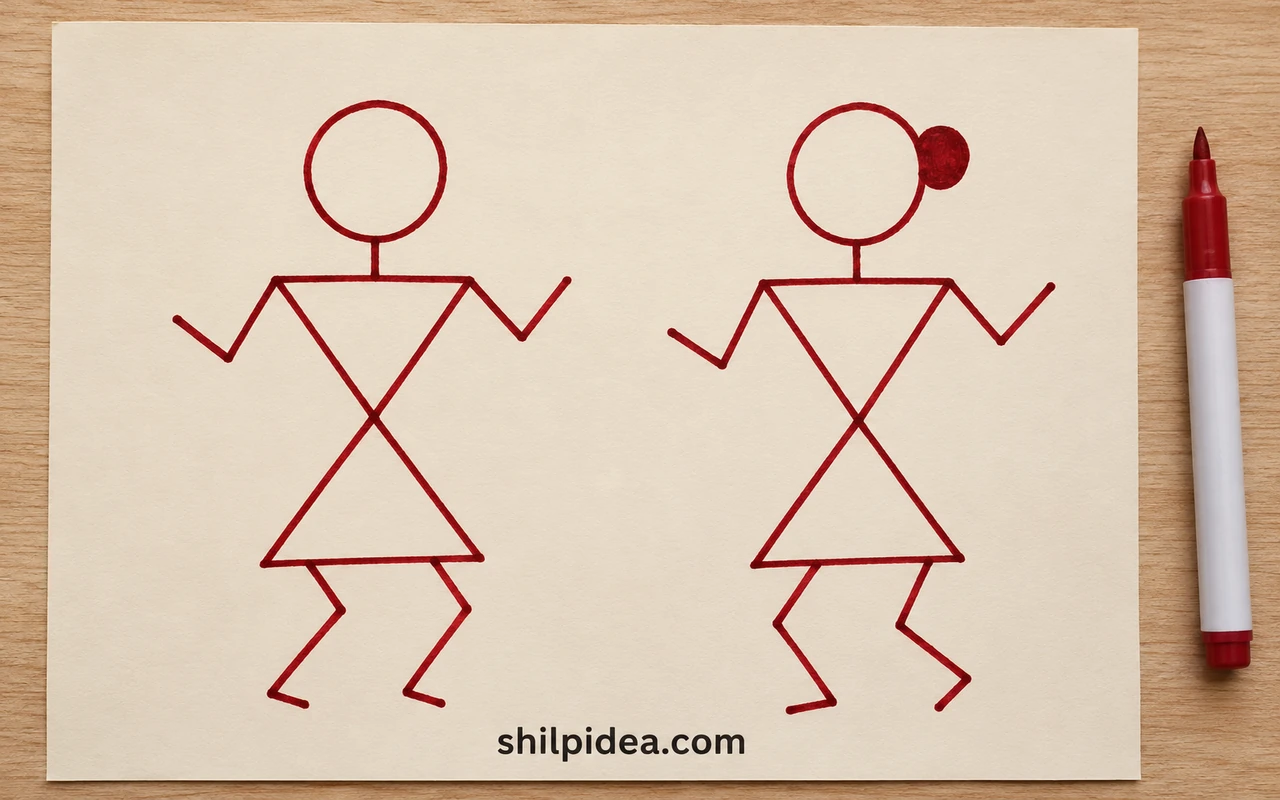
- Repeat the same body. Draw a second person beside the first, using the same circle-and-triangle construction. To follow the original chart’s woman example, add a small side bun touching the head; it is optional.
- Finish the pair. Change an arm or knee angle while keeping both figures a similar size. Let the red ink dry fully, then erase visible pencil guides gently without rubbing the paper rough.
When you are comfortable drawing on plain paper, explore mixed-media painting for background ideas. Keep the first practice sheet simple so the figure construction stays clear.
The same geometric body works for both figures. The hair detail above follows this article’s earlier example; it is not a universal rule for representing gender in Warli art. Study individual artists’ work rather than treating one beginner chart as the whole tradition.
For a quick recap, here is the earlier chart retained from this guide.

Turn Your Practice Figures into a Small Art Project
Once the basic figure feels comfortable, try a short row of people with different arm positions or leave space around a single pair. Keep your first composition simple so the shapes remain clear. These related projects offer Warli scenes to study and other painting surfaces to explore when you are ready for a different exercise.
- Warli Painting Ideas for Handmade Wall Decor
- Warli Painting Designs for Tribal-Inspired Wall Art
- Mixed-Media Painting Ideas Using Everyday Materials
- Angry Birds Rock Painting Ideas
- Animal Rock Painting Ideas for Creative Inspiration
- Popsicle Stick Painting Ideas for Creative Projects
Which would you draw first—a simple standing pair or figures with dancing poses? Share your idea in the comments. If you try the exercise, tell us which shape felt easiest and where you would like a little more help.
































0 Comments