19 Christmas Gift Wrapping Ideas with Stamped Kraft Paper
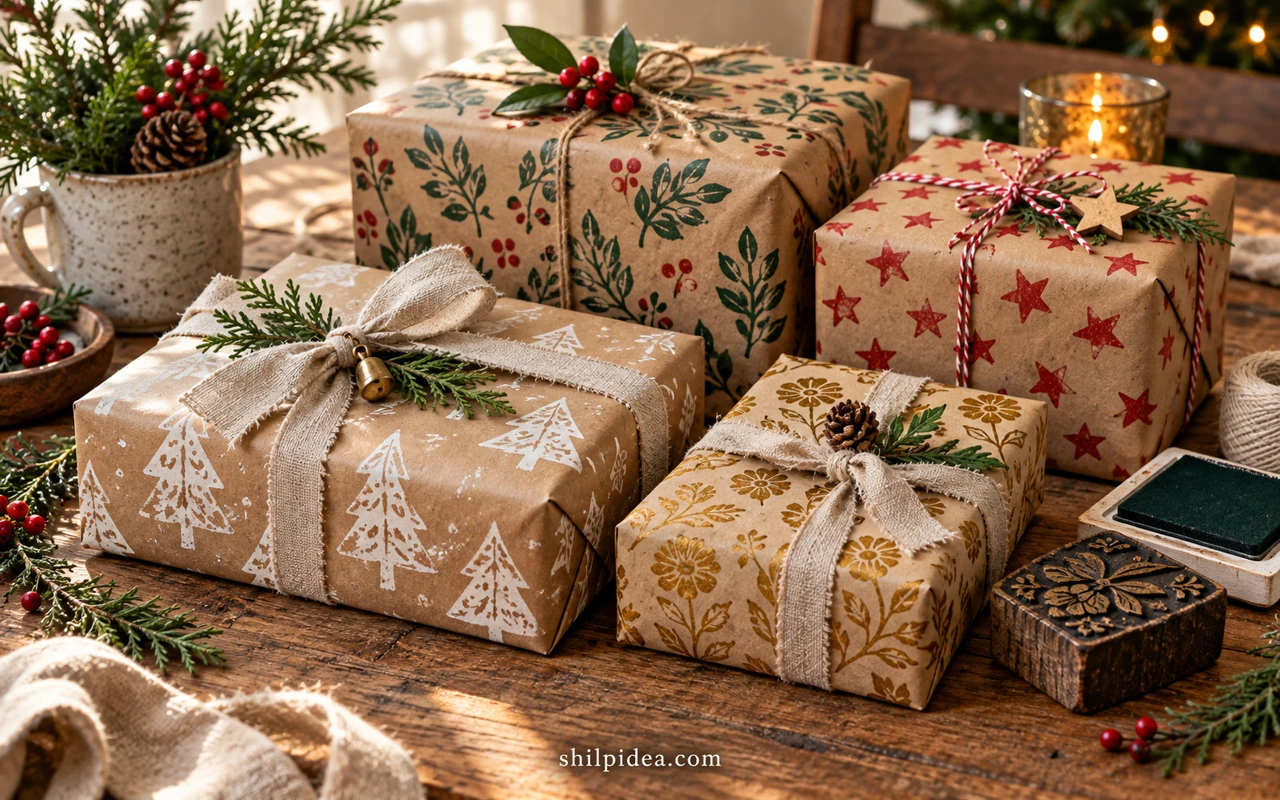
A roll of plain kraft paper gives Christmas gifts a warm, simple starting point. Stamped marks can make each parcel feel personal, whether you choose tiny snowflakes, a bold carved block or a loose pattern made with children.
Add a soft finish from these velvet bow ideas, or keep the tying simple and let the print carry the decoration.
This collection focuses on pattern and presentation. Some source projects show pale paper or printing in progress; use those details as inspiration when planning your own kraft-paper version.
1. Stamp a Loose Pattern on Reclaimed Packing Paper

Plain packing paper can become part of the gift rather than something to hide. A scattered stamp pattern works with its existing folds and slightly irregular surface. Keep enough open space between prints that the paper still feels calm once it is folded around a box. A soft ribbon makes a useful contrast to the handmade marks.
Get the tutorial: Stamp a Loose Pattern on Reclaimed Packing Paper by Almost Makes Perfect.
2. Choose Wintry Branches for a Quiet Botanical Parcel
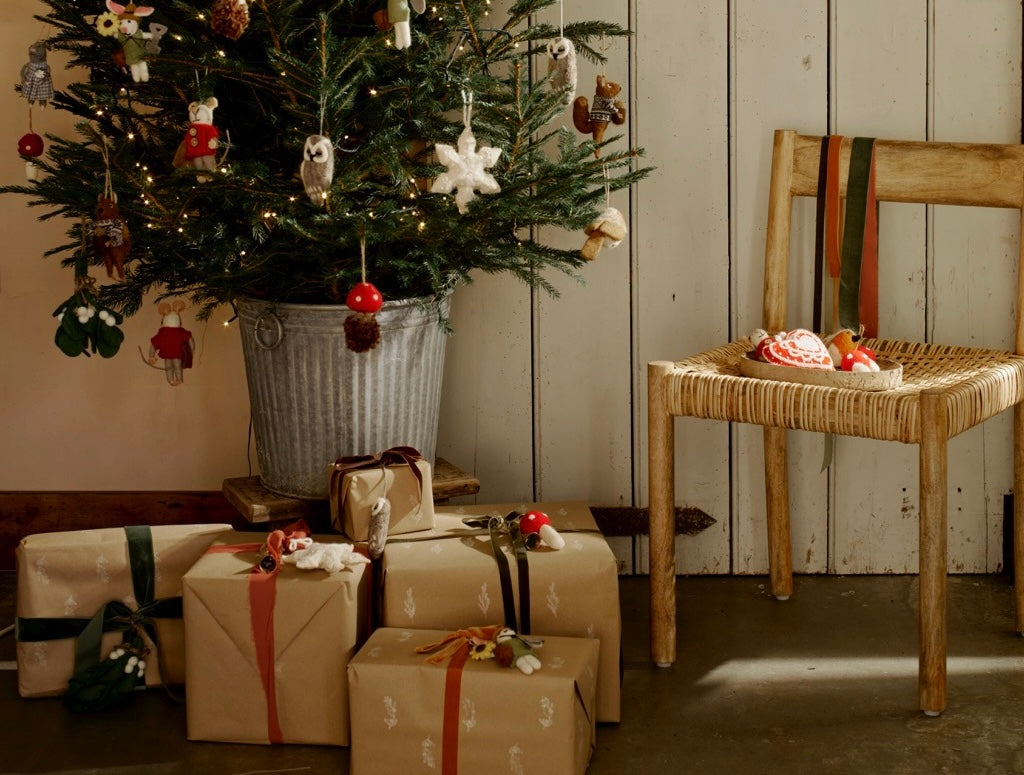
A branch motif gives kraft paper a seasonal feeling without covering it in familiar Christmas symbols. Think about the direction of the prints before wrapping: upright branches on the top face can look more deliberate than a pattern that suddenly runs sideways. Keep the finishing ribbon simple so the line work has space to remain visible.
Get the tutorial: Choose Wintry Branches for a Quiet Botanical Parcel by Ayr Barns.
3. Try a Bold Geometric Block Print

A strong repeating block can make a small parcel feel graphic and substantial. The black-and-white example shows the effect of a confident geometric pattern; on brown kraft, dark ink would create a warmer version. Align one printed edge with the top of the box, then let the rest of the pattern wrap naturally around the sides.
Get the tutorial: Try a Bold Geometric Block Print by DeSerres.
4. Build a Folk-Art Theme Around a Dala Horse

A carved horse motif offers a distinctive alternative to trees and stars. Miss Mustard Seed’s print has a folk-art character that works with simple ribbon and a small tag. Choose one main image rather than adding several unrelated Christmas stamps. When adapting the effect to kraft paper, check that the ink has enough contrast to show the carved details.
Get the tutorial: Build a Folk-Art Theme Around a Dala Horse by Miss Mustard Seed.
5. Give Snowmen a Simple Repeating Silhouette

A small snowman stamp is recognizable even when the details are pared back. The dark shapes on this brown paper make the pattern easy to read from a distance. Leave space around each figure rather than overlapping them. A handwritten tag can add the guest or recipient’s name without requiring another stamp or a second decorative motif.
Get the tutorial: Give Snowmen a Simple Repeating Silhouette by Making Manzanita.
6. Scatter Snowflakes Around a Clear Ribbon Band
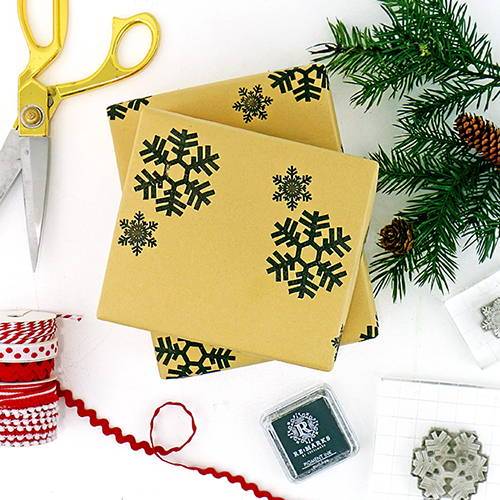
Snowflake stamps supply plenty of detail, so the rest of the parcel can stay simple. Leave a relatively clear strip where the ribbon will sit, allowing the pattern to show around it. Test a single impression on the actual kraft paper first. Fine lines sometimes need a different ink or gentler pressure than a bold solid stamp.
Get the tutorial: Scatter Snowflakes Around a Clear Ribbon Band by RubberStamps.com / Happiness is….
7. Mix Stamped Paper with a Contrasting Graphic Wrap
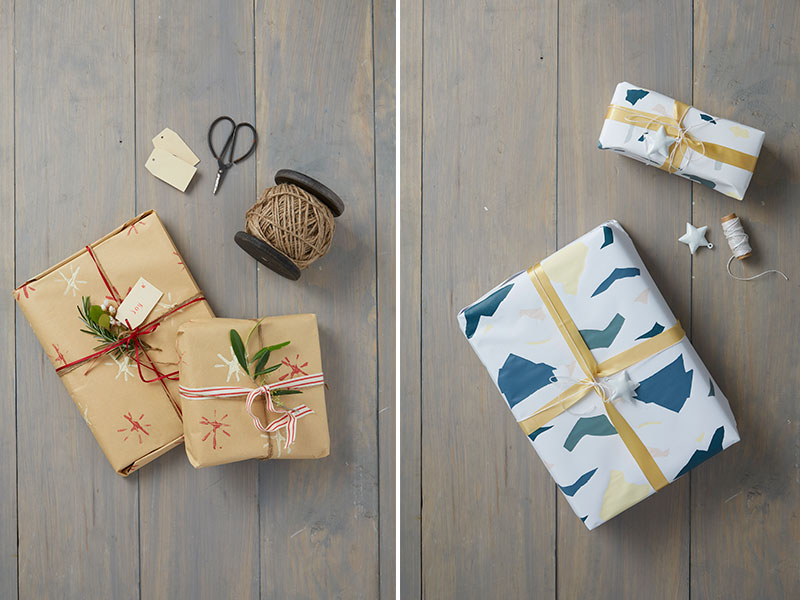
A small group of gifts can share a palette without all using the same print. The paired papers here suggest a useful approach: one parcel carries the repeated stamp, while another introduces a different graphic rhythm. Keep the ribbon or tag consistent across the group. That repeated finishing detail helps the packages feel connected under the tree.
Get the tutorial: Mix Stamped Paper with a Contrasting Graphic Wrap by Habitat by Resene.
8. Leave Space for a Large Handwritten Name

A stamped pattern does not have to cover the entire sheet. Reserve a clear panel for a large initial or handwritten name, then concentrate the marks around it. The mixed gift grouping here offers inspiration for combining personal lettering with printed decoration. This can replace a separate gift tag when you are wrapping several similar boxes for family members.
Get the tutorial: Leave Space for a Large Handwritten Name by Bunnings.
9. Use One Oversized Star as the Main Accent

One generous star can be enough for a small parcel. The simple shape is easy to recognize and leaves room for ribbon to cross the package without hiding the design. This example uses pale wrapping; adapt the placement to kraft paper with an ink that remains visible. Try the stamp on scrap paper before committing to the final sheet.
Get the tutorial: Use One Oversized Star as the Main Accent by Bunnings.
10. Coordinate Printed Paper with a Reusable Gift Bag
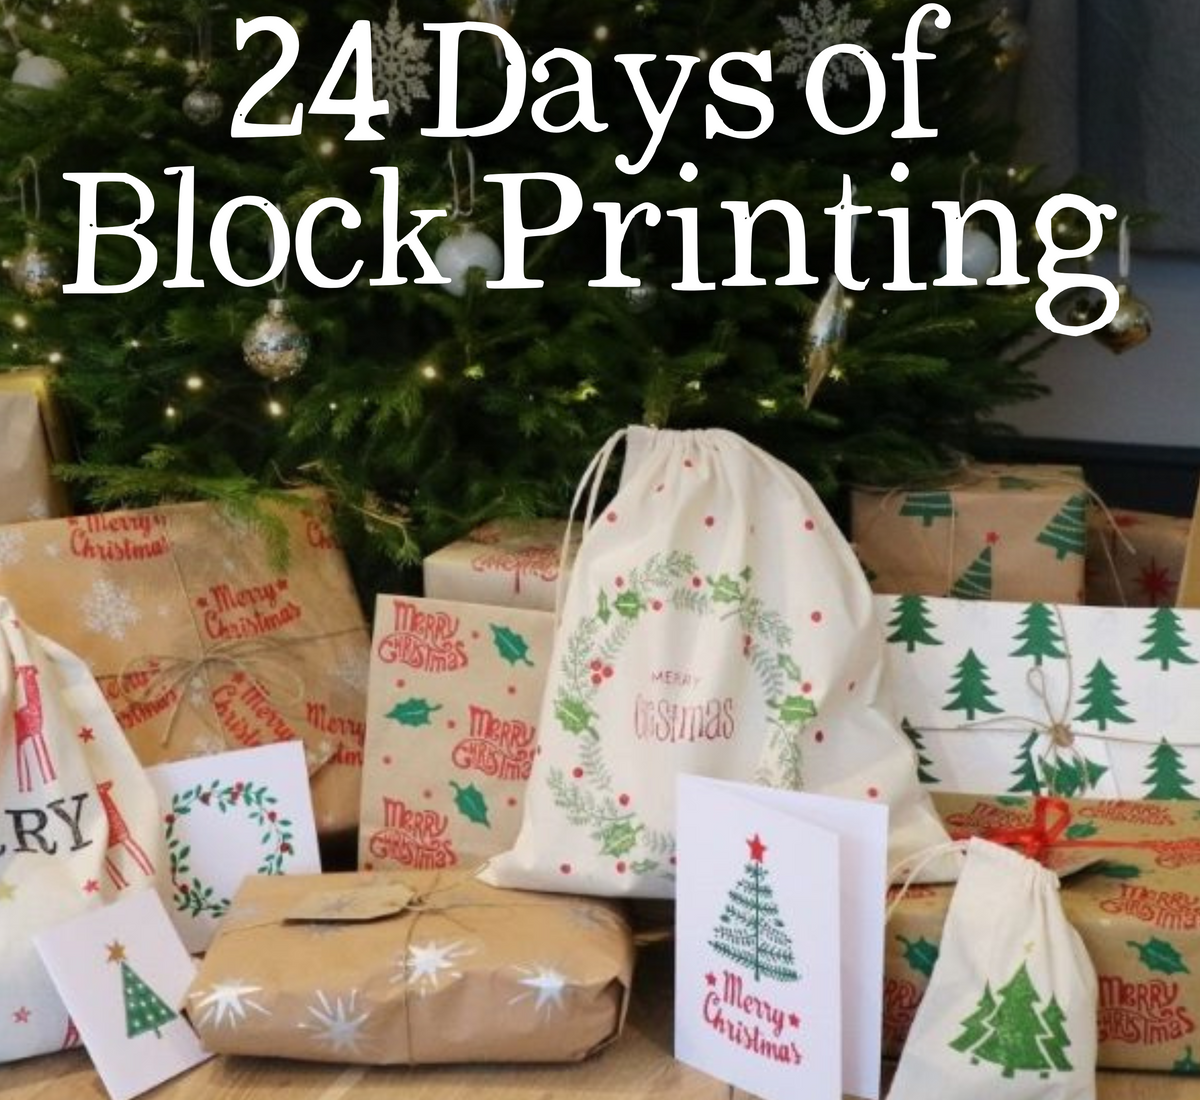
A coordinated set can include more than boxes. The block-printed gift grouping here combines paper and fabric projects, offering a way to repeat one motif across different packages. Use ink appropriate to each surface rather than assuming paper ink will wash well on fabric. Let one common pattern do the connecting work instead of matching every material exactly.
Get the tutorial: Coordinate Printed Paper with a Reusable Gift Bag by The Indian Block Print Co..
11. Let Children Create a Playful Allover Print
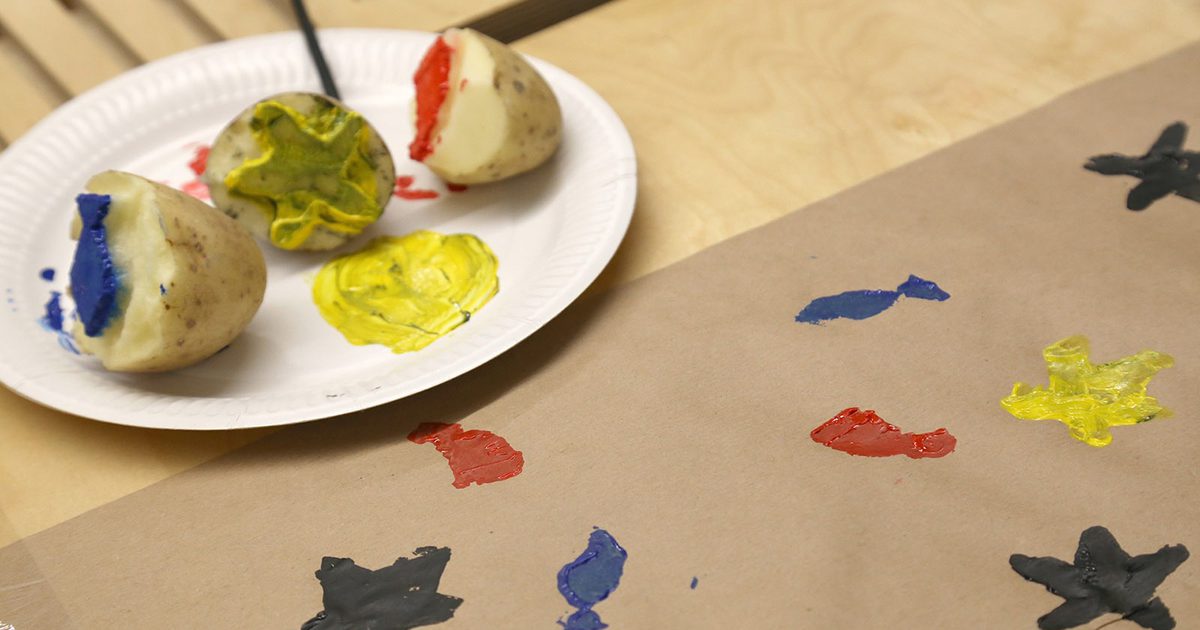
A mixed scatter of shapes can turn gift wrapping into a family activity. Lay out a manageable area of paper and let the marks stay irregular rather than correcting every gap. Adults should prepare any carved potato stamps. Once the paper is completely dry, use it with plain string so the children’s printing remains the part people notice first.
Get the tutorial: Let Children Create a Playful Allover Print by Encounter Edu.
12. Print a Repeating Poinsettia Pattern

A poinsettia block supplies a rich floral pattern that still feels unmistakably Christmas. This repeated red design shows how a single carved motif can fill a whole sheet. Keep the spacing consistent enough to create a rhythm, but allow for the small differences that come with hand printing. A plain tag will look clearer than another busy embellishment.
Get the tutorial: Print a Repeating Poinsettia Pattern by Hayley / Buff and Blue Prints via Essdee.
13. Pair a Small Leaf Stamp with Simple Dot Marks

A leaf and a dot can work together without requiring a complicated multi-part carving. The source photograph shows the small printing tools and their marks, making the combination easy to understand as a design idea. Use the leaf as the main shape and dots as supporting detail. On kraft paper, a limited two-color palette keeps the arrangement readable.
Get the tutorial: Pair a Small Leaf Stamp with Simple Dot Marks by Hayley / Buff and Blue Prints via Essdee.
14. Create a Sunburst Pattern with a Round Block

A round carved block produces a decorative rhythm that feels different from scattered stars or trees. The finished box here shows how the repeat can become the whole wrapping design. Think about the size of the box when choosing the block: a very large motif may be lost around the corners. A simple bow leaves the print in focus.
Get the tutorial: Create a Sunburst Pattern with a Round Block by Handprinted.
15. Build Holly from Separate Leaves and Berries

Separate holly shapes let you adjust the arrangement to each package rather than working with one fixed wreath stamp. Add berry-like dots only where they help the leaf groups read clearly. This source uses a pale background; the same composition can be adapted to kraft after testing the colors. Keep the clusters away from folds that would break the main shape.
Get the tutorial: Build Holly from Separate Leaves and Berries by Handprinted.
16. Arrange Circular Motifs in an Even Repeat

A circular repeat creates a more decorative, almost textile-like surface. The pale pattern on brown paper shows that a detailed stamp can remain gentle when its contrast is restrained. Keep the ribbon narrow enough to reveal several complete motifs. This is a good option when you want the wrapping to feel festive without adding greenery or an ornament on top.
Get the tutorial: Arrange Circular Motifs in an Even Repeat by Handprinted.
17. Print a Continuous Pattern Across the Sheet

A repeat block can build a connected surface rather than a collection of separate pictures. The inking stage shown here helps explain the process behind that effect. Work from a test print so you understand how the block edges meet. For the finished parcel, position the most successful area on top and save any uneven sections for small tags.
Get the tutorial: Print a Continuous Pattern Across the Sheet by Handprinted.
18. Make Fine Starbursts with a Rubber-Band Stamp

A rubber-band tool gives a starburst a different character from a solid carved star. The thin lines leave more of the brown paper visible and suit a loose scatter. Keep the amount of paint modest so the lines do not merge. This is a useful design to test on offcuts before printing a sheet large enough for a present.
Get the tutorial: Make Fine Starbursts with a Rubber-Band Stamp by Habitat by Resene.
19. Use a Handmade Snowflake Stamp for a Softer Print

A modelled snowflake stamp can give the design rounded, slightly uneven arms. The photograph shows printing in progress, with the handmade tool visible beside the marks. Let those small irregularities be part of the result. If you adapt the blue-on-white example to kraft, test the contrast first and leave the ink to dry fully before folding the paper.
Get the tutorial: Use a Handmade Snowflake Stamp for a Softer Print by Crayola.
Finish the Parcel Without Hiding the Print
Once the ink is dry, choose one finishing detail that suits the pattern. A bow, a small handmade ornament or a neat paper tag can be enough. If you are building a set of Christmas gifts, these collections offer useful details to repeat across the packages.
- Velvet Bow Ideas for Christmas Trees and Holiday Gifts
- Beaded Christmas Ornament Ideas for a Holiday Craft Night
- Hand-Painted Christmas Ornament Ideas for Beginners
Which pattern would you choose for your Christmas presents: a familiar holiday shape or something completely your own? Share your favorite idea in the comments. If you have tried stamping gift wrap, we would love to hear what you enjoyed making and any tips you would pass on.
















0 Comments