15 Hand-Painted Christmas Ornament Ideas for Beginners
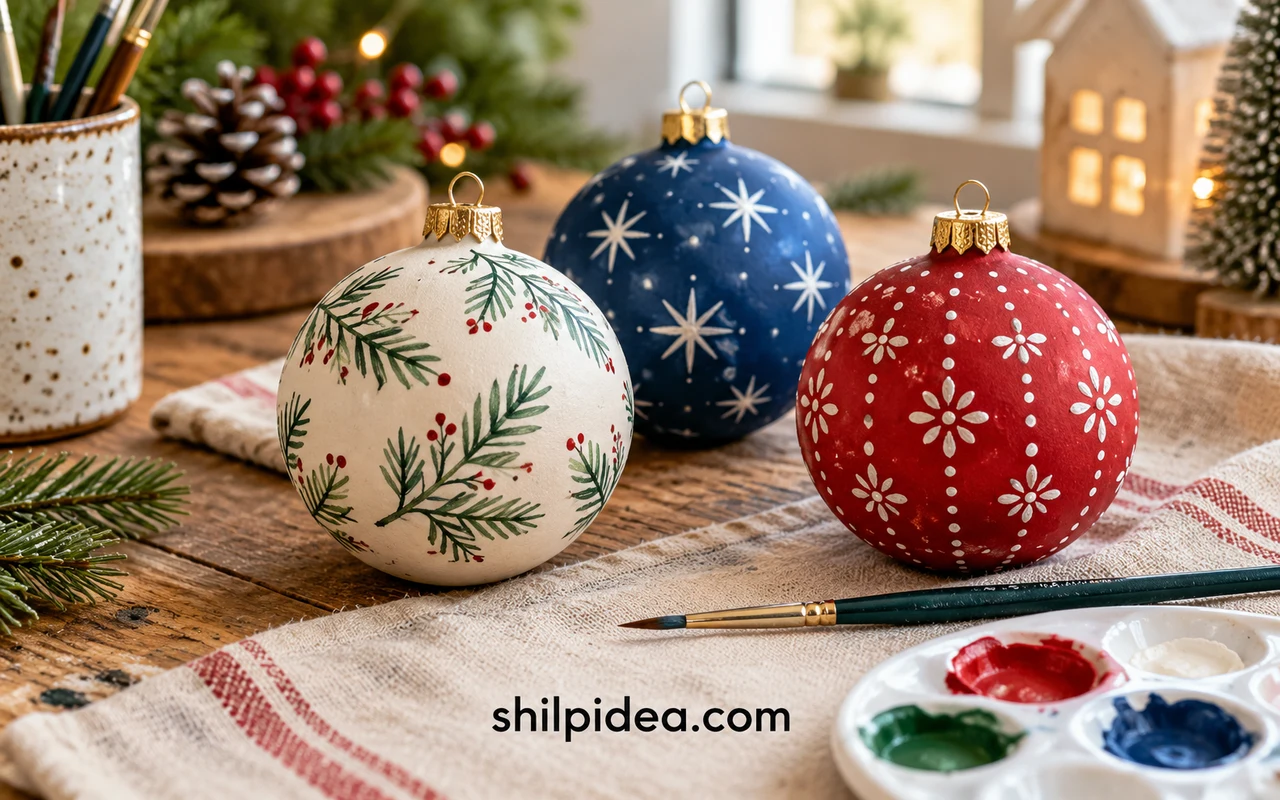
Hand-painted Christmas ornaments can begin with a few dots, short brushstrokes, or a single leaf. You do not need a complicated picture to make an ornament feel personal.
This collection brings together 15 design directions from creators, including colorful abstract patterns, botanical details, lettering, and simple metallic accents. The examples use different ornament materials, so choose paint suited to your own blank.
Start with one design on a spare ornament, let each layer dry as directed, and follow the linked project for preparation and finishing. The photographs help you compare patterns before you pick up a brush.
1. Broad Color Panels with Small Starbursts

Semigloss Design divides a round ornament into broad colored panels and adds tiny starburst marks. Large areas of paint give you a forgiving starting point before the smaller details. Choose two or three colors with enough contrast to stay readable on the tree. Turn the ornament slowly as you work, allowing the first side to dry before handling it.
2. Little Pine Sprigs on a Pale Background

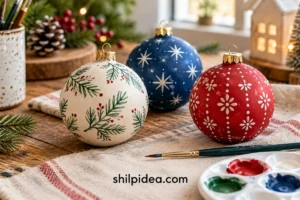
Kate Riley paints small botanical sprigs onto shaped ceramic ornaments. The repeated leaves create a pattern without needing one large central illustration. Practice a short stem and a few leaf strokes on paper first, then leave breathing room between the sprigs. A pale base makes the green details visible, especially when the ornament hangs among dark tree branches.
3. A Blended Rainbow around the Ornament
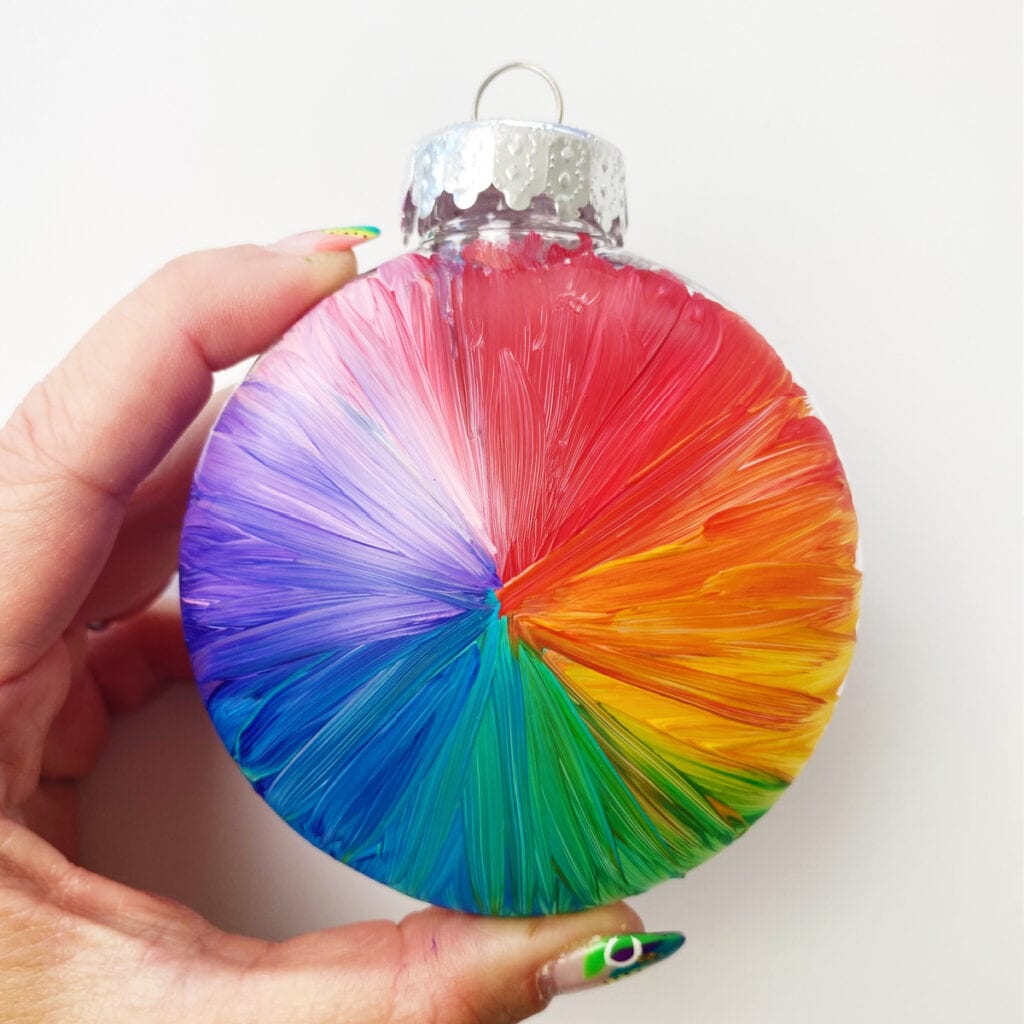
Color Made Happy’s rainbow design uses connected bands of color rather than a precise drawing. The visible brushwork gives the ornament energy, so slight variations become part of the finish. Work with neighboring colors in small areas and avoid repeatedly mixing every shade together. Set up a safe drying position before you start, since a round surface is awkward to put down.
4. A Personalized Name with a Painted Border
Oriental Trading’s example combines a name with a light botanical border. Leave the lettering area clear while planning the rest of the design. A short name or initial is easier to space neatly than a long message. Try the layout on paper at the same size first, and let the base coat dry before adding fine lines or lettering.
5. A Retro Color-Blocked Bauble

Minted’s retro-inspired ornaments use bold blocks of color to highlight the shape of the bauble. This is a good direction when you enjoy painting larger areas more than tiny decorative marks. Select a limited palette and let one section dry before working beside it. The result can coordinate with small paper Christmas trees in matching colors.
6. Dot Patterns with a Clear Center

Cindy H. Yue’s dotted ornaments turn a repeated mark into an intricate-looking pattern. Begin with a small central group, then add a simple ring rather than attempting the most detailed example immediately. Test how much paint your tool holds on a scrap surface. Leave time between neighboring dots so you do not accidentally drag one wet mark into another.
7. Warm Leaves on a Dark Base

DIY in Progress paints warm orange and yellow foliage against a dark ornament. The contrast lets a few leaf shapes make a strong impression. Use a small brush and keep the spacing relaxed, rather than trying to cover every patch of the background. Choose a finish appropriate for the ornament material, and avoid touching the painted surface until it is dry.
8. A Few Gold Stars on Wide Stripes
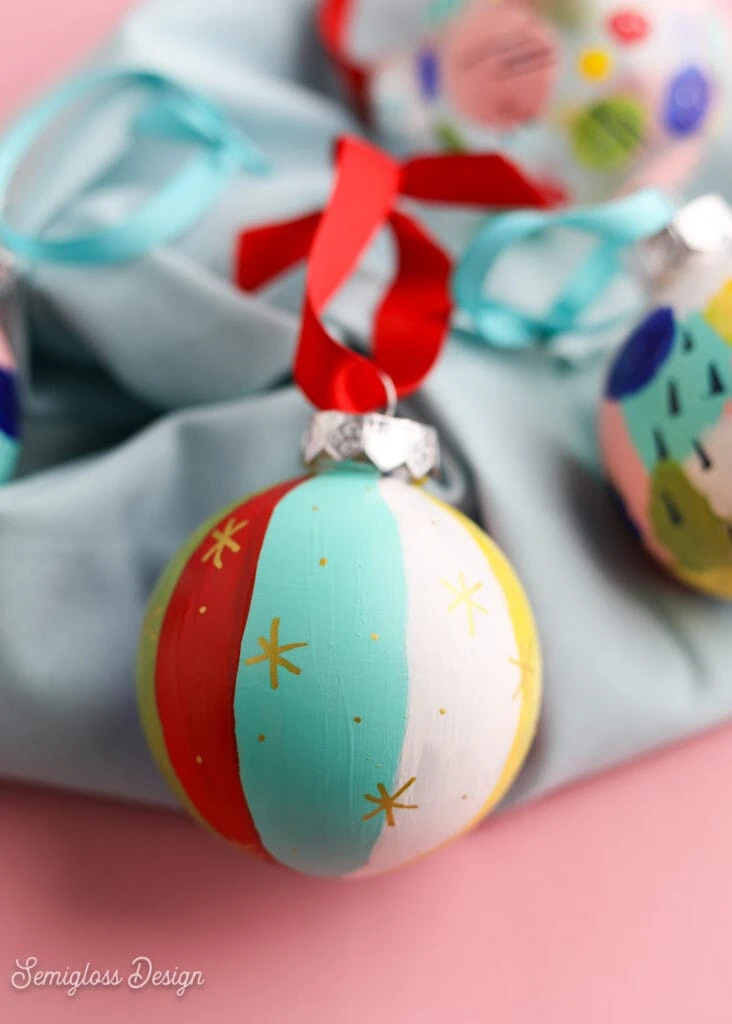
A broad striped background can support just a handful of small gold stars. Semigloss Design’s example keeps the marks separate so they remain readable. Plan where the stars will sit before adding them, especially near a strong color boundary. A fine paint pen suited to the surface can offer more control if you find a tiny brush difficult to handle.
9. Loose Abstract Strokes on Shaped Ceramics

Centsational Style lets the ornament’s curved shape and irregular brushstrokes share the attention. You can begin with two colors and a few generous marks instead of a tightly repeated pattern. Leave some background visible so the strokes do not merge into one solid coat. Choose a ceramic blank intended for craft painting, and follow the paint maker’s finishing instructions.
10. A Raised Mandala-Inspired Detail

Isoscella’s textured ornament adds raised lines and dots to a simple base. It is a more patient option for a beginner who enjoys careful repetition. Try a small, uncomplicated motif before copying a full circular pattern. Let the dimensional medium dry undisturbed, and follow the original project for the order of the raised decoration and the painted finish.
11. Colorful Hearts on Clear Glass

Plaid’s project includes a heart motif painted on the outside of a clear ornament. The transparent background leaves the bright marks light and playful. Use paint suitable for glass and check its cleaning and curing directions before starting. Hold the ornament at the cap or support it securely so your fingers do not smudge a freshly painted section.
12. Horizontal Stripes with a Few Dots
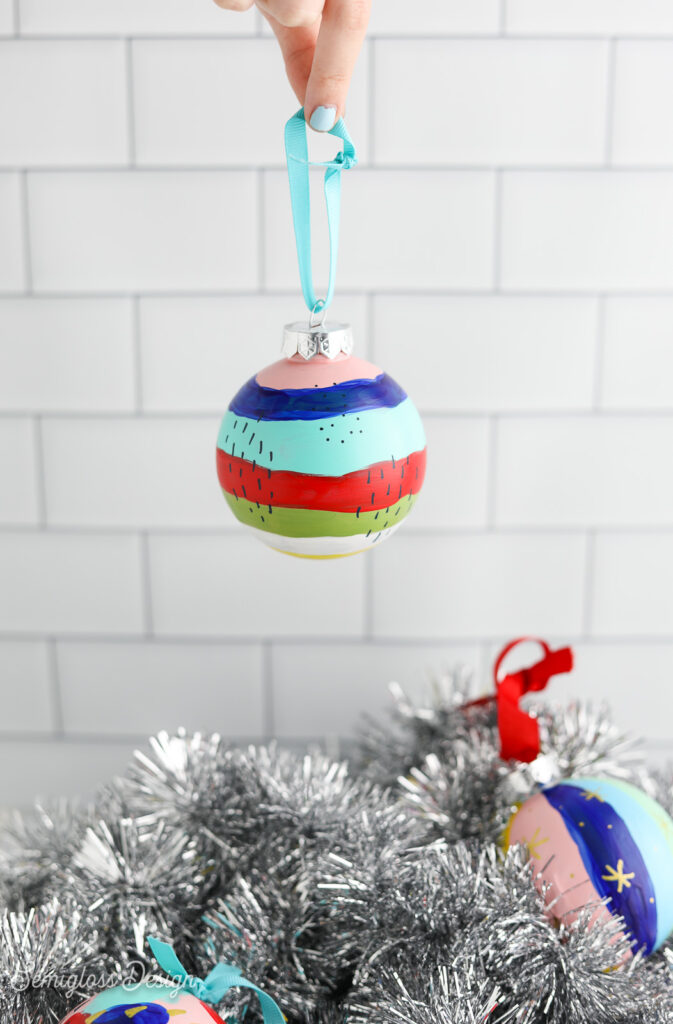
Semigloss Design’s narrow striped ornament shows how a basic band can become decorative with a few contrasting dots. Rotate the ornament gently while painting, and keep a small gap between colors if neat edges feel difficult. Slightly varied stripe widths can look intentional when the palette stays consistent. Add the dotted details after the bands have dried fully.
13. Small Painted Flowers beside an Initial
Oriental Trading builds tiny flowers from simple rounded marks, then adds lighter centers. This is a useful way to decorate a personalized ornament without needing realistic petals. Keep the flower group to one side of the lettering so the name remains easy to read. Try a single flower first, and add a second only if the composition needs it.
14. Abstract Color with a Little Metallic Shine

Kate Riley adds metallic accents to colorful painted ceramic ornaments. A small amount of shine can define an edge or highlight one area without covering the hand-painted pattern. Make the painted design satisfying on its own before adding the accent. Follow the original guide if you choose leaf or glitter, since those finishes use different materials from ordinary metallic paint.
15. Scattered Brushstroke Confetti
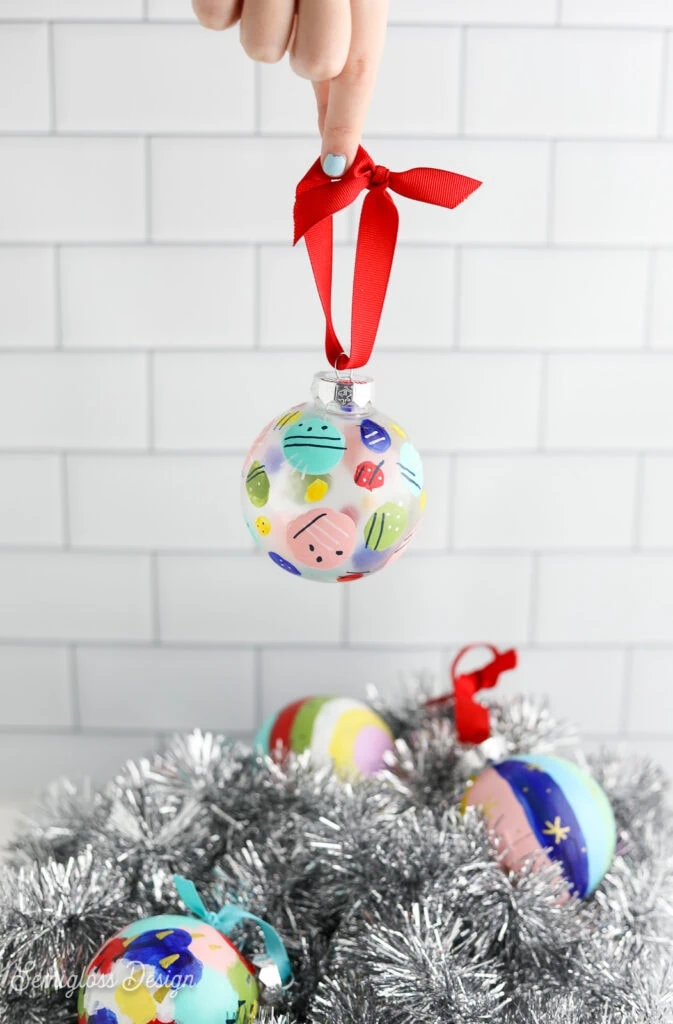
Semigloss Design’s playful abstract marks offer a relaxed alternative to evenly spaced dots or stripes. Vary the direction of short strokes while keeping the color selection small enough to feel connected. Leave a little blank space between groups of marks. A practice ornament is useful for judging how the colors look together once dry and hanging on the tree.
Choose One Pattern and Make It Your Own
A small group of ornaments can feel connected through one repeated color, ribbon, or mark. Make the simplest design first and let it dry before deciding whether the next one needs more detail. Carry the same palette into paper decorations and handmade holiday cards, so your painted pieces become part of a thoughtful holiday display rather than an isolated craft:
- Paper Bag Snowflakes for Christmas Decor
- Paper Christmas Trees for Small Spaces
- Christmas Gift Wrapping Ideas with Jute
















0 Comments