20 Craft Foam Project Ideas for Colorful Decorations
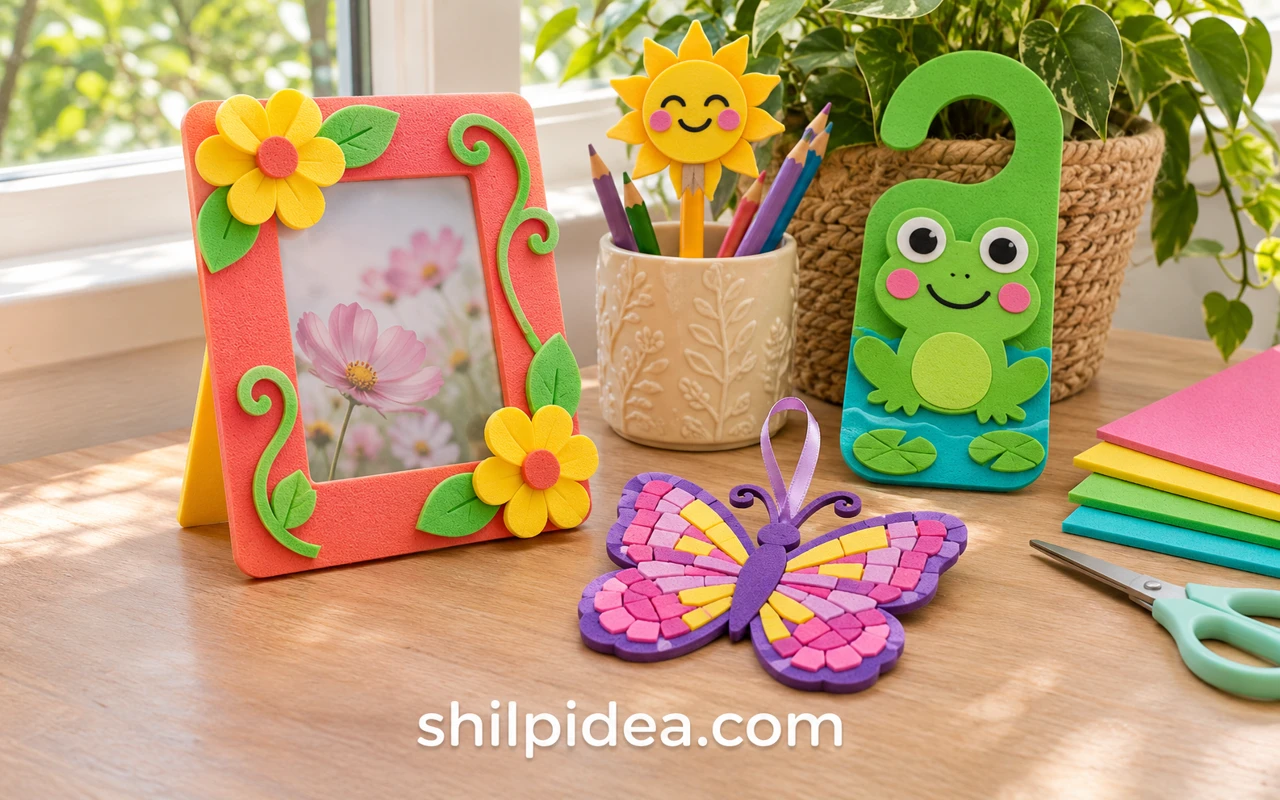
Craft foam makes it easy to add color and a little dimension to handmade decorations. Flat sheets can become layered pictures, cheerful desk accents or small party details without needing a large workspace.
Pair these craft foam project ideas with popsicle stick crafts when you want simple supports and display bases.
These 20 examples include flat shapes, wearable party accents and more involved assembled pieces. Browse our button craft ideas for complementary details, then choose a project suited to the tools and supervision available.
1. Foam Stamps for Handmade Gift Paper

Small foam shapes on bottle-cap handles can turn plain paper into a personalized wrapping sheet or card background. The raised design is the useful part: keep it simple enough to print clearly. Test the pattern on scrap paper before working on the final piece, especially with letters, which need to face the correct direction on the finished print.
Get the tutorial: Foam Stamps for Handmade Gift Paper by FirstPalette.
2. Cheerful Pencil Toppers for a Desk Display

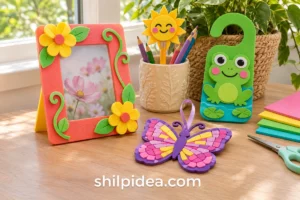
A cup of pencils becomes a small display when the tops carry suns, stars or playful faces. Layered foam provides the shape while small details supply character. Keep decorations light and leave the pencil usable. Choose drawn features instead of loose beads for younger children, and let an adult handle any pointed tool needed to make the central opening.
Get the tutorial: Cheerful Pencil Toppers for a Desk Display by FirstPalette.
3. A Colorful Crown for a Party Place Setting

A foam crown can work as both a party-table accent and a wearable keepsake. Large simple points leave room for buttons, circles or self-adhesive shapes. Measure the band for the intended wearer before decorating it, keeping the join clear. For more activity-table inspiration, these creative kids activities offer other ways to make the preparation part of the celebration.
Get the tutorial: A Colorful Crown for a Party Place Setting by FirstPalette.
4. Geometric Pictures Made from Foam Offcuts

Straight strips and curved pieces let children build pictures without drawing every outline. Arrange the pieces before gluing so the composition can change as new shapes appear. This is a useful approach for using leftovers from larger projects. Keep the finished work on a backing sheet rather than leaving small pieces loose around a shared play or dining area.
Get the tutorial: Geometric Pictures Made from Foam Offcuts by FirstPalette.
5. A Small Stocking with Contrasting Edges

Two foam stocking shapes can become a lightweight hanging decoration with a contrasting cuff and simple seasonal details. Treat it as a decorative pocket rather than a holder for heavy gifts. Check the creator’s joining method before starting, and keep the hanging loop secure. Oversized surface shapes remain clearer than a crowded collection of tiny embellishments when viewed on a door or branch.
Get the tutorial: A Small Stocking with Contrasting Edges by FirstPalette.
6. Superhero Cuffs with Bold Emblems

A painted cardboard cuff provides a clear background for a foam star or another simple emblem. This makes a playful costume detail and a colorful addition to a party activity table. Keep the fit comfortable, with no tight fastening around the wrist. Make the main emblem from a contrasting color and let that one shape carry the design rather than adding layers everywhere.
Get the tutorial: Superhero Cuffs with Bold Emblems by FirstPalette.
7. A Flower-Trimmed Photo Frame

A plain foam frame is easy to personalize with flowers and a few contrasting accents. Keep the opening slightly smaller than the photograph so its edges stay covered, and test the arrangement before attaching the details. These cardboard photo frames offer a different backing approach if your foam needs more support. Keep glue away from the visible photo area.
Get the tutorial: A Flower-Trimmed Photo Frame by This Glorious Life.
8. A Foam Flower Wreath for Indoor Display

Large layered foam petals create a single oversized flower on a wreath base, with a very different effect from a small stem. Use the original tutorial to understand the base and attachment method rather than assuming the visible flowers support themselves. Choose a limited palette and keep the petal spacing consistent for a more considered arrangement. Keep the wreath away from heat and check the hanging point before displaying it.
Get the tutorial: A Foam Flower Wreath for Indoor Display by Grace Monroe Home.
9. A Decorated Visor for a Craft Party

A foam visor gives children a broad area for playful shapes while leaving the face clear. Plan the cutout and fit before covering the surface with decorations. Flat details are easier to manage than heavy dangling pieces. Set out a few coordinated colors so everyone can make a different design that still looks connected when the finished visors are displayed together.
Get the tutorial: A Decorated Visor for a Craft Party by FirstPalette.
10. A Heart-Wing Butterfly for a Display Board
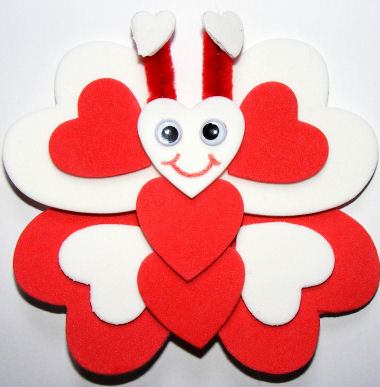
Layered hearts make an instantly recognizable butterfly, with a smaller body connecting the wings. The contrasting layers provide most of the detail, so a simple face is enough. The original project uses a magnet; for homes with young children, a firmly attached display-board decoration avoids adding a loose small magnet. Keep all small craft pieces away from children who may mouth them.
Get the tutorial: A Heart-Wing Butterfly for a Display Board by Activity Village.
11. Flowers Built from Overlapping Hearts

Heart-shaped petals produce a rounded flower without needing to cut a complicated silhouette. Arrange the petals around the center before gluing, leaving the shape easy to recognize. Use the flowers as card fronts or lightweight display accents. A plain background makes the overlapping edges clearer, particularly when the petals and center use a similar shade of pink or red.
Get the tutorial: Flowers Built from Overlapping Hearts by Activity Village.
12. A Friendly Heart Character with Flexible Limbs
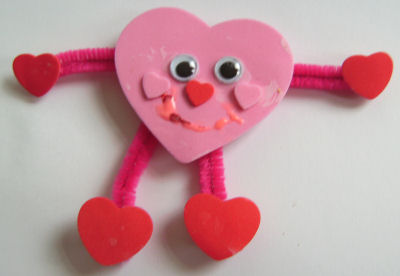
A large heart becomes a playful character when paired with a face and narrow limbs. It suits the front of a card, a small hanging decoration or a display-board accent. Keep the body larger than the hands and feet so the outline remains readable. Fold or cover any exposed pipe-cleaner wire ends, and avoid long loops around young children.
Get the tutorial: A Friendly Heart Character with Flexible Limbs by Activity Village.
13. A Gingerbread Shape with Paint-Like Details

A foam gingerbread figure gives children a decorating surface that can be kept after the activity. Puffy-looking lines, painted details and a simple hanging loop give the shape its character. This is a decoration, not food or a toy for chewing. Leave any applied paint or glue to dry fully before handling, and store the finished figure flat between seasons.
Get the tutorial: A Gingerbread Shape with Paint-Like Details by Activity Village.
14. A Rounded Ornament Made from Glitter Strips

Curved strips turn flat glitter foam into a three-dimensional hanging ornament. The alternating colors make the construction visible, so tidy spacing matters more than extra embellishments. Follow the original video for its internal support and joining sequence. Adult handling is appropriate for hot glue and cutting tools; this is a more involved option than simply sticking flat shapes onto a backing.
Watch the tutorial: A Rounded Ornament Made from Glitter Strips by The Little Crafties.
15. A Personalized Award Medal

A foam circle and a broad ribbon create a decorative award that can be adapted to a craft party or family game. The central panel leaves room for a short name, number or cheerful message. Keep the wording readable and avoid adding heavy decorations. For younger children, display the medal on a board instead of using a long neck ribbon.
Get the tutorial: A Personalized Award Medal by Activity Village.
16. A Star Necklace for Dress-Up Displays

A large star and a few simple accents can become a bright costume accessory. The foam option offers a lightweight alternative to a heavy pendant, but the cord still needs thoughtful use. Keep dress-up accessories supervised and remove them for sleep or active climbing. Choose contrasting shapes with enough open space around the star so the main outline remains the focal point.
Get the tutorial: A Star Necklace for Dress-Up Displays by FirstPalette.
17. A Ribbon-Threaded Flower Basket

A flat flower-shaped piece takes on a shallow basket form when ribbon gathers the edges. The construction offers a useful contrast to layered flat decorations. Treat the result as a small decorative container for light, dry items, not a load-bearing basket. Use the original video for the slot positions and gathering sequence, and let any handle attachments set before moving it.
Watch the tutorial: A Ribbon-Threaded Flower Basket by The Little Crafties.
18. A Star Wand with Flowing Ribbon
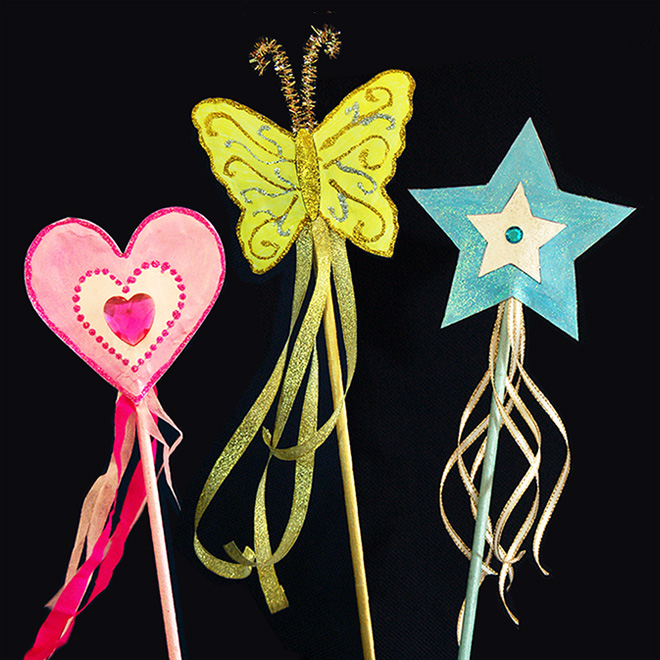
The pictured paper wand offers a shape-and-ribbon reference that you can adapt with craft foam for a lightweight party prop. The star should be large enough to cover the join neatly. Round off rough stick edges and keep the finished wand for supervised pretend play. Avoid sharp points or long trailing ribbons, and check that the top cannot pull away easily.
See the paper reference: A Star Wand with Flowing Ribbon by FirstPalette.
19. A Flower Bouquet with Photo Centers

Small photographs inside foam flowers turn a bouquet into a personal desk or shelf display. Keep each image crop simple so faces remain visible at the smaller scale. A stable container matters as much as the flowers themselves; arrange the stems before adding decorative filler. Our flower centerpiece ideas can help you compare the finished arrangement’s height and proportions.
Get the tutorial: A Flower Bouquet with Photo Centers by Teaching Tiny Tots.
20. Folded Glitter Butterflies for Hair Accessories

Folded foam sections give these butterflies dimension, rather than relying on a single flat outline. The glitter surface makes them noticeable even at a small scale. Follow VIKI Studio DIY’s video for the folding and attachment details, and check the chosen clip or band before use. Keep sharp clip edges, loose decorative beads and any hot-glue work under adult control.
Watch the tutorial: Folded Glitter Butterflies for Hair Accessories by VIKI Studio DIY.
Choose the Next Detail for Your Craft Table
Pick one foam project and gather only the supplies it needs before adding more ideas to the table. Use scissors and adhesives suited to the material, leave glued pieces to set, and let adults handle blades and hot glue. The projects below offer other ways to make frames, decorate small objects or use leftover supplies with children.
- Popsicle Stick Projects for Colorful Displays
- Colorful Button Art for Creative Kids
- Cardboard Photo Frames for Personal Displays
- Creative Activities to Try with Kids
- Playful Projects from Recycled Materials
What would you make first with a few colorful foam sheets? Share your project choice or a decoration you would adapt in the comments. If you already craft with foam, your tips for neat cutting, simple joins or using small offcuts are welcome too.





















0 Comments