19 Small-Space Winter Craft Corner Organization Ideas
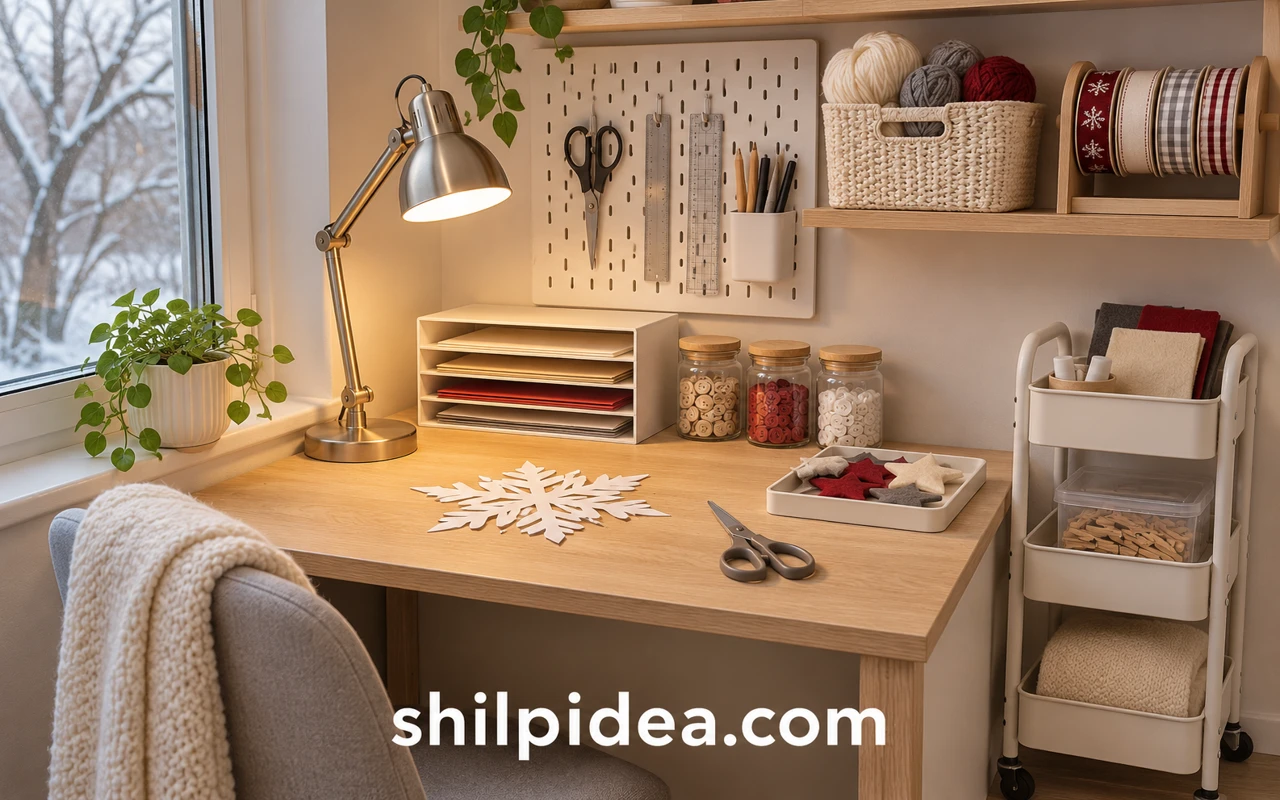
A winter craft corner needs room to work as well as places to store supplies. A few clear zones can keep paper, felt, ribbon and yarn from taking over a shared desk.
Start with small storage shelves and decide what should stay within reach.
These 19 ideas use year-round storage photographs as references for winter project supplies. Pair them with covered tub organizers when you need portable containers, then adapt only the pieces that suit your space.
1. Plan a Closet Around the Supplies You Actually Use
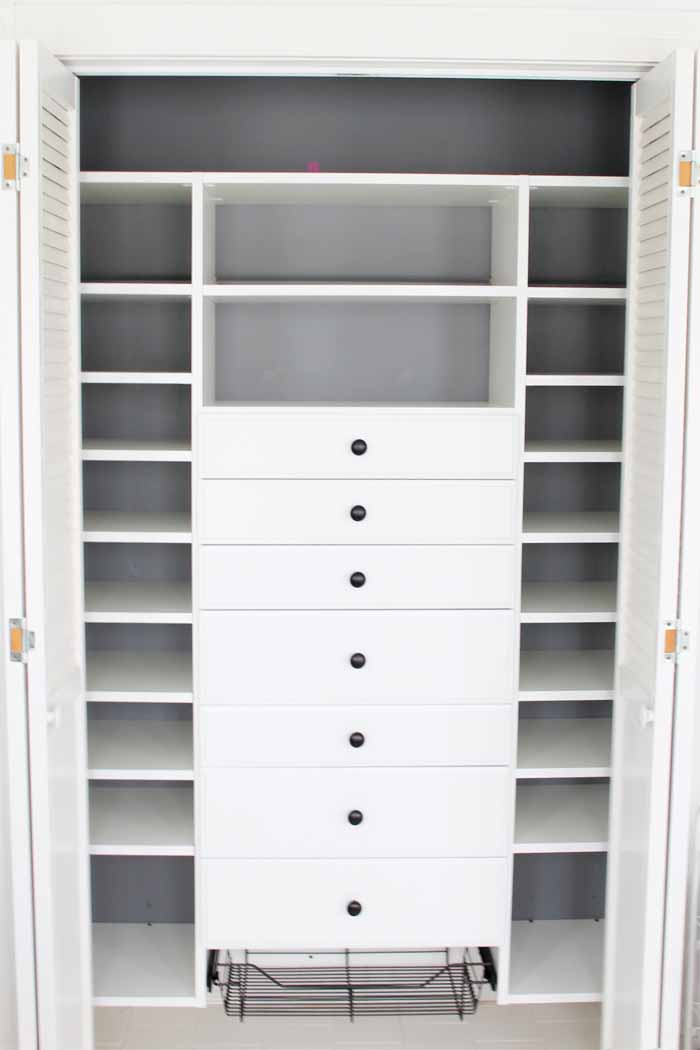
An empty fitted closet makes the storage layout easier to see before the supplies arrive. Take that planning approach even if you only have one cupboard: measure paper, fabric stacks and the tallest containers before adding shelves. For winter crafting, leave the current project at an easy height and place spare seasonal stock elsewhere. A full closet system is a reference, not a requirement for a small corner.
2. Label Flat Boxes by Winter Project
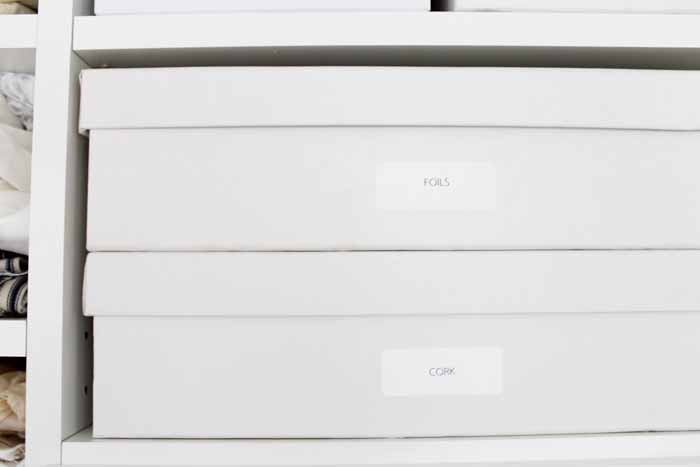
Shallow labeled boxes keep supplies together without turning a shelf into an unstructured pile. Sort by a real project, such as felt ornaments or paper snowflakes, rather than creating a box for every possible material. Keep the label on the side you see when the box is stored. Leave enough room to lift it out without moving a tower of unrelated containers.
3. Keep Buttons Visible in Small Jars
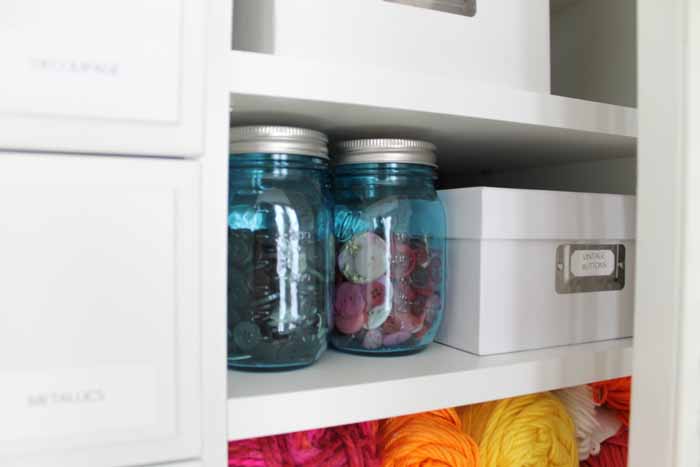
Clear jars make color and quantity easy to judge before opening them. They work for buttons or other small decorative pieces used in winter sewing and gift projects. Keep only the most-used jars near the work surface and store the rest securely. Where children share the area, choose suitable unbreakable containers and keep small contents and lids beyond the reach of children who may mouth them.
4. Fold Fabric to Fit One Shelf Depth
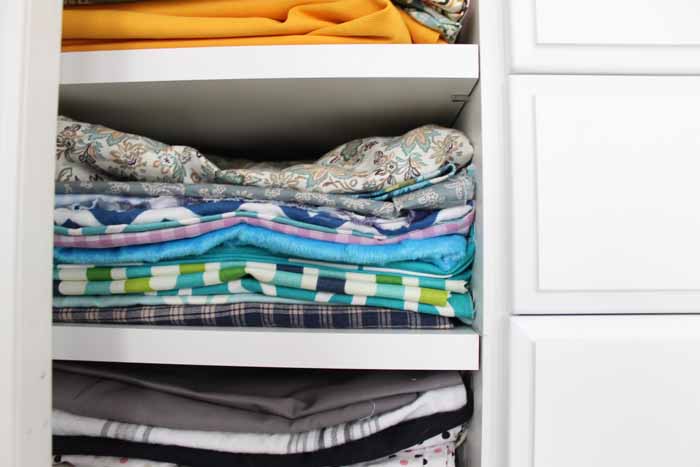
A consistent folded size lets you see several fabric choices at once. For fleece scraps, felt sheets or lining fabric, choose a fold that fits the shelf rather than forcing every piece into the same bulky bundle. Stack loosely enough to remove one piece without pulling out the rest. Our wooden storage shelves provide other shelf formats to compare with your available space.
5. Use a Shallow Drawer for Craft Paint
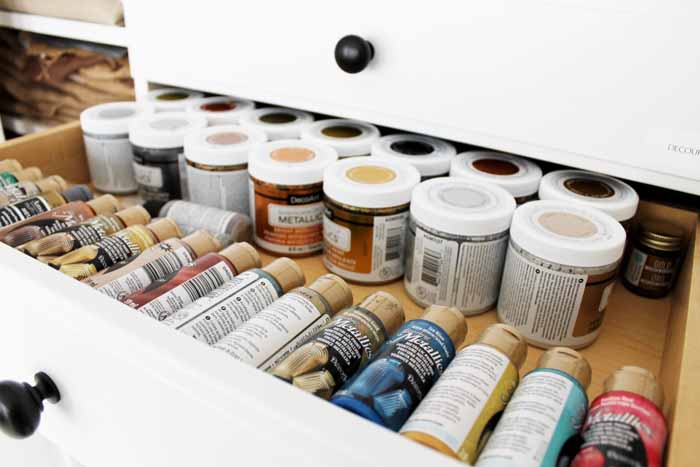
A shallow drawer keeps small paint bottles together while leaving the worktop available. Arrange bottles so the color labels or cap marks can be read, then return each one after a project. Before winter gift-making begins, check that lids close properly and remove unusable supplies. Follow the storage conditions on the product label; a convenient drawer beside a heater or cold window may be the wrong location.
6. Give Glitter and Small Bottles Separate Compartments
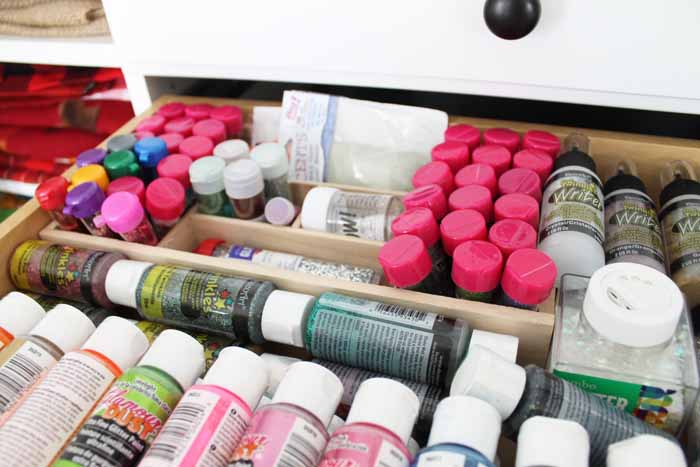
Dividers stop small bottles from sliding into one mixed pile. The same approach can separate glitter glue, tiny embellishment containers and other finishing supplies used on seasonal decorations. Keep lids firmly closed and avoid open loose glitter on a shared desk. Choose the divider layout around the actual bottle sizes, leaving room for your fingers to lift out one item without disturbing its neighbors.
7. Hang a Small Bag for Each In-Progress Project
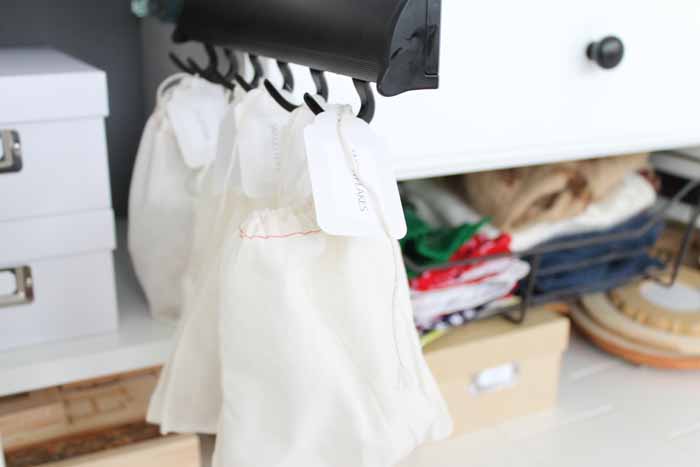
A hanging bag can hold one modest project that needs to leave the desk between sessions. Use it for a felt ornament set or lightweight fabric pieces, keeping sharp tools in a separate secure holder. Label the project so it does not become an anonymous bag of scraps. Check the hook and storage system’s load limit before filling several bags on the same rail.
8. Reserve High Shelves for Infrequent Supplies
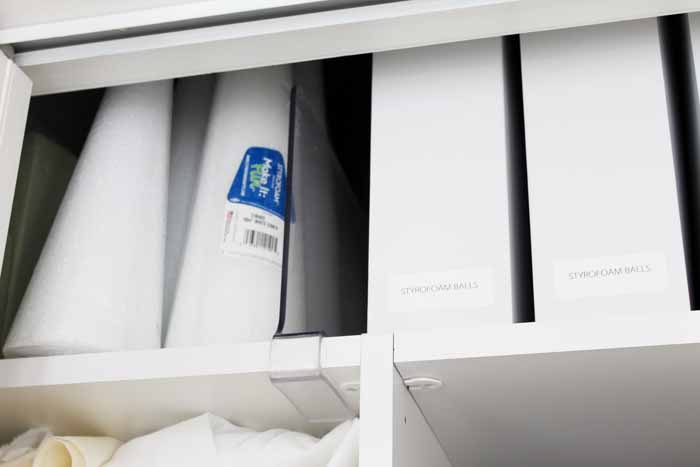
The top shelf is useful for light, less frequently needed supplies that would otherwise occupy the working area. Store surplus gift bags or out-of-season decorations there, while leaving current winter materials within comfortable reach. Keep heavy items lower and use a stable step stool when needed. Group high-shelf contents in containers that can be lifted safely rather than balancing loose pieces above the desk.
9. Roll the Current Supplies Beside Your Chair

A compact cart makes a craft corner easier to share with another room function. Keep the current project on top, frequently used supplies in the middle and suitable heavier items lower down. Avoid loading the handle with loose bags that can catch as the cart moves. The aim is a mobile work kit that can park neatly, not a second overflowing cupboard on wheels.
10. Suspend Thin Packs from a Short Rail

Clear hanging packs make flat embellishments visible without laying them across the desk. This can work for seasonal stickers, die cuts or lightweight paper pieces. Keep similar sizes together so one pack does not disappear behind a much larger one. Leave enough space to slide and remove the hangers, and confirm that the rail and fasteners suit the wall and total load.
11. Move Everyday Tools onto a Pegboard

A pegboard gives scissors, rulers and small containers a home above the work surface. You can borrow a small section of this larger studio arrangement rather than covering a whole wall. Keep only frequently used tools on display and leave the rest in drawers. When paper snowflake cutting begins, the cleared desk becomes more useful than another row of decorative storage containers.
12. Group Ribbon Spools on Removable Dowels

A ribbon rack makes different widths and colors easy to compare while wrapping gifts. Removable dowels matter because an empty spool eventually needs replacing. Keep ribbon ends controlled without winding them tightly around other rolls. Measure the largest spool before building or buying a holder, and check whether a shallow shelf or a portable box would fit your small space better than a wall-mounted rack.
13. Store Paper Flat in Narrow Sorting Slots

Closely spaced horizontal slots keep sheets visible without requiring a stack to be lifted each time. Separate full sheets from usable offcuts and reserve one slot for the current project palette. This is helpful when cutting several paper decorations in the same colors. These paper bag snowflakes are one seasonal project to plan before deciding how much paper needs to stay within reach.
14. Light the Work Area Without Filling It

Lighting beneath a shelf can improve the view of small cutting and stitching tasks while leaving the desk clear. Treat this photographed installation as a layout reference and follow the current light manufacturer’s instructions. Use an appropriate ready-made system, manage cords away from cutting tools and keep paper clear of heat-producing fittings. Electrical changes belong with a qualified professional rather than an improvised craft-room installation.
15. Put Project Plans on a Compact Wall Board

A small planning board can hold measurements, a short supply list and the next task without spreading loose notes over the desk. The shuttered example provides a larger reference that can be scaled down to a clipboard or compact board. Keep only current winter projects visible. A short plan is easier to act on than a wall covered in every idea you might eventually try.
16. Combine Closed Drawers with Open Baskets

A cube unit can hold several storage types within one furniture footprint. Drawers hide small mixed supplies, while baskets suit soft yarn or larger fabric bundles. Choose containers that slide out easily and keep the front clear of the chair’s path. Anchor furniture as directed and check each insert’s limits. The matching exterior matters less than whether each section has a useful, clearly defined job.
17. Divide the Everyday Drawer into Small Zones

Simple drawer compartments make pens, washi tape and small tools easier to return after a session. Fit the layout to your hand movements: the item used most often should be easiest to reach. Keep blades and needles secured separately when children use the same desk. For a handmade option, popsicle stick organizers offer small-scale ways to think about sorting supplies.
18. Borrow Storage Beneath the Worktop

The larger studio table shows how storage and a usable surface can share the same footprint. For a small corner, borrow one side of the idea with a suitable drawer unit or shelving support, while preserving legroom. Do not fill the entire underside with bins. You need space to sit comfortably, move the chair and reach the supplies without repeatedly lifting the tabletop contents.
19. Create a Separate Spot for Larger Preparation Tasks

A second preparation surface can help when cutting larger paper, laying out fabric or organizing pieces before assembly. A small home may need a folding table used briefly instead of a permanent standing station. Check its stability and working height, then clear it after the task. Keep sewing and cutting tools away from an active household route, especially when other people share the room.
Put the Cleared Space to Work
Choose one storage change that will make your next session easier, then test it with a real project before adding more containers. Keep a clear area for making, a secure home for tools and a simple way to put unfinished work aside. These related projects and organizer ideas can help you decide which supplies deserve the closest space.
- Fabric-Covered Tubs for Portable Craft Storage
- Popsicle Stick Organizers for Your Desk
- Plastic Bottle Organizers for Small Supplies
- Paper Bag Snowflakes for Winter Displays
- Hand-Stitched Felt Stars for Seasonal Decorating
Which supply takes over your craft corner first: paper, ribbon, fabric or tiny embellishments? Tell us in the comments what you would give a dedicated home. If a small storage change has already made your winter crafting easier, share the detail that helped you keep using it.




























0 Comments