How to Organize a Tiny Entryway with a Wall-Mounted Mail Pocket
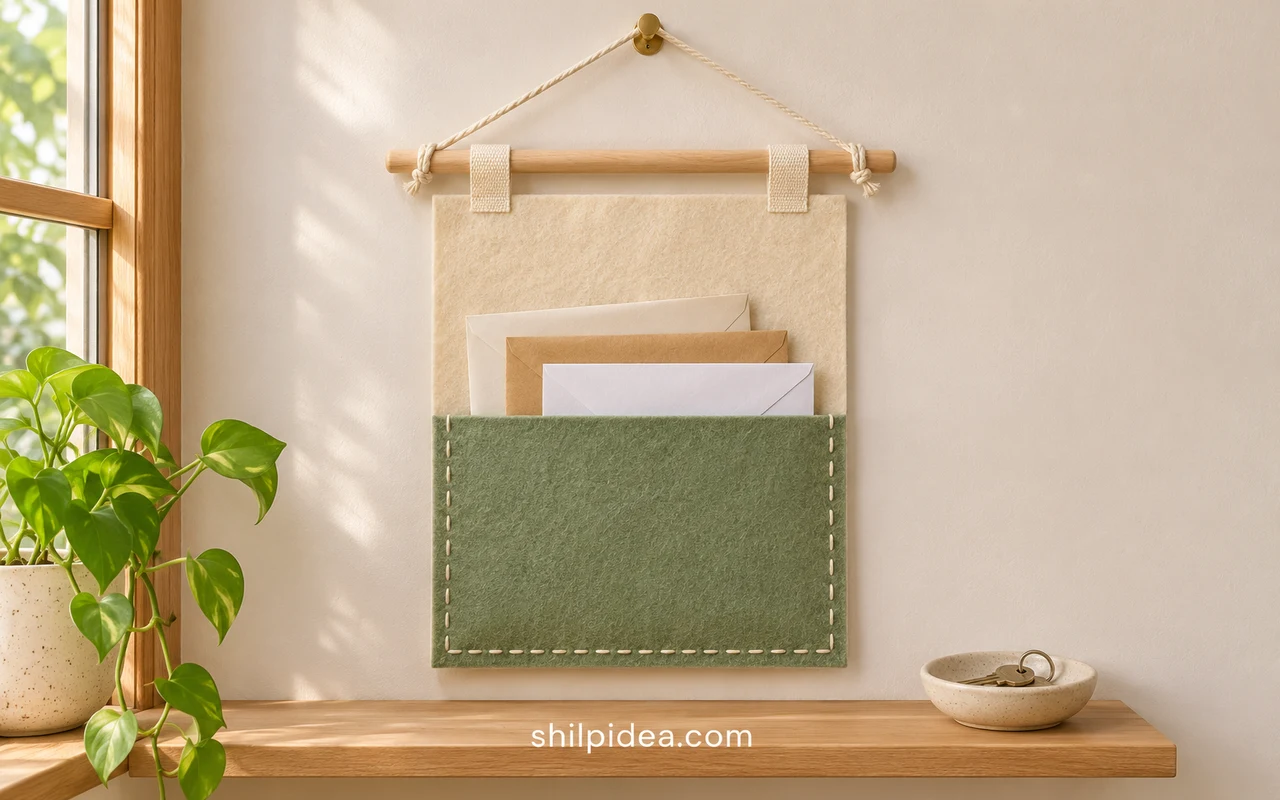
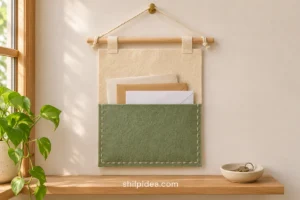
A wall-mounted mail pocket gives incoming envelopes a home without taking over a narrow console or kitchen counter. This simple felt version hangs from a wooden dowel and holds a small batch of papers awaiting attention.
Pair it with these small entryway ideas when floor space is limited. A single open pocket keeps the daily drop-off routine easy to remember.
The guide covers cutting, hand stitching, hanging and sorting. For coats and shoes, explore narrow mudroom storage alongside this lightweight paper station.
Materials and Tools
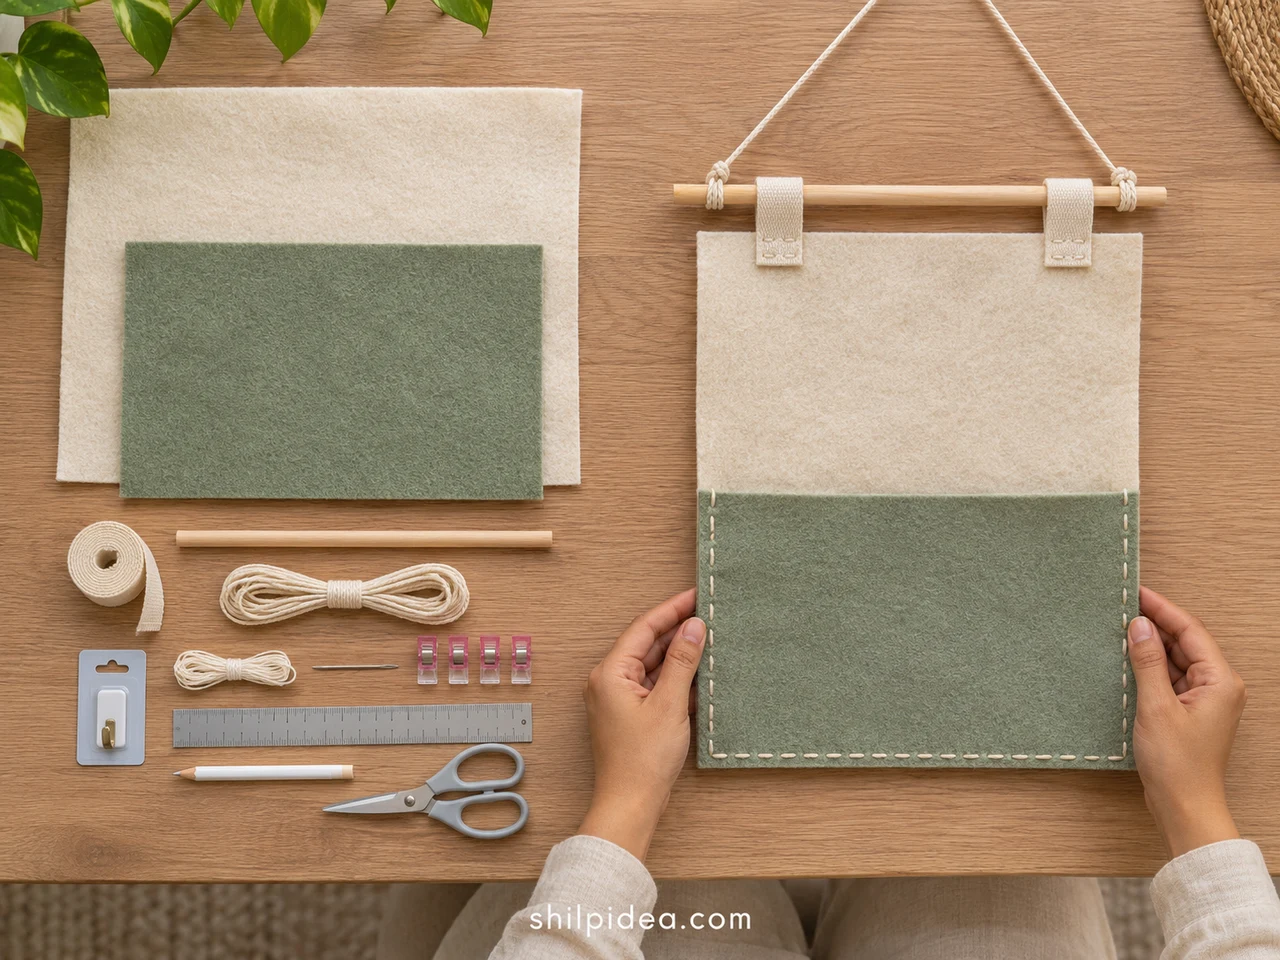
Gather these supplies for one flat pocket intended for a few lightweight envelopes.
- Dense craft felt – One ivory backing piece, 12.00 × 16.00 inches, and one sage front piece, 12.00 × 8.00 inches; choose felt firm enough to hang without curling.
- Cotton webbing – Two pieces, each 1.00 inch wide and 4.00 inches long, for the hanging loops.
- Wooden dowel – One smooth dowel approximately 14.00 inches long and 0.50 inch in diameter; check for splinters before use.
- Cotton hanging cord – Start with approximately 24.00 inches; adjust the length to the hook position before trimming any excess.
- Needle and thread – A hand-sewing needle suitable for the felt and webbing, plus strong sewing thread or embroidery thread; test on a scrap first.
- Measuring and cutting tools – A ruler, fabric-safe marking pencil, sharp fabric scissors and sewing clips.
- Wall hanging hardware – A hook or fixing suitable for your wall surface and the total loaded weight; follow its supplied installation directions.
- Mail-sorting supplies – Three labeled small clothespins or binder clips for “Action,” “File” and “Outgoing,” plus a recycling container nearby.
All cutting sizes below are width × height in inches. The felt body finishes at approximately 12.00 × 16.00 inches; the dowel and hanging cord extend beyond it. This is a proposed design, not a physically tested Shilpidea pattern. Treat the visuals as reference views rather than full-size templates, and test your materials before loading the pocket.
Precautions Before You Begin
Choose a clear work area and a suitable place for lightweight paper storage.
- Keep needles, scissors and loose cord away from children and pets.
- Check that the door can open fully without hitting the organizer.
- Use the fixing manufacturer’s directions for the actual wall; check for concealed services before drilling.
- Keep the cord short and out of children’s reach. Do not hang the pocket above a crib, bed or heater.
- Do not use this design for keys, bottles, books or heavy parcels. No load capacity has been established for the handmade pocket.
1. Measure and Cut the Felt Pieces
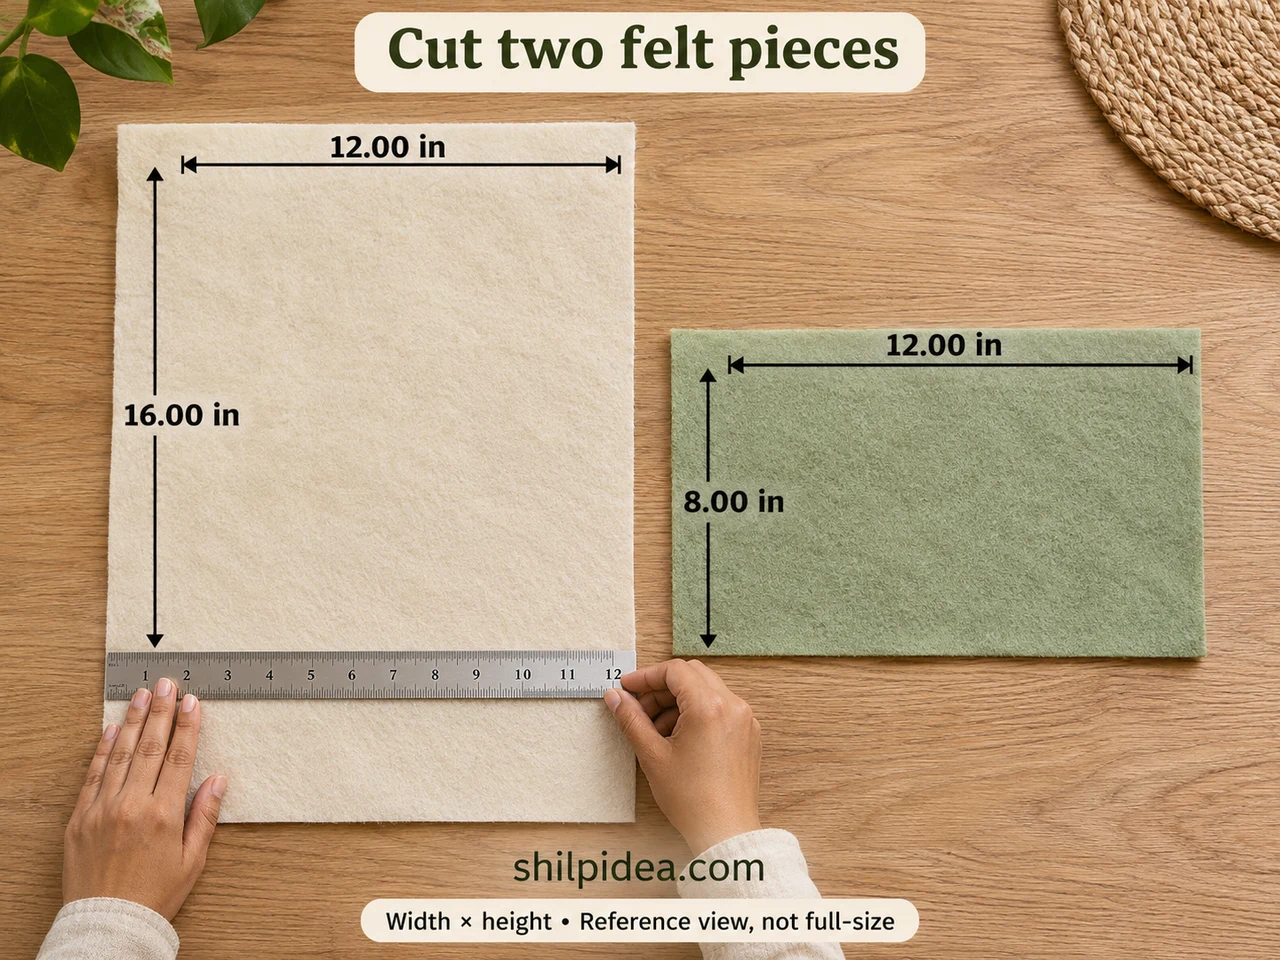
- Check the location – Hold a paper rectangle measuring 12.00 × 16.00 inches against the intended wall. Allow extra room above for the dowel and cord, and check the door swing and your reach before cutting the felt.
- Mark two rectangles – Mark an ivory rectangle 12.00 inches wide by 16.00 inches tall and a sage rectangle 12.00 inches wide by 8.00 inches tall. Check the corners with the square end of a ruler or a sheet of paper.
- Cut clean edges – Cut along the marked lines with fabric scissors. Lay both pieces flat and compare their widths. Trim only uneven edges; do not fold or hem the felt, since this design uses its raw edges.
Before moving on: The two pieces have the same width. The sage front is half as tall as the ivory backing, and its straight top edge will become the pocket opening.
2. Stitch the Pocket Along Three Edges
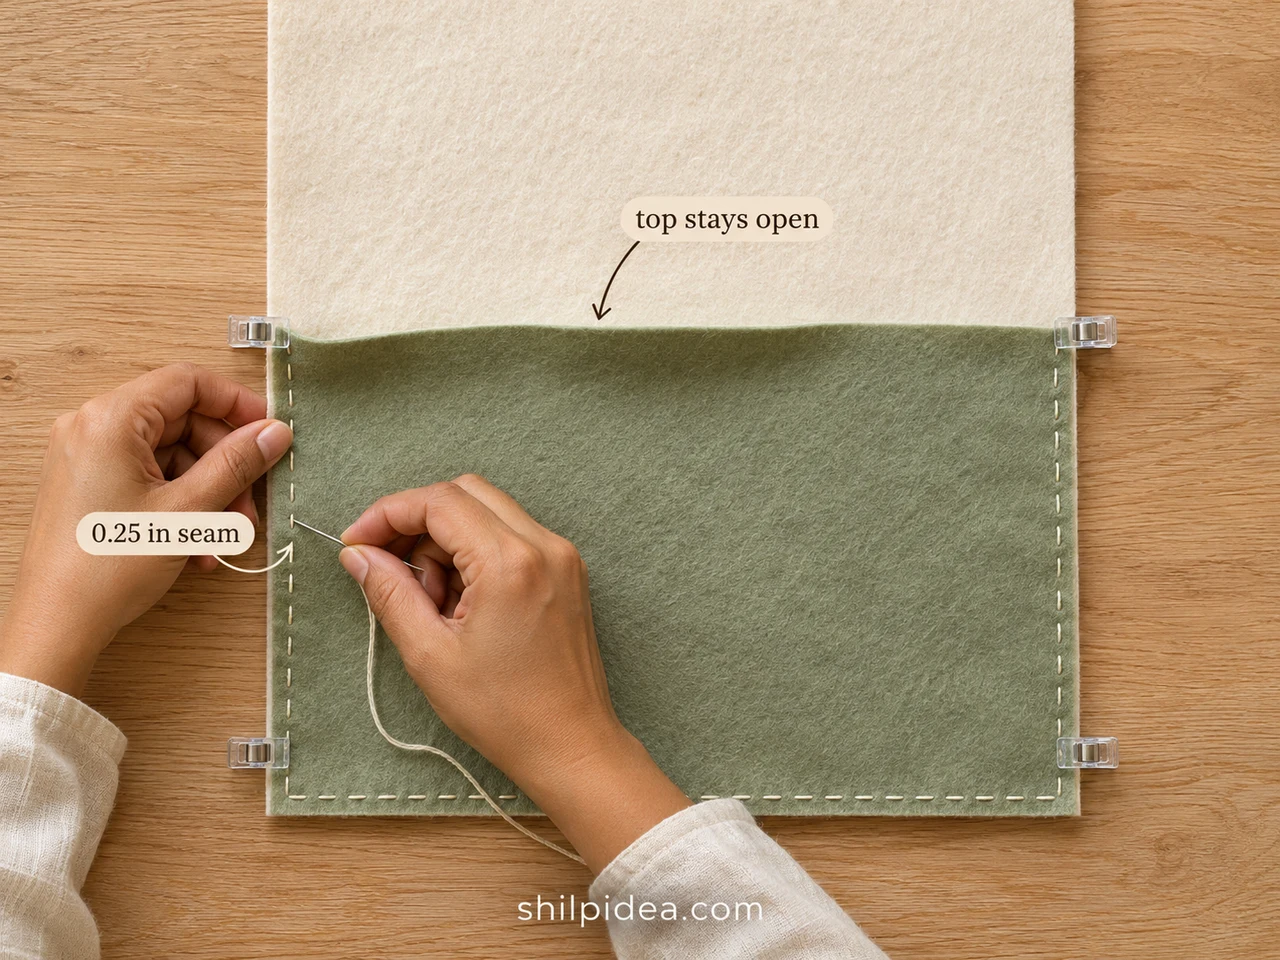
- Align the layers – Lay the ivory backing face up in portrait orientation. Place the sage piece over its lower half, aligning both side edges and the bottom edge. Clip the layers together, leaving the sage top edge accessible.
- Mark the stitch path – Lightly mark a line 0.25 inch inside the left, bottom and right edges of the sage piece. Keep the entire top edge unmarked and unstitched. The stitching forms a U, not a closed rectangle.
- Sew the three sides – Starting at one upper corner of the sage piece, use short, even running stitches through both layers. Continue down the side, across the bottom and up the opposite side. Secure both ends with several small backstitches.
- Check the opening – Remove the clips and slide an empty envelope between the layers. It should enter from the top without catching. If the thread pulls the felt into ripples, loosen and redo that section before continuing.
The stitch lines leave about 11.50 inches between the side seams. Because the pocket is flat rather than gusseted, it is meant for a small batch of envelopes, not a thick stack. Let the felt rest flat while sewing, and avoid pulling the thread so tightly that the opening narrows.
Before moving on: Only the left, bottom and right edges join the two pieces. You can put a hand or an empty envelope into the top opening.
3. Attach the Two Hanging Loops
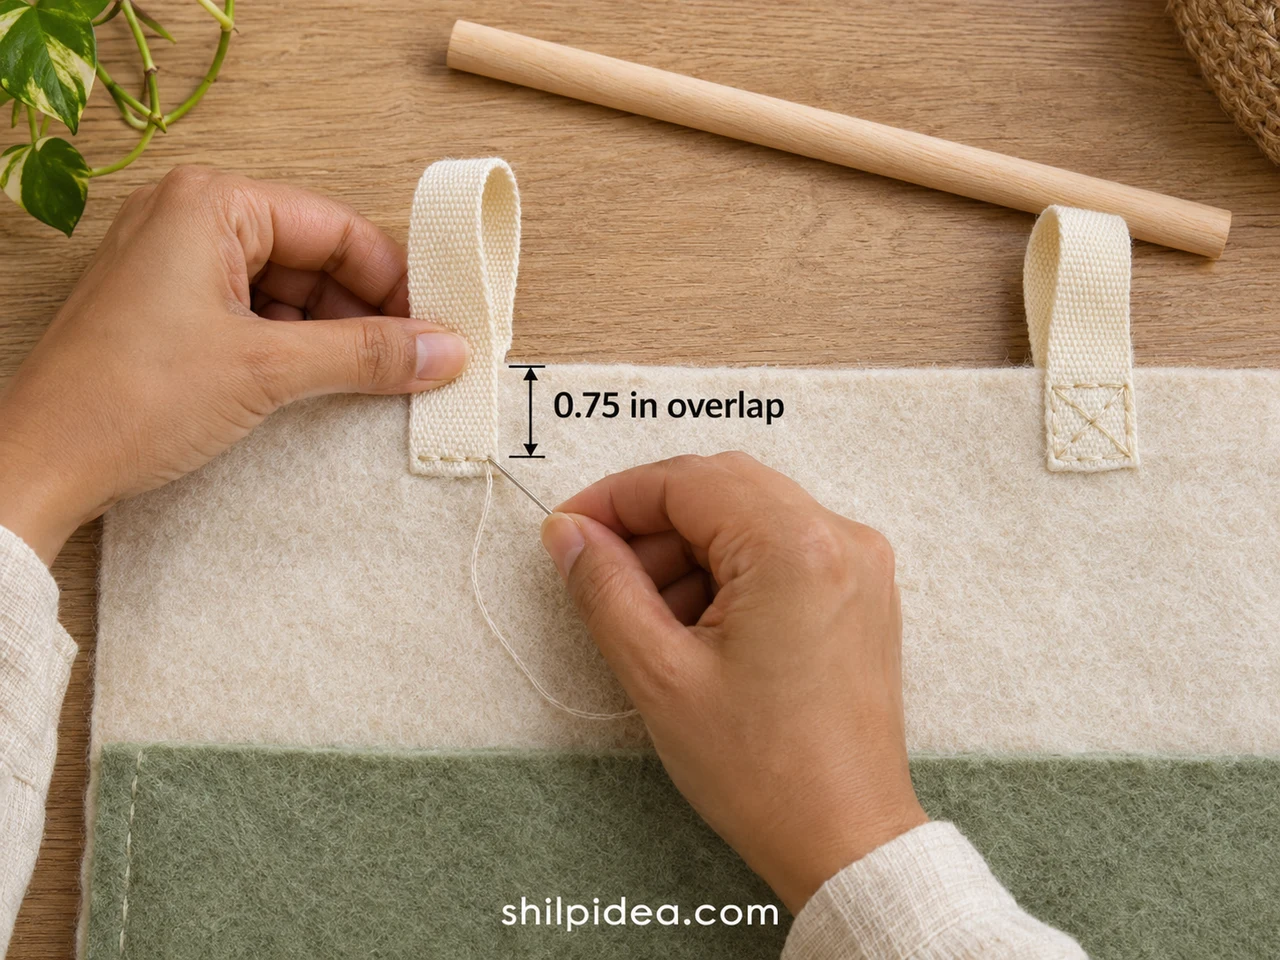
- Prepare the webbing – Cut two 4.00-inch lengths of 1.00-inch-wide cotton webbing. Fold each in half so its cut ends meet. Tuck the raw ends inward by about 0.25 inch if they fray, keeping both loops the same finished length.
- Position the loops – Place the paired ends of each folded strip against the upper front of the ivory backing, overlapping the felt by about 0.75 inch. Set the outer edge of each strip 1.00 inch in from its corresponding side edge.
- Secure both attachment areas – Hand-sew a small rectangle through both webbing ends and the backing, then add diagonal stitches across that rectangle. Keep these stitches below the felt’s top edge, leaving the loop above it open for the dowel.
Before sewing the second loop permanently, slide the dowel through both loops to compare their height. Adjust if it tilts, then remove the dowel to finish stitching. The needle should pass through the layers without excessive force; use thinner webbing or a more suitable needle if necessary.
Before moving on: Both loops sit at equal height and accept the dowel freely. Their attachment stitches pass through the webbing ends and the felt, not just one loose layer.
4. Add the Dowel and Hang the Empty Pocket
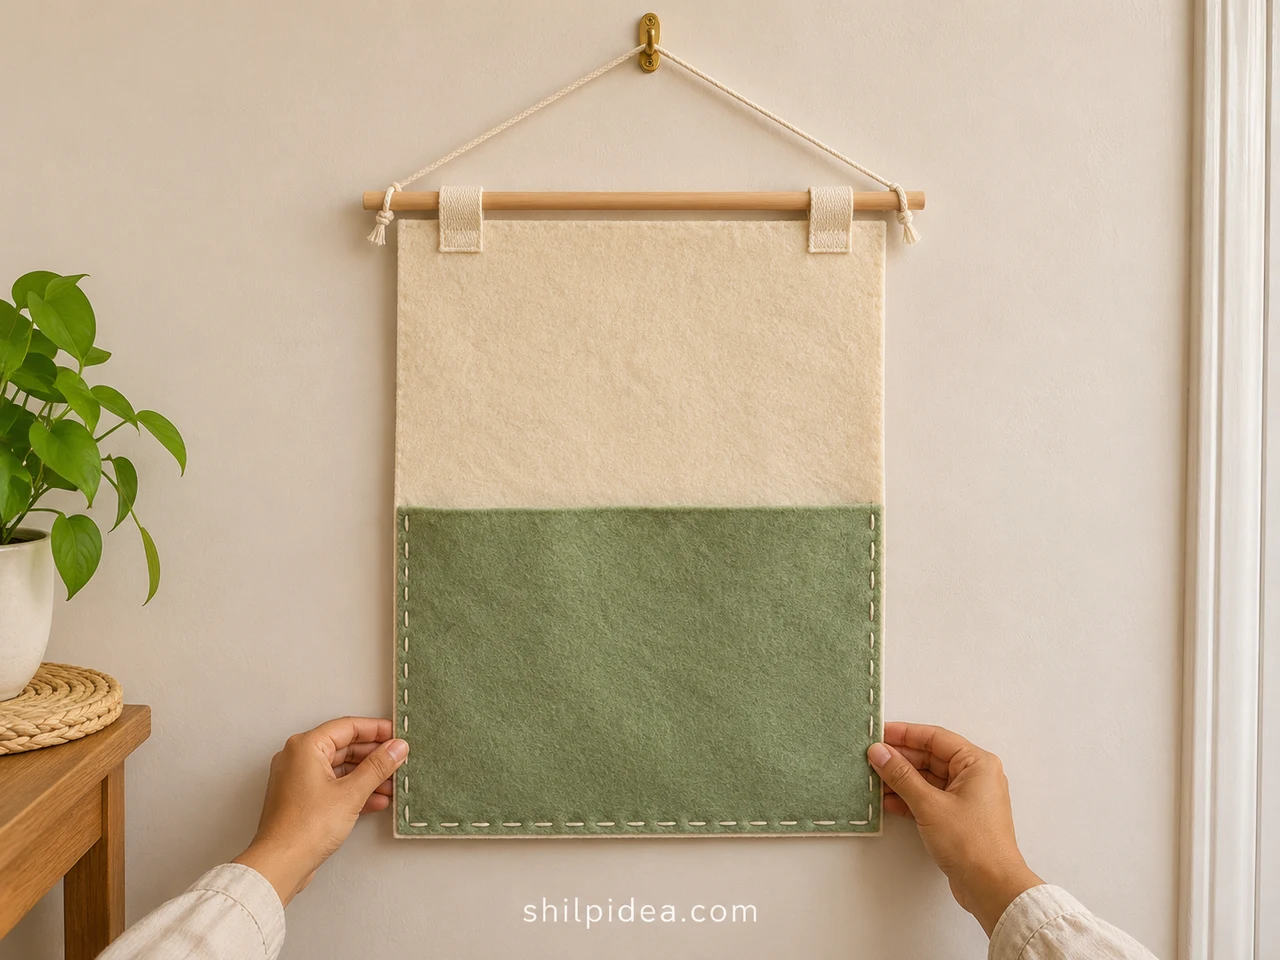
- Thread and center the dowel – Slide the smooth dowel through both webbing loops and center it over the backing. With a 14.00-inch dowel and a 12.00-inch body, about 1.00 inch of wood should extend beyond each side of the felt.
- Tie the hanging cord – Tie one end of the cord securely around each exposed dowel end, outside the loops. Keep both knots away from the tips. Adjust the cord so the pocket hangs level, then check that the knots resist slipping.
- Install the wall fixing – Install the chosen hook or fixing exactly as its manufacturer directs for your wall. Observe any preparation and waiting time. Hang the empty organizer first and confirm that the felt, loops and dowel sit evenly.
If the cord slides toward the dowel ends, stop and revise the attachment before adding mail. A fixing rated for a certain weight does not establish a matching capacity for handmade felt seams. Start with one light envelope and inspect the whole assembly; take it down if the backing stretches, the loops pull loose or the fixing moves.
Before moving on: The empty pocket hangs level, the hook is secure and the door clears it. There is no loose dangling cord tail.
5. Sort Incoming Mail into a Small Daily Batch
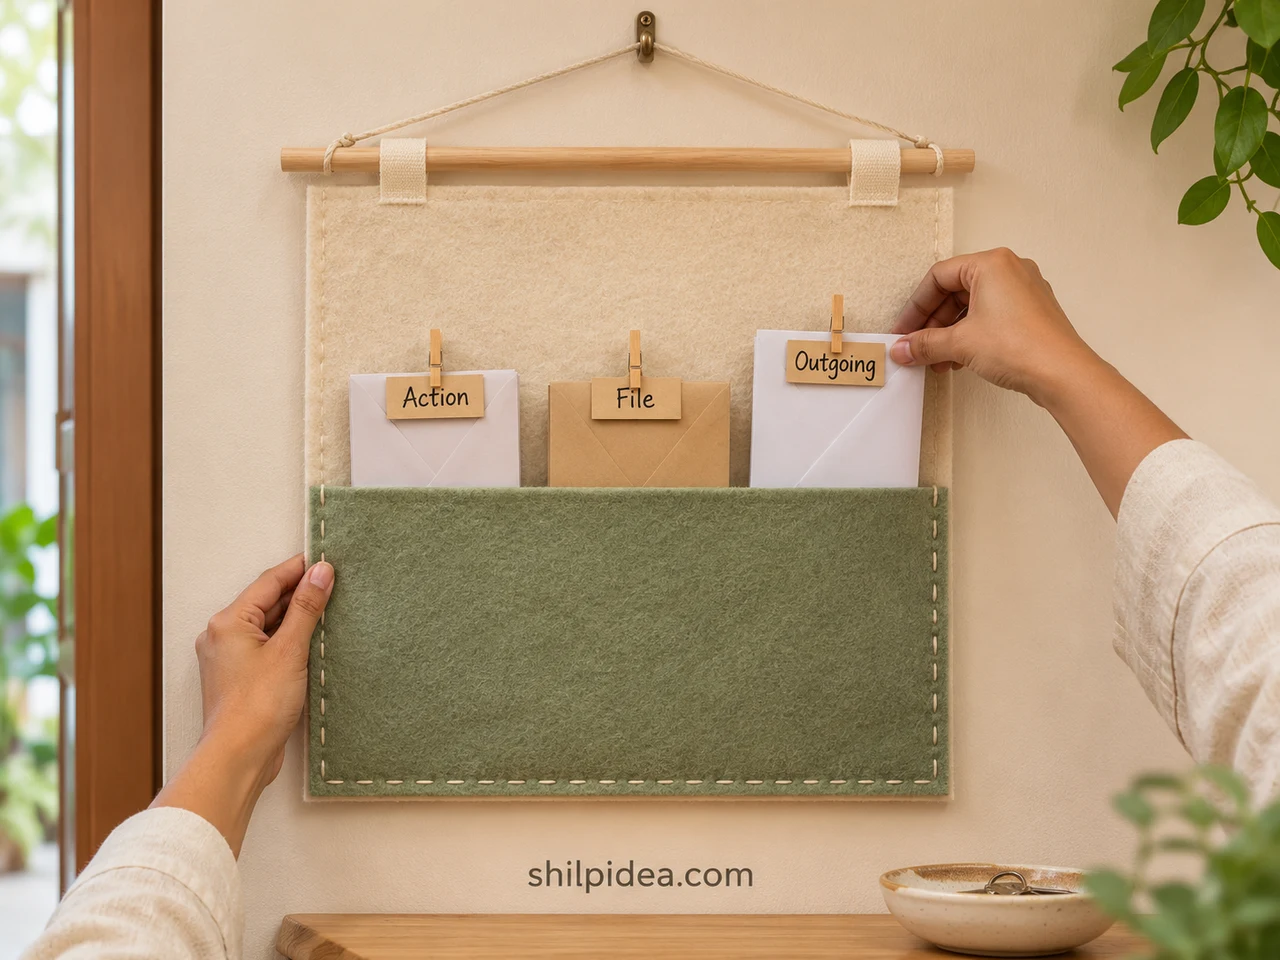
- Sort before storing – Open and review mail as it arrives. Recycle unwanted inserts, set aside sensitive papers for appropriate disposal and clip together only the items that belong in the pocket. Avoid placing unreviewed mail straight into it.
- Separate the next actions – Use labeled clips for Action, File and Outgoing. Place the small bundles upright with their labels visible above the pocket edge. Keep deadlines in your calendar rather than relying on the pocket as a reminder.
- Reset the pocket regularly – Choose a regular moment to pay attention to the Action bundle, move records into their proper storage and take outgoing mail with you. Remove papers before the front bulges or the backing begins to distort.
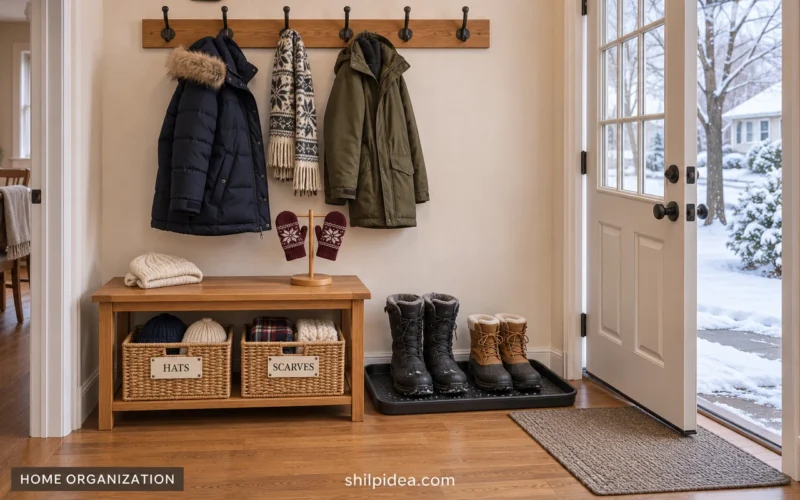
One pocket works best as a short-term landing place. It does not replace a filing system, and it should not become a home for every receipt. If you also need a spot for gloves or scarves, give them a separate basket using these winter entryway solutions rather than adding weight to the felt.
Before moving on: Only current mail remains in the organizer. Important documents and sensitive correspondence have a more private, permanent home.
Fix Sagging, Uneven Hanging or Loose Stitches
- The pocket sags: Remove the mail first. Check whether the felt itself is too soft or the seams have stretched. Use firmer felt for a remake; do not solve sagging by pulling the thread tighter.
- The dowel tilts: Compare the two loop lengths and cord knots. Correct an uneven loop attachment before adjusting the wall position.
- The side seam opens: Empty the pocket and restitch the damaged area, securing both ends. Replace torn felt rather than repeatedly sewing through a weakened edge.
- Mail disappears below the opening: Use a visible labeled clip on each small bundle. Do not add loose filler inside the pocket to raise the papers.
Keep the Felt Pocket Clean and Useful
Empty the pocket before cleaning it. Follow the care instructions for the felt and webbing; test any spot-cleaning method on a scrap, and let damp material dry fully before rehanging. Inspect seams, loops, cord and the wall fixing whenever you reset the mail. Keep the organizer away from splashes and direct heat. If you change its size or materials, reassess the construction rather than assuming it can hold more weight.
More Small-Space Storage Projects to Explore
A useful entryway gives each everyday item a clear destination. Once incoming mail has a place, look at the next recurring pile: shoes beside the door, coats over a chair or supplies scattered across a tabletop. Choose one small improvement that fits your available space and routine. These related ideas can help you plan a coordinated storage area without filling every wall.
- Small Entryway Corners with Practical Storage
- Bench and Basket Ideas for Narrow Entryways
- Winter Entryway Storage for Everyday Layers
- Wooden Crate and Pallet Shelf Ideas
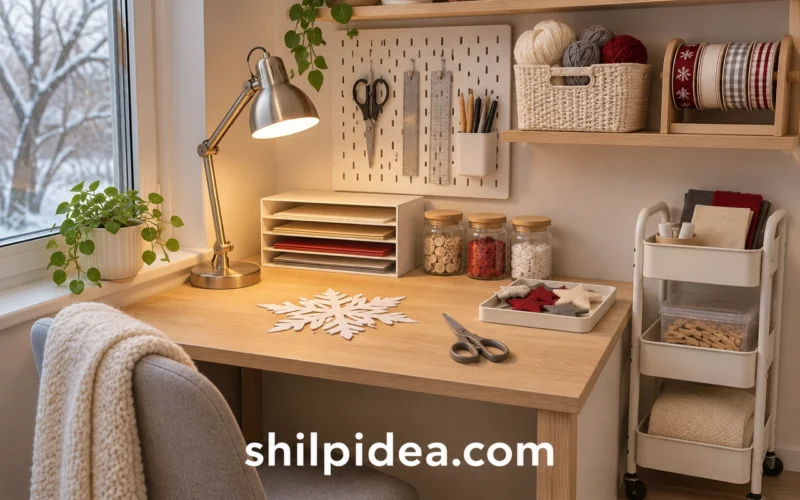
- Organizing a Small Winter Craft Corner
Where does incoming mail collect in your home, and which sorting label would help you most? Share your plans in the comments. If you try this pocket, tell us how your felt and hanging arrangement worked.

























0 Comments