How to Sew a Fabric Storage Bin with Stiffened Sides
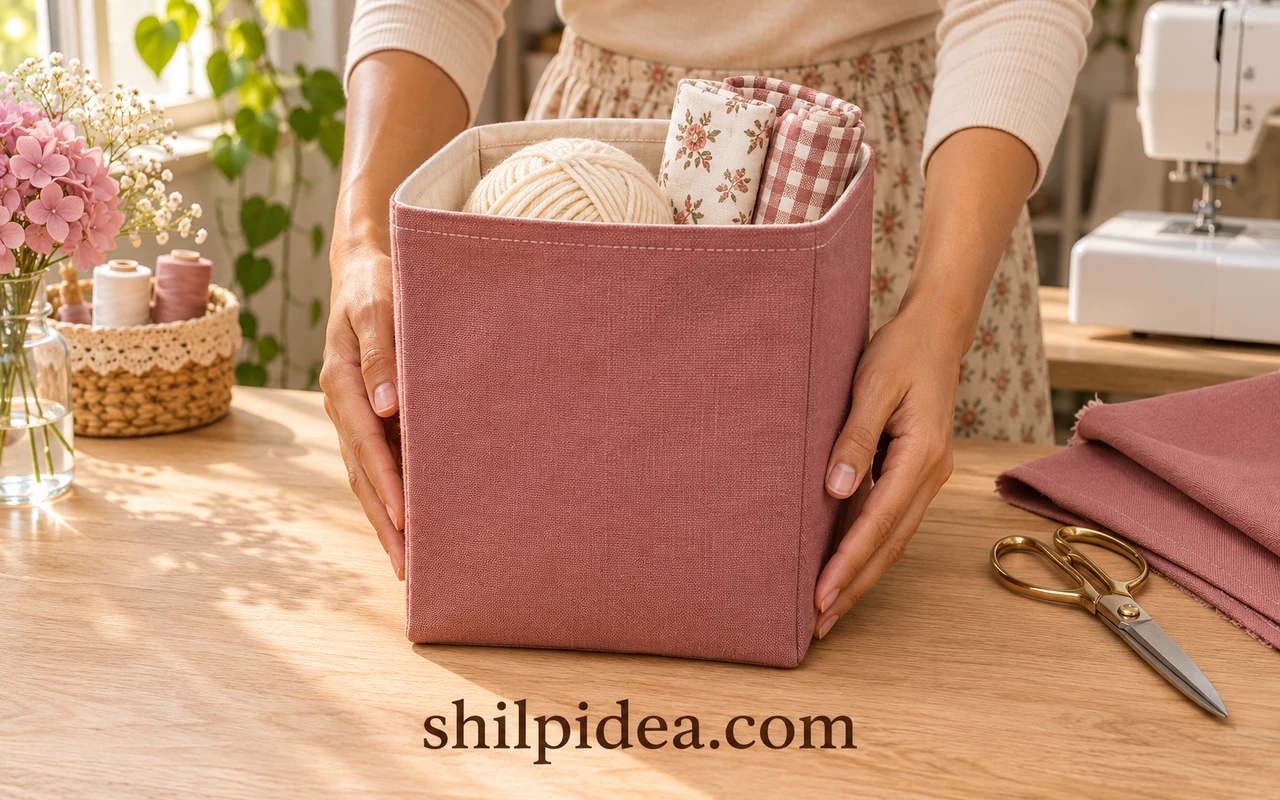
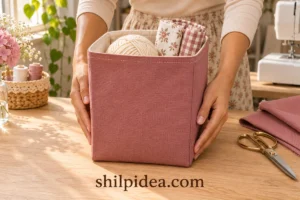
A fabric storage bin gives yarn, fabric scraps and small accessories a home on an open shelf. This lined version uses firm interfacing to help the sides stay upright while keeping the soft feel of cloth.
Choose cotton canvas and a coordinating lining, much as you would for reusable fabric bags. Boxed corners create the base without a separate bottom panel.
Follow the measuring, joining and finishing stages below, then pair the bin with fabric-covered organizers to coordinate your craft shelf.
Materials and Tools
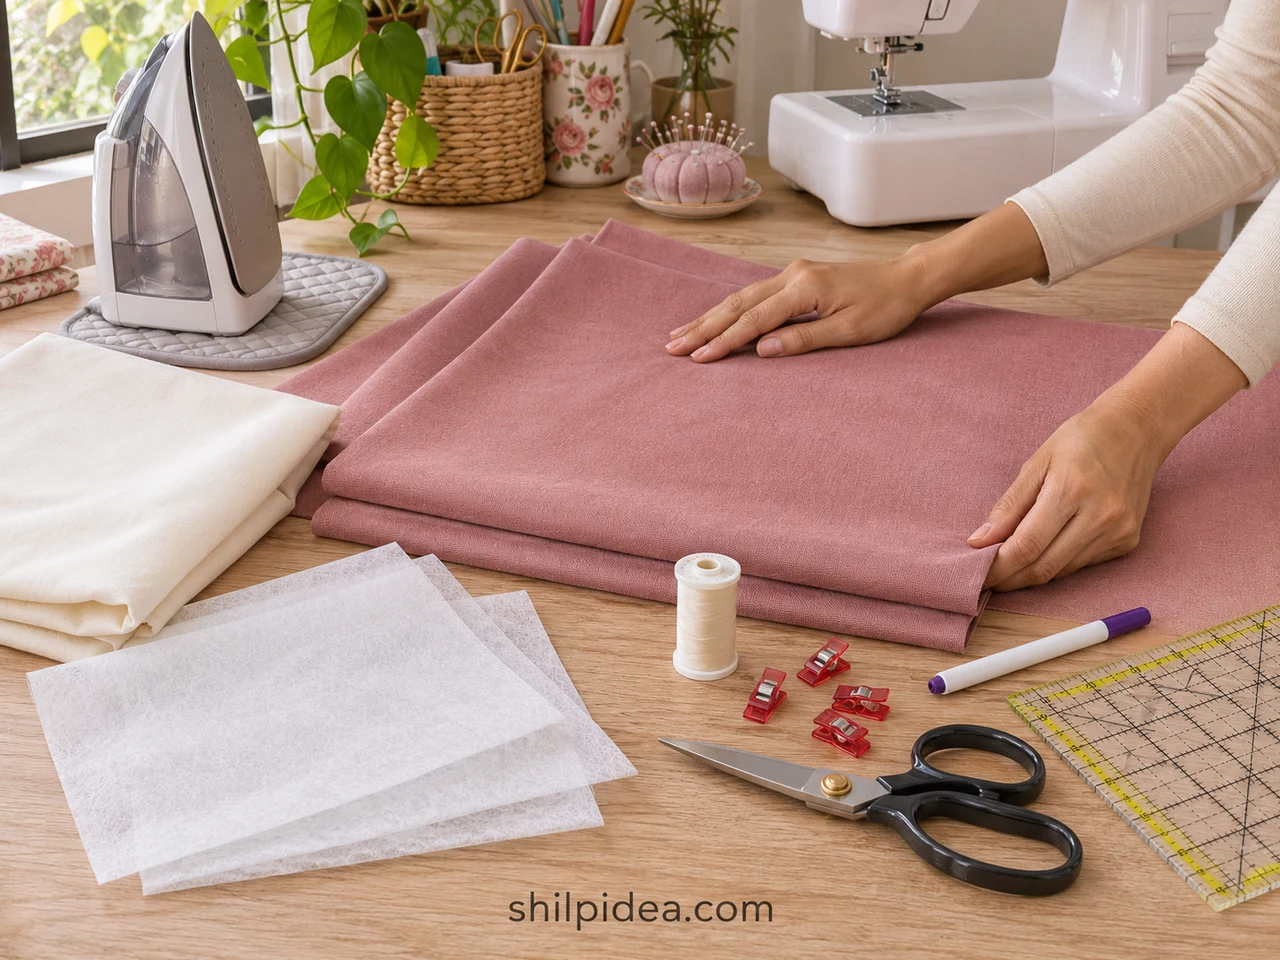
Gather these supplies for one small bin. The amounts below are cut pieces; allow extra fabric for squaring and a fused test swatch.
- Outer fabric – Cut two 13 × 11-inch rectangles (33 × 28 cm) of medium-weight, nonstretch cotton canvas.
- Lining fabric – Cut two matching 13 × 11-inch rectangles of woven cotton.
- Firm fusible interfacing – Use two 13 × 11-inch pieces suitable for the outer fabric, such as Pellon 809 Décor-Bond; trim if its instructions require it.
- Thread and machine – Use matching all-purpose sewing thread and a sewing-machine needle suited to the fabric layers.
- Measuring and cutting tools – Have a ruler, fabric marker, paper for a corner template, fabric shears and sewing clips ready.
- Pressing tools – Use an iron, a stable heat-safe ironing surface and a clean cotton pressing cloth.
- Hand-finishing tools – Keep a hand-sewing needle, seam ripper and blunt corner turner nearby.
The planned finished bin measures approximately 6 × 6 × 7 inches (15 × 15 × 18 cm), with no folded cuff. These are proposed instructions, not a physically tested Shilpidea pattern. Make one sample before cutting a matching set; use written dimensions, not image proportions.
Understand the Layers and Measurements
You will make two separate open-top boxes, called shells: a rose outer shell and an ivory lining shell. They join only at the rim. The lining has a temporary opening so you can turn the assembly right side out.
- Right side: the fabric face you want visible in the finished bin.
- Wrong side: the back of the fabric; interfacing attaches here on the outer panels.
- Right sides together: the two finished faces touch inside the stack; their backs face outward.
- Seam allowance: the distance from the raw edge to the stitching, not an extra amount to add to the cutting dimensions.
| Part or seam | Measurement |
|---|---|
| Two outer + two lining panels | 13 in wide × 11 in tall (33 × 28 cm) each |
| Two interfacing pieces, outer panels only | 13 × 11 in (33 × 28 cm); trim as directed by the product |
| Each bottom corner cutout | 3½ × 3½ in (8.9 × 8.9 cm), measured from raw edges |
| Construction seams, including corners and rim | ½ in (1.3 cm) |
| Gap in lining bottom seam | 4 in (10 cm), centered |
| Final topstitching | ⅛ in (3 mm) below the finished rim |
Seam allowances are already included. Use the inch measurements consistently; metric equivalents are rounded. Mark the 13-inch edge as the top before cutting the corners.
Precautions Before You Begin
Check the materials and machine setup before cutting the full set.
- Preshrink washable fabric as its care instructions allow; press it flat before measuring.
- Test the interfacing on a scrap and follow its specified heat, moisture and pressing time.
- Keep fingers clear of the needle and remove clips before they reach the presser foot.
- Rest the iron safely and switch the machine off before changing its needle.
- Use the bin for lightweight, dry items; it is not a rigid box or a handled carrying bag.
1. Cut the Rectangles and Fuse the Outer Panels
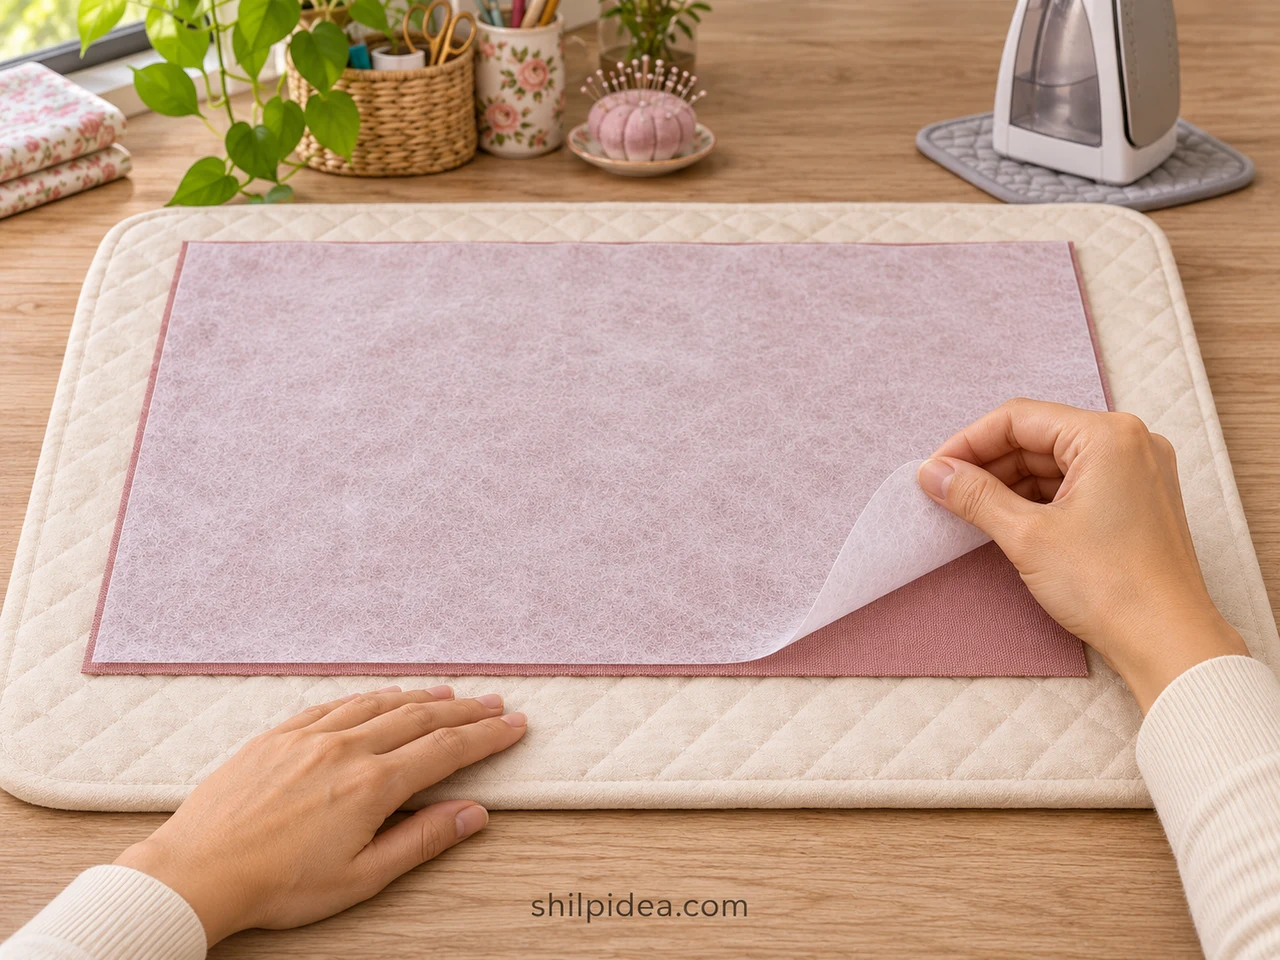
- Cut the six rectangles – Cut two rose outer panels, two ivory lining panels and two interfacing pieces using the table above. Mark the wrong side and top edge of each fabric panel with removable marks.
- Position the interfacing – Lay one outer panel wrong side up. Place the interfacing adhesive-side down against it, following the product’s trimming directions. Repeat with the second outer panel. Leave both lining panels unfused.
- Press and cool – Fuse according to the instructions supplied with your interfacing, including the pressing cloth, heat and hold time. Lift the iron between placements rather than sliding it. Let both panels cool flat.
Pellon 809 product guidance identifies it as a firm fusible stabilizer. A fused scrap should feel supportive but still bend enough to pass through the turning gap.
Check before moving on: You have four fabric panels: two backed with interfacing and two plain lining pieces. The interfacing should be bonded without loose bubbles.
2. Mark and Cut the Bottom Corners
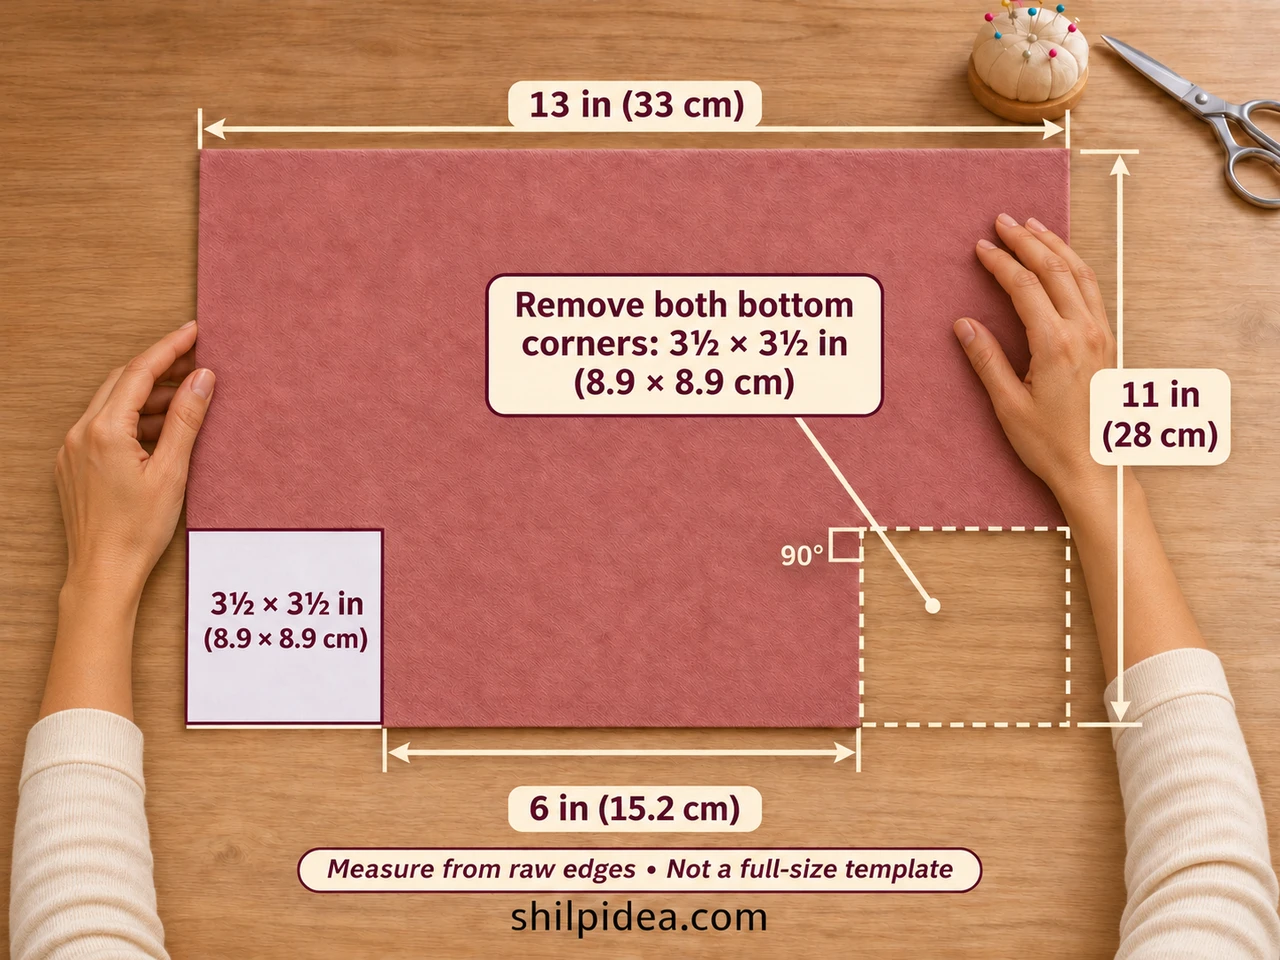
- Make the corner template – Draw a 3½-inch (8.9 cm) square on paper and check that all corners are 90 degrees. Position it at a bottom corner, flush with both original raw edges.
- Remove eight squares – Cut that square from both bottom corners of each of the four fabric panels. Cut through the bonded interfacing with the outer fabric. Do not cut either top corner.
Check before moving on: All four panels have the same shape. Each has a full 13-inch top edge and a 6-inch (15.2 cm) straight raw edge between its bottom cutouts. These are cutting dimensions, not seam positions.
3. Sew the Outer Shell and Lining Separately
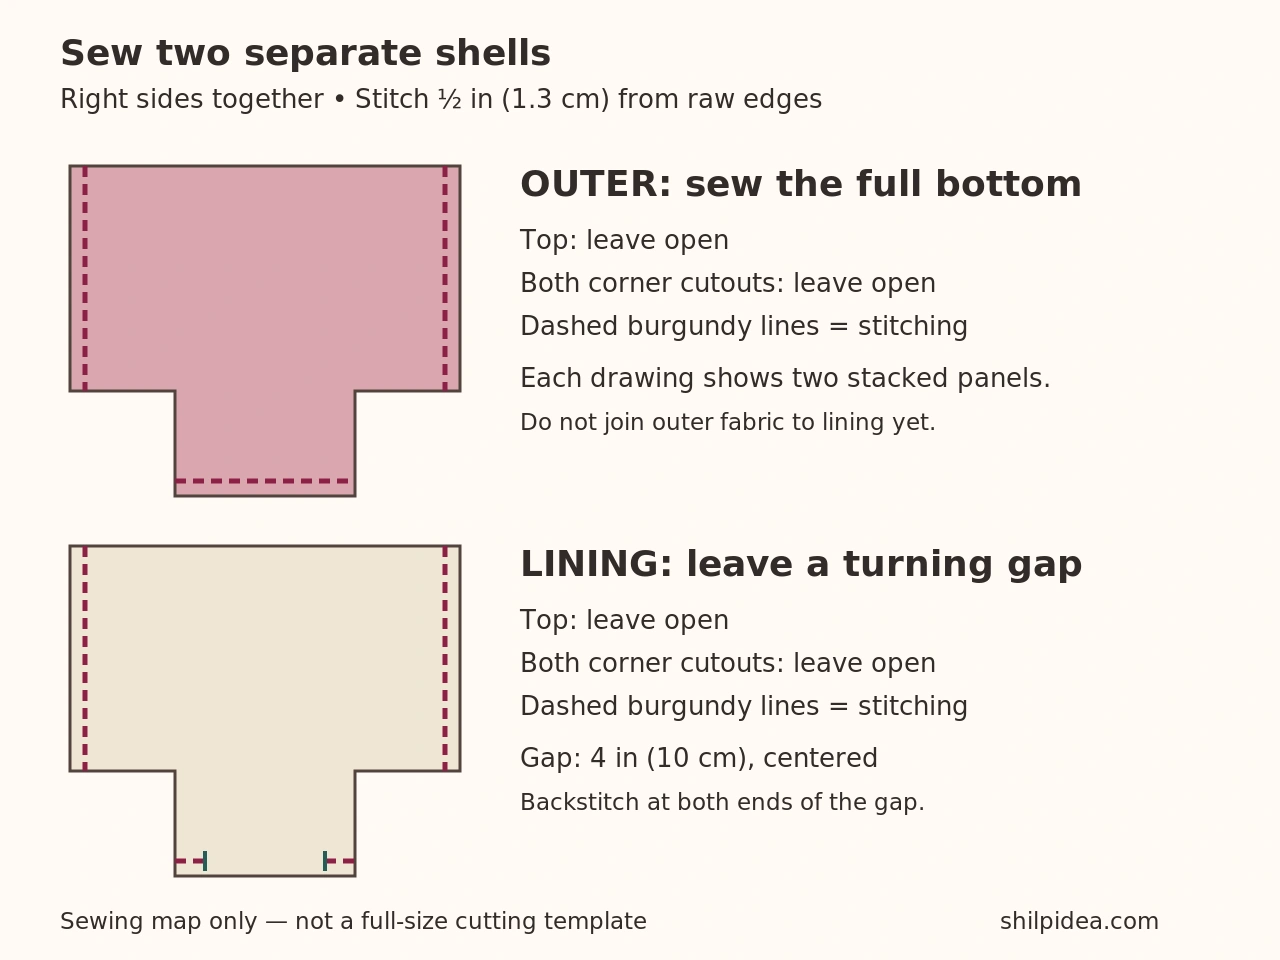
- Pair the outer panels – Place the two rose panels right sides together, so their interfacing faces outward. Align the edges and clip. Sew both straight sides and the straight bottom with a ½-inch seam allowance.
- Keep the openings clear – Backstitch at each seam end. Leave the top edge and both L-shaped corner cutouts unsewn. At this stage, do not sew around the cutout edges or join the outer shell to the lining.
- Sew the lining with a gap – Pair the ivory panels right sides together. Sew the side seams. On the straight bottom, mark a centered 4-inch opening; sew only from each end to its nearest mark, backstitching at the marks.
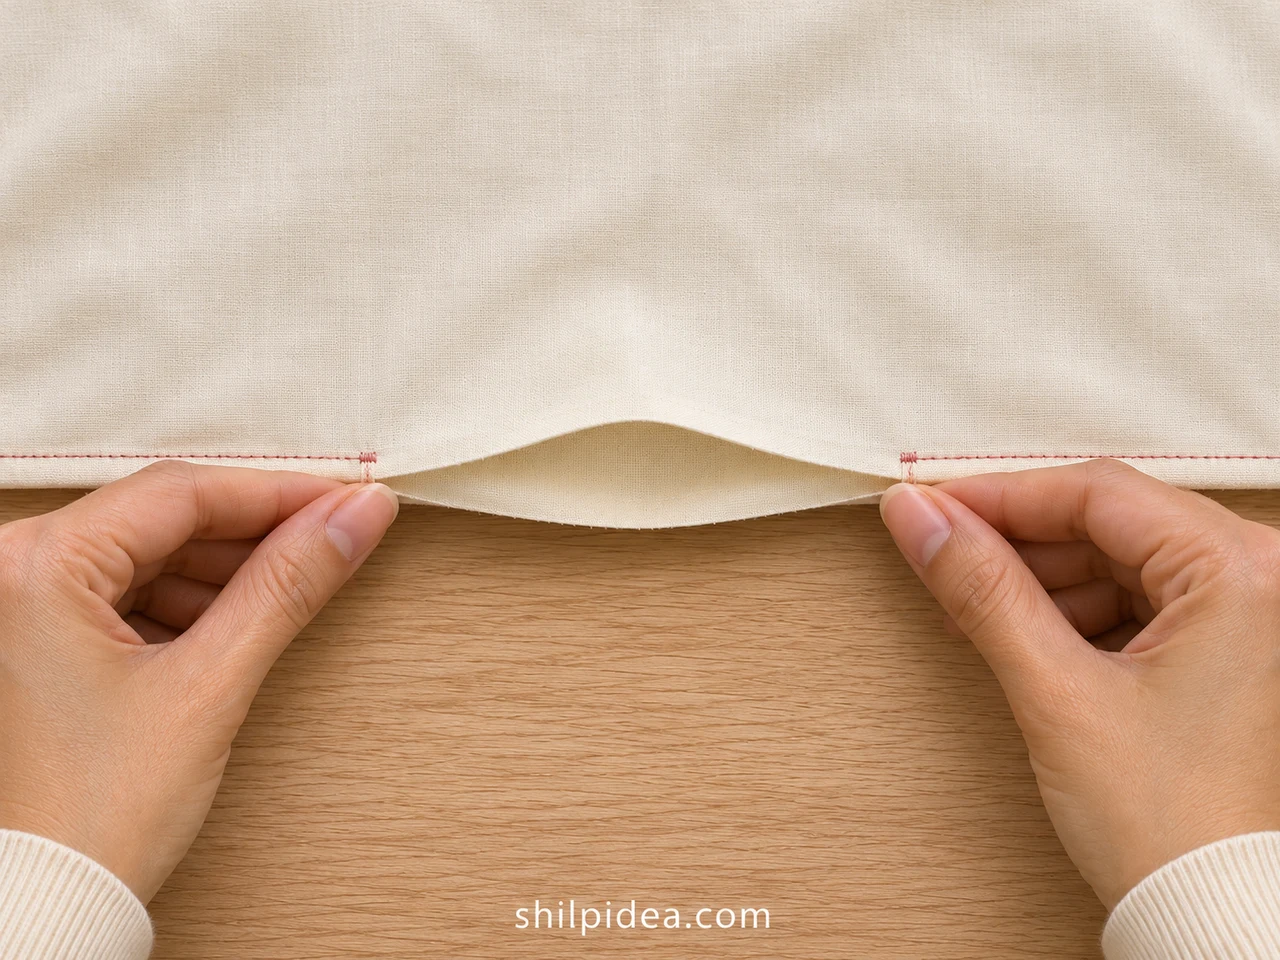
- Press the seam allowances – Press the sewn allowances open. At the lining opening, fold each raw edge inward by ½ inch and press, continuing the seam line. Leave this gap unstitched until after turning.
Check before moving on: You have two separate flat shells, both wrong side out. Only the ivory bottom has a gap. The top edges and all four corner openings remain open.
4. Open and Sew the Boxed Corners
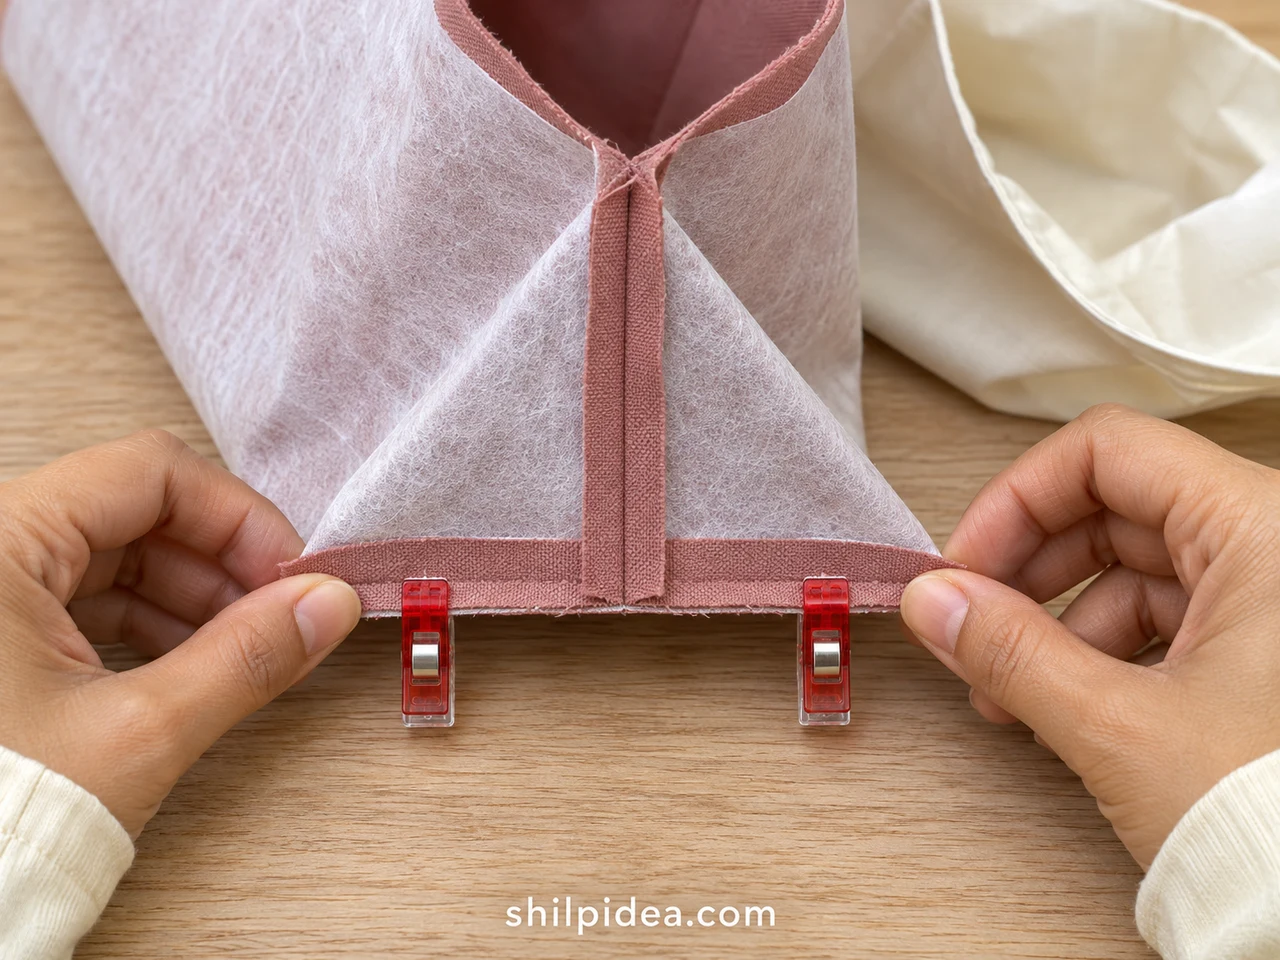
- Bring the seams together – Keep one shell wrong side out. Open one cutout by pulling its two fabric layers apart. Bring the side seam directly onto the bottom seam, with the seam allowances spread open.
- Flatten and stitch the corner – Align the cut edges into one straight, two-layer edge and clip. Sew across it ½ inch from the raw edge, perpendicular to the matched seams. Backstitch at both ends; remove clips as you approach.
- Repeat on both shells – Repeat on the other outer corner and both lining corners: four corner seams total. Gently open each shell into a box shape. Keep the lining’s bottom gap open.
Check before moving on: Each shell now has a square base. The side and bottom seams meet at the center of each boxed-corner seam; if they are offset, correct that corner before continuing.
5. Nest the Shells and Sew Around the Rim
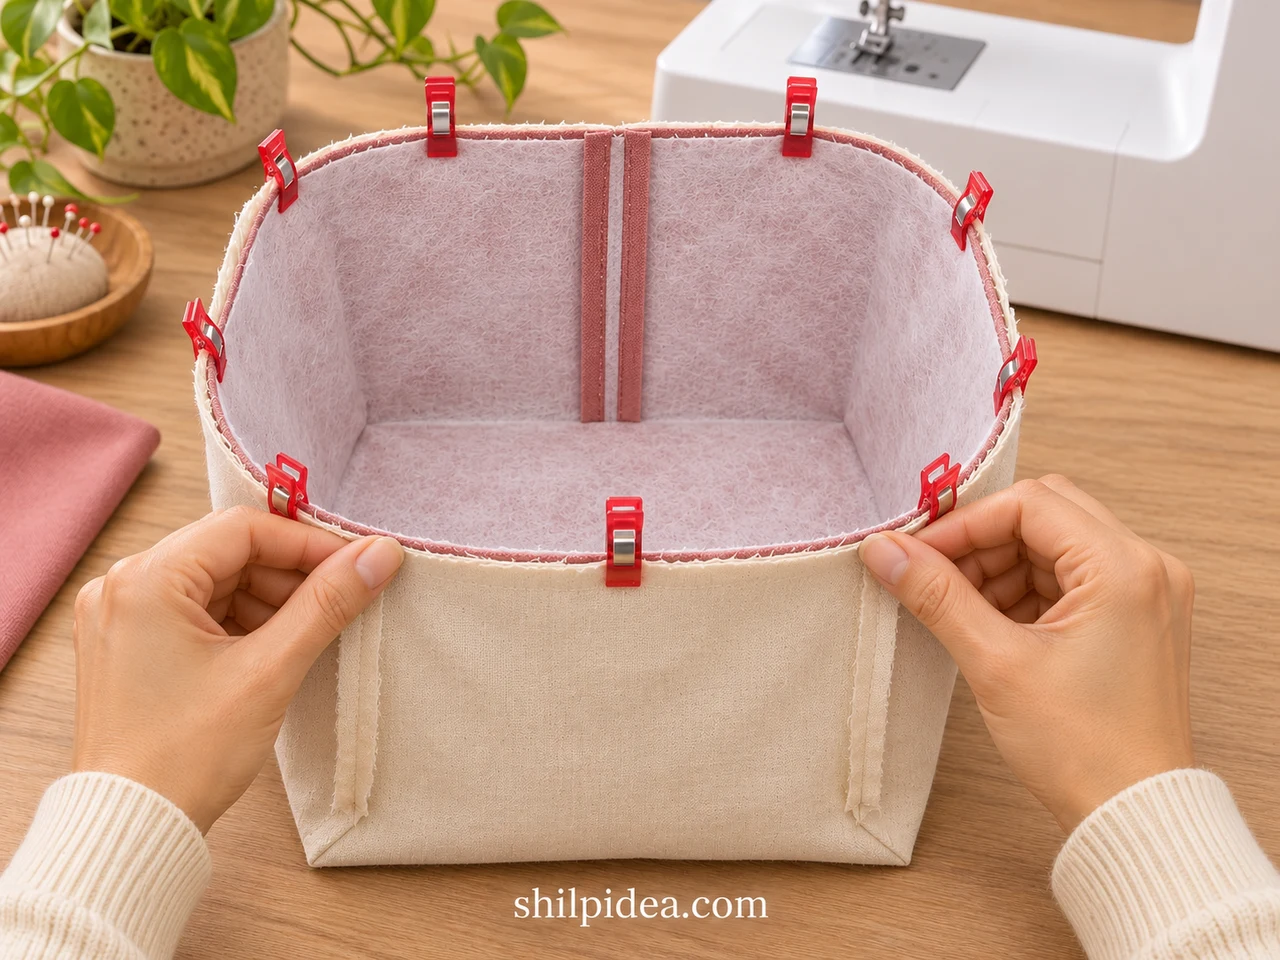
- Set the two orientations – Turn the rose outer shell right side out: its smooth rose face is outside and interfacing is inside. Leave the ivory lining wrong side out, with its seam allowances visible outside.
- Put rose inside ivory – Lower the rose shell into the ivory shell, with both openings facing up. Their right sides now touch. Looking down inside, you should see the interfacing on the back of the rose shell.
- Match and sew the rim – Match the two side seams and align the raw top edges. Clip, then sew a complete circle with a ½-inch seam allowance. Keep the base clear; never sew straight across the opening.
Orientation check: At this temporary stage, ivory is on the outside and rose is nested inside it. This looks reversed because turning will move the seam allowances between the layers.
Check before moving on: The rim is joined all the way around, the bin’s mouth is still open, and the 4-inch gap remains accessible in the ivory bottom.
6. Turn the Bin Through the Lining Gap
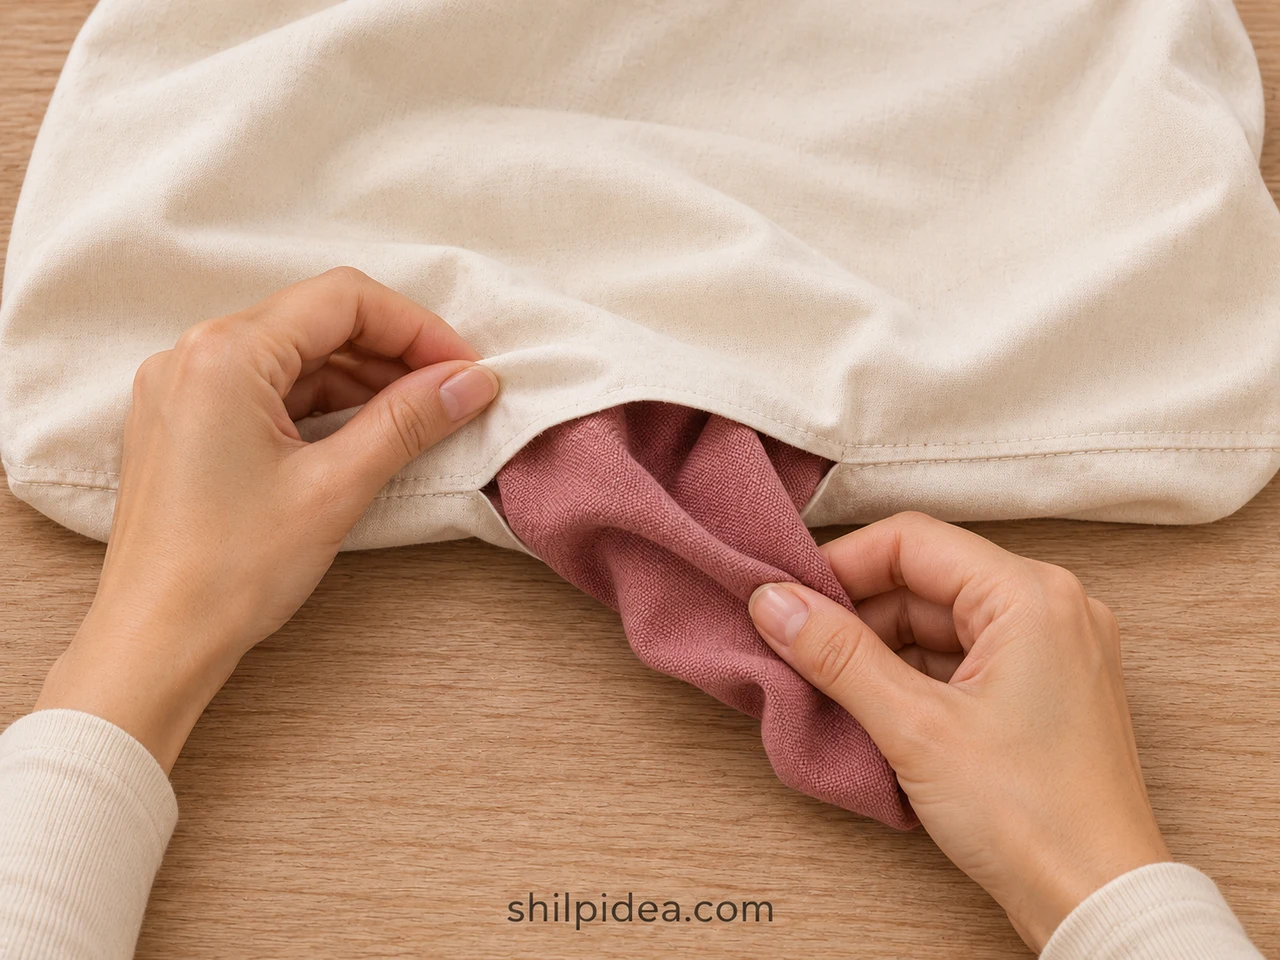
- Find the bottom opening – Lay the assembly on its side and locate the unsewn gap in the ivory bottom. Reach through that gap and grasp a small fold of the rose outer shell.
- Ease the outer shell through – Draw the rose fabric through a little at a time, feeding the stiffened panels with your other hand. Do not pull hard on the gap’s stitched ends or try to drag the whole bin through at once.
- Pull the lining clear – Continue until the joined rim has turned and both fabric right sides are visible. Leave the lining pulled out of the rose shell for now, so its bottom opening remains easy to reach.
Check before moving on: The two shells are connected at the rim, like two open boxes joined mouth to mouth. Interfacing and raw seam allowances are hidden between the layers. The ivory bottom gap is the only opening left to close.
7. Close the Opening in the Lining
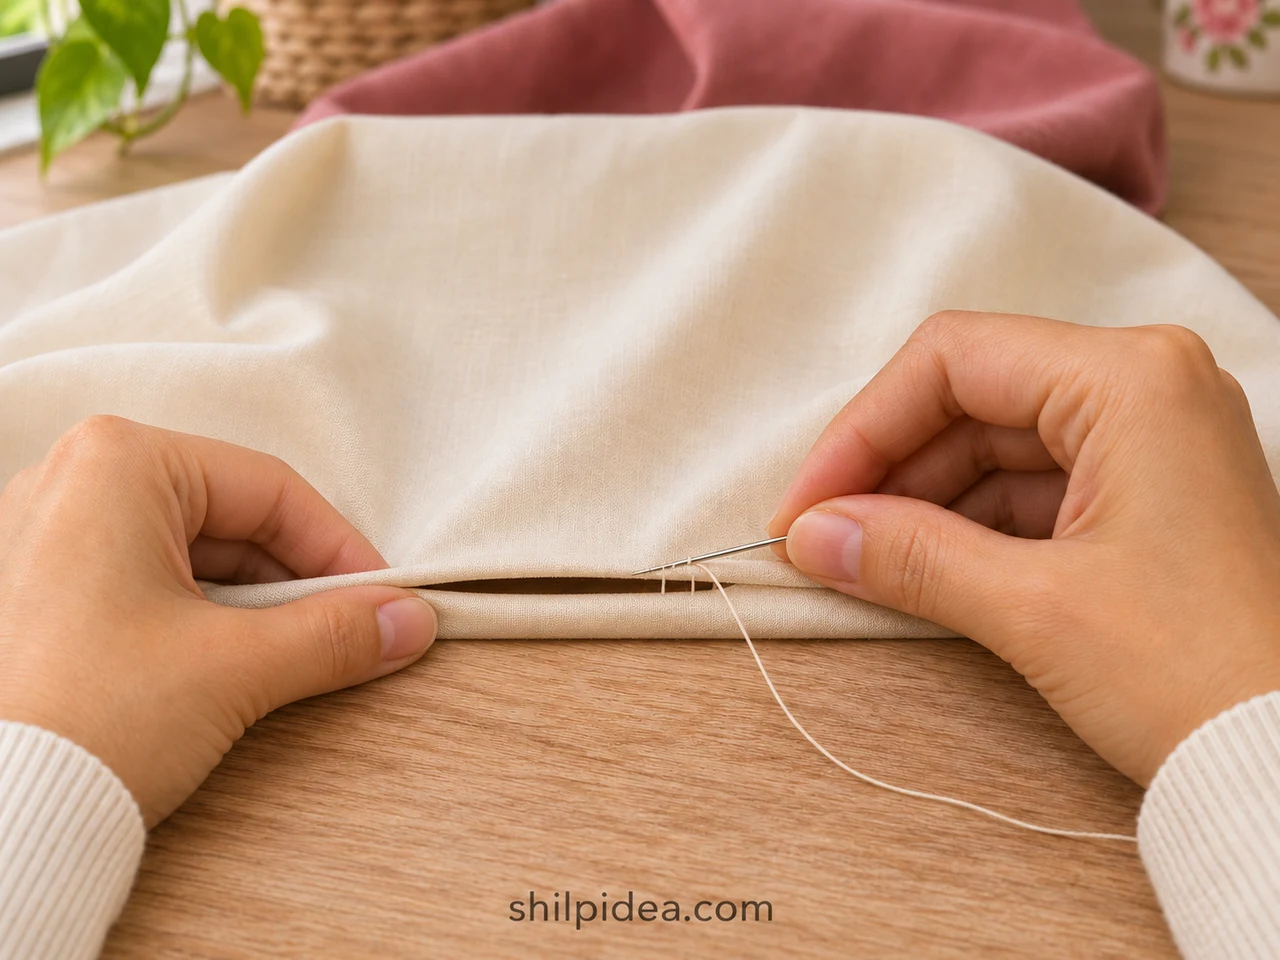
- Restore the folded edges – At the gap, tuck both raw edges inward along the ½-inch folds pressed earlier. Bring the folded edges together so they continue the original bottom seam without a step or overlap.
- Ladder-stitch the gap – Knot matching thread. Alternate tiny stitches inside one fold and then the opposite fold, advancing along the opening. Gently draw the thread snug every few stitches, then secure the end without puckering the lining.
If you prefer a visible machine finish, hold the two folded edges together and stitch close to their edge instead. Keep the rose shell out of the needle path.
Check before moving on: The lining bottom is fully closed, with no exposed raw edges, and remains loose from the rose shell except at the rim.
8. Seat the Lining and Topstitch the Rim
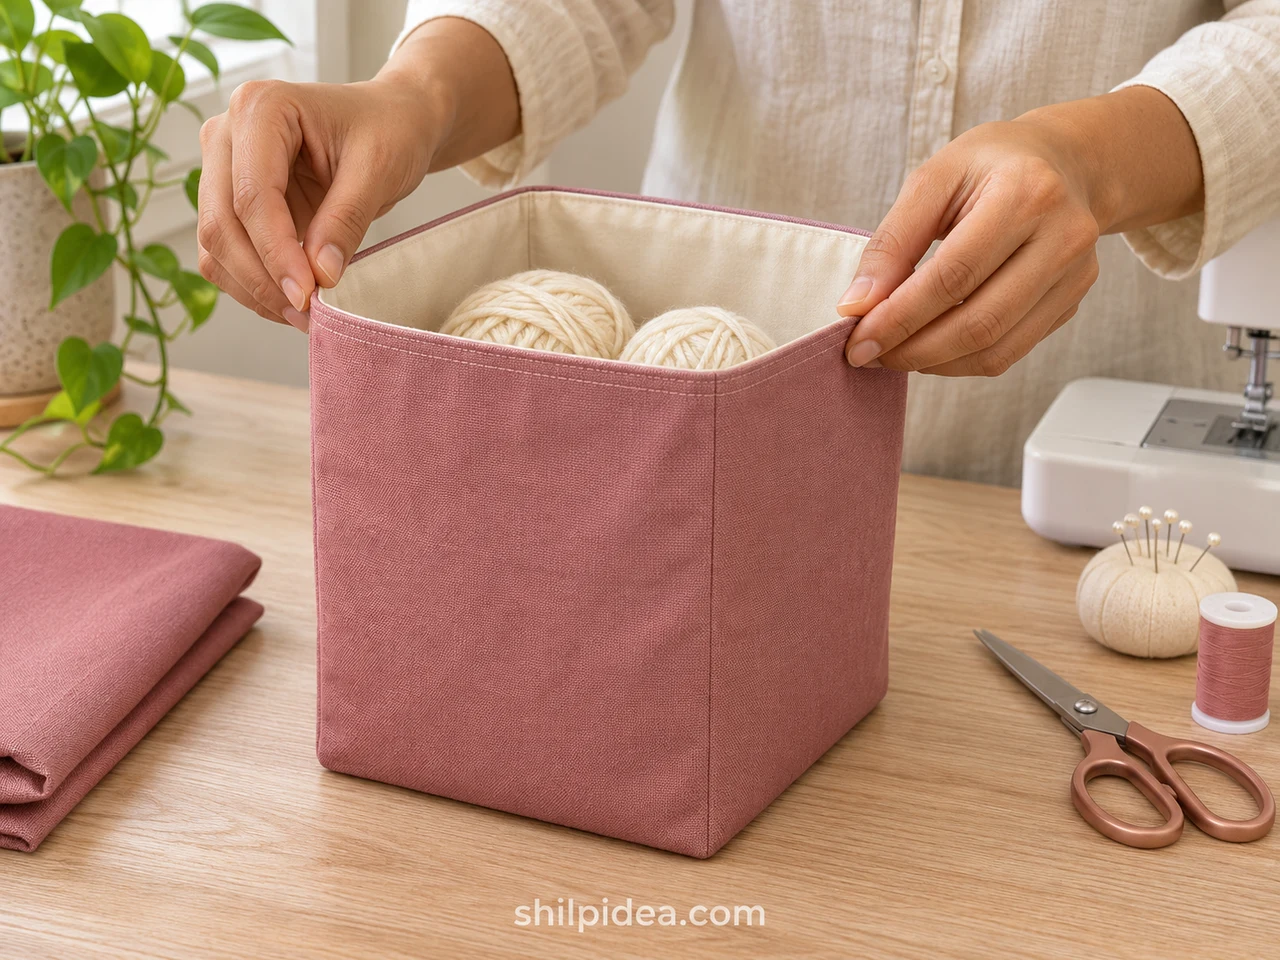
- Tuck the lining inside – Push the ivory lining down into the rose shell. Seat each lining corner against its matching outer corner and smooth the base. The rose face should now be outside and ivory visible inside.
- Press and topstitch – Roll the joined rim between your fingers until the seam sits at the top edge. Press as the materials allow, then topstitch through both layers ⅛ inch (3 mm) below the rim, removing clips as you sew.
- Check the empty bin – Stand the bin on a flat surface before adding lightweight supplies. Smooth the walls and check the base for twisting. Support the bottom when moving it; the rim is not a carrying handle.
Check before moving on: The finished rim has one continuous line of topstitching, the lining sits inside without a twisted corner, and the empty bin keeps its intended shape.
Fix Soft Sides, Wrinkles or an Uneven Base
- The sides slump: Check the interfacing bond after it has cooled. Repress only as the product directions permit. If the fabric combination remains too soft, choose firmer support for the next sample rather than repeatedly overheating this one.
- The lining bunches: Seat all four corners and smooth it upward before topstitching. Persistent extra fabric may mean the seam allowances differ; unpick and correct the relevant seam.
- Turning feels tight: Feed smaller folds through the lining gap. If necessary, unpick a few stitches at one end, turn gently, then close the entire enlarged opening. Do not tear the cloth by pulling harder.
- The base twists: Recheck that side and bottom seams meet at each boxed corner. Correct the misaligned corner instead of stretching the finished bin.
- The rim ripples: Test on a layered scrap, reduce pulling as you sew and check needle and presser-foot settings against your machine manual.
Care for the Bin Between Projects
Keep the bin on a dry shelf and brush away loose threads or dust. Follow the care requirements of both fabrics and the interfacing; the most restrictive instructions should guide cleaning. Test any spot-cleaning method on a leftover fused swatch. Reshape the bin while drying when permitted, and avoid crushing its walls under heavy objects. For bathroom use, store only dry supplies away from splashes.
More Fabric and Storage Projects to Try
Choose the bin’s job before starting another size: one might hold yarn beside your chair, while another gathers offcuts near the machine. Repeat a fabric color across a few organizers to make the shelf feel coordinated. These projects offer other ways to use small pieces of cloth and arrange everyday supplies without buying a full matching storage set.
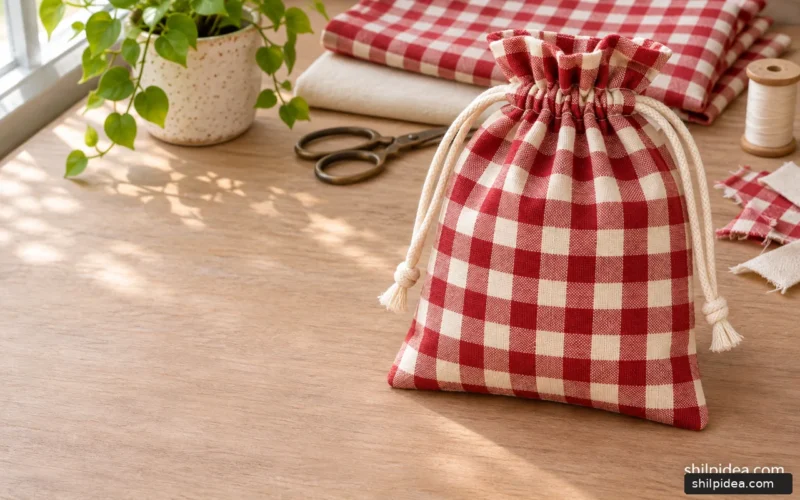
- Reusable Drawstring Bags for Small Gifts
- Fabric-Covered Containers for Craft Supplies
- Framed Wall Art from Fabric Samples
- Bathroom Storage for Towels and Essentials
What would you keep in your fabric bin, and which lining would you pair with the outside? Share your plans in the comments. If you sew a sample, tell us how your fabric and interfacing combination held its shape.




























0 Comments