18 Paper Quilling Animal Ideas for Kids
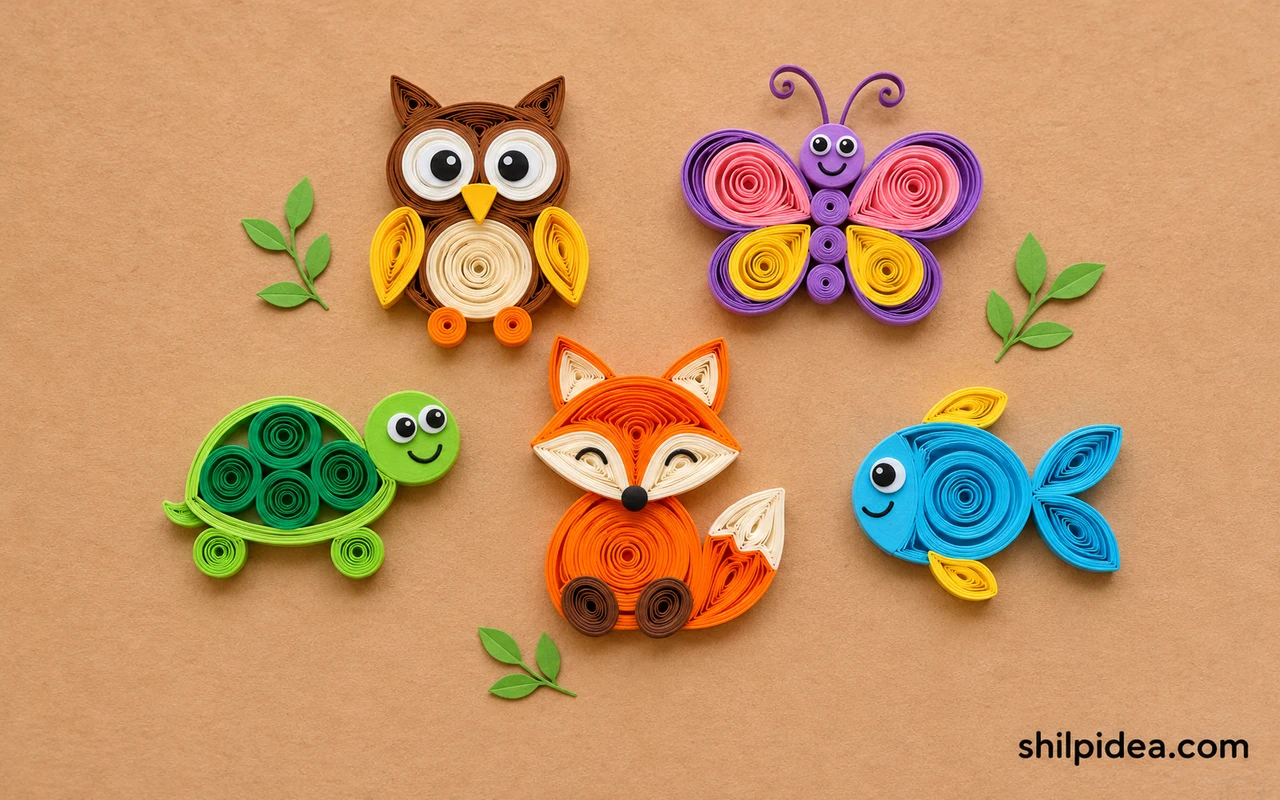
Start with a round coil and see how a pinch or a pair of loops turns it into an animal. A flat fish or owl is easier to assemble than a piece that has to stand up.
Set the pieces on the backing before adding glue so you can adjust their positions. Start with these quilled leaf shapes if small pointed ears or tails are hard to pinch evenly.
Try mounting the finished animal on one of these quilled greeting cards when it has a flat back.
1. Fish With Loose Coils

Place the little fish at different heights and angle each tail away from its body. A few wide curves suggest water without covering the open spaces around the fish. Arrange the pieces on the backing and let the child try a couple of positions before you glue them. A large first version makes small gaps and uneven ends easier to see.
2. Pink Flamingos on Thin Legs

Make the pink body from an oval coil and curve a slim strip up into the neck. Leave the legs thin and attach them last so they stay easy to adjust. Let the larger paper coils settle before pressing their sides into shape. Use less glue near thin details so the lines around the body and legs still look clear.
3. Two Small Birds With a Heart

Turn two loops toward a small red heart and let simple tapered shapes do the work of the wings. Keep the beaks close enough to read as a pair. Arrange the pieces on the backing and let the child try a couple of positions before you glue them. A large first version makes small gaps and uneven ends easier to see.
4. Dark Owl With a Pale Belly

Put the eyes on the same horizontal line at first, then test the paper shapes for a slightly tilted expression. The pale oval makes the face easier to see. Let the larger paper coils settle before pressing their sides into shape. Use less glue near thin details so the lines around the body and legs still look clear.
5. Dog With an Open Wirelike Outline

Bend pale paper around a sketch of the head and back. Use a shorter strip for the tail and leave the outline airy so the legs are visible. Arrange the pieces on the backing and let the child try a couple of positions before you glue them. A large first version makes small gaps and uneven ends easier to see. See quilled wall art for ways to display a small animal on a backing.
6. Rabbit With Long Folded Ears

Make the ears from matching long loops and leave them open enough to see the inside edges. Give the body a wider base so it looks steady. Let the larger paper coils settle before pressing their sides into shape. Use less glue near thin details so the lines around the body and legs still look clear.
7. Yellow Bird With a Red Beak

Make the body and head in the same yellow, then set in a little red for the tail and beak. Keep the red shapes small to preserve the outline. Arrange the pieces on the backing and let the child try a couple of positions before you glue them. A large first version makes small gaps and uneven ends easier to see.
8. Octopus With Curling Arms

Put a wide round coil at the center and set the longest arms out to the sides. Turn a few arm ends back inward so they look like curls. Let the larger paper coils settle before pressing their sides into shape. Use less glue near thin details so the lines around the body and legs still look clear.
9. Reindeer With Branched Antlers

Lay the antler pieces beside the head before gluing so you can match their height. Leave space around the nose and ears so their shapes are easy to pick out. Arrange the pieces on the backing and let the child try a couple of positions before you glue them. A large first version makes small gaps and uneven ends easier to see.
10. Gray Bird on a Tiny Base

Wind gray strips into a shallow body and use a short red detail at the face. A small base can help the shape stand if you use a thicker coil. Let the larger paper coils settle before pressing their sides into shape. Use less glue near thin details so the lines around the body and legs still look clear. Once the group stands neatly, look at miniature quilled dolls for other ways to build a figure.
11. Flat Coil Animal Sampler

Build small creatures one at a time on a dark backing. Give each one a clear silhouette so the paper links and the space between animals both show. Arrange the pieces on the backing and let the child try a couple of positions before you glue them. A large first version makes small gaps and uneven ends easier to see.
12. Blue Sea Turtle With a Patterned Shell

Plan the shell first and set matching flippers at the sides. Add a paler paper loop near each dark edge to distinguish the flippers from the shell. Let the larger paper coils settle before pressing their sides into shape. Use less glue near thin details so the lines around the body and legs still look clear.
13. Penguin on a Light Card

Put the dark outline around a white belly before choosing the size of the feet. The orange details stand out even when they take up little space. Arrange the pieces on the backing and let the child try a couple of positions before you glue them. A large first version makes small gaps and uneven ends easier to see.
14. Small Animal Shapes on a Sampler

Keep a single backing color as you build several tiny animals. Each one can use a different mix of coils, and you can save the largest shapes for the widest bodies. Let the larger paper coils settle before pressing their sides into shape. Use less glue near thin details so the lines around the body and legs still look clear.
15. Birds and Butterflies With Bright Wings

Repeat a bright color across different wing outlines. Curl a thin strip back toward the body if you need to fit a wing in a narrow part of the backing. Arrange the pieces on the backing and let the child try a couple of positions before you glue them. A large first version makes small gaps and uneven ends easier to see. A compact coil can also help you practice for paper quilling earrings.
16. Brown Owl With Large Round Eyes

Set a large eye on each side of the beak and check the gaps around the face. Outline the wings in a deeper brown to make them read clearly. Let the larger paper coils settle before pressing their sides into shape. Use less glue near thin details so the lines around the body and legs still look clear.
17. Quilled Squirrel With a Curled Tail
Fill the tail with warm brown coils and let the upper curl extend above the ears. Leave the feet close together to set the squirrel on a clear baseline. Arrange the pieces on the backing and let the child try a couple of positions before you glue them. A large first version makes small gaps and uneven ends easier to see.
18. Tiny Quilling Creatures With Varied Bodies

Try a new profile by moving one piece from a familiar arrangement. A wider wing, a smaller head, or a longer tail can change the kind of animal a coil suggests. Let the larger paper coils settle before pressing their sides into shape. Use less glue near thin details so the lines around the body and legs still look clear.
Pick an Animal With a Shape You Can See
Sketch the outer shape on scrap paper and decide which parts can come from the same size coil. A few large pieces are easier to handle when children are learning. Add the eyes and other fine details after the body placement is set. Use these related paper projects to practice any shapes you want to try again.
- Quill a Handmade Greeting Card
- Make Paper Quilling Earrings
- Practice Making Quilled Leaves
- Try Paper Quilling Wall Art
- Make Miniature Quilled Dolls
Which animal would you build first? Tell us in the comments which parts you would make from tight coils and where you would leave the paper open for a lighter shape.




















0 Comments